background image

22

Adjusting the Feet

Your oven stands on 4 adjustable feet. When the oven is placed where it will be used, check if the oven is level. If it 

is not level, you can adjust by turning the feet clockwise if required. It is possible to raise the appliance a maximum 

of 30mm by the feet. DO NOT move the appliance by dragging, it should only be moved by lifting it up.

Level the cooker by screwing the bottom of the feet in or out, as shown.

Moving the Cooker

Stability Bracket

The supplied stability bracket or a recognized cooker stability device must be fitted.

Using the fitted adjustable feet is MANDATORY. For safety reasons and to ensure adequate ventilation, the 

cooker chassis MUST NOT sit directly on the floor, a plinth, or other support surface.

•  Two people must always raise the cooker, as shown, to 

prevent damaging the adjustable feet.

•  Do not lift the cooker by the door handles.
•  DO NOT DRAG the cooker. Lift the feet clear of the floor.

50x60 : 420mm

Plastic Foot

Stability Bracket

Wall Plug

Washer

Screw

* All images are for indication only; please refer to your individual unit for actual item.

CFSGWH_SV12_IB_120607_Annie.indd   22

12年6月7日   下午7:15

Содержание CFSGSV12

Страница 1: ...FREE STANDING GAS COOKER INSTRUCTION INSTALLATION MANUAL CFSGWH12 CFSGSV12 ...

Страница 2: ...ame Failure Safety Feature 11 Shelf Positions 11 Replacing the Anti tilting Oven Shelf 11 Adjusting the Temperature 11 Preheating 12 Cooking 12 Using the Grill 13 Lighting the Grill 13 Cooking with the Grill 14 Cleaning Instructions 15 Cleaning the Outside of the Cooker 15 Cleaning the Oven Door Glass 15 Cleaning the Inside of Your Oven 15 Cleaning the Gas Hob 16 Hob Burner Parts and Pan Supports ...

Страница 3: ...vant to Liquid Petroleum Gas LPG 24 To Connect the Gas Supply 25 Replacement of Burner Injectors 26 To Replace the Hob Injectors 26 Adjusting the Reduced Flame Position 26 To Replace the Oven Grill Injectors 27 Removal of the Grill Burner Injector 27 Removal of the Oven Burner Injector 27 Adjusting the Reduced Flame Position 27 Table for the Choice of the Injectors 28 Lubrication of the Gas Taps 2...

Страница 4: ... Tray x 1 P N 20613041 Oven Shelf x 1 P N 37015284 Grill Pan Handle x 1 P N 37004739 Pan Supports Left Right 2 P N 20711046 Instruction Installation Manual P N 52068398 Large Burner Ring 1 P N 37001476 Large Burner Cap 1 P N 37001479 Standard Burner Ring 2 P N 37001477 Standard Burner Cap 2 P N 37001480 Small Burner Ring 1 P N 37001478 Small Burner Cap 1 P N 37001481 If items are missing or damage...

Страница 5: ...b 2 Control Panel 3 Oven Shelf 4 Oven Tray 5 Oven Door 6 Oven Door Handle 7 Adjustable Feet 1 Pan Support 2 Large Burner Fast 3 Standard Burners 4 Small Burner Simmer 3 2 1 4 All images are for indication only please refer to your individual unit for actual item ...

Страница 6: ...Warnings section Make sure all the controls are turned off Turn the mains power on This appliance is for cooking purposes only It must not be used for other purposes for example room heating The use of a gas cooking appliance results in the production of heat moisture and products of combustion in the room in which it is installed Ensure that the kitchen is well ventilated especially when the appl...

Страница 7: ...ween the maximum and OFF O positions 4 After ignition check the flames visually If you see yellow tipped lifted or unstable flames turn the control off and check the assembly once the parts have cooled sufficiently of the burner rings and caps Also make sure that no liquid has entered into the burner cups If the burner flames go out accidentally turn the burners off and do not try to light them ag...

Страница 8: ...ob follow these simple suggestions Use saucepans with thick flat bottoms Food in a saucepan with an uneven bottom will take longer to cook Flame failure probe Ignitor Do not let large saucepans or frying pans overlap the edges of your hob as this can deflect heat onto your worktop and damage the surface Always make sure saucepans are stable Using very heavy saucepans may bend the trivet pan suppor...

Страница 9: ...f combustion in the room in which it is installed Ensure that the kitchen is well ventilated especially when the appliance is in use keep natural ventilation holes open or install a mechanical ventilation device mechanical extractor hood Prolonged intensive use of the appliance may call for additional ventilation for example opening of a window or more effective ventilation for example increasing ...

Страница 10: ...e bottom burner grid Releasing the control too soon will extinguish the flame due to the flame failure safety feature Manual Ignition in case of electricity failure To ignite the oven burner press and turn the control anti clockwise so that the control is at its maximum position Hold an ignition source e g candle lighter close to the hole just to the left of centre of the bottom of the oven Move t...

Страница 11: ... stops at either side of the guide slot Once past this stop the shelf can be placed level again To remove completely angle the shelf upward so the shelf stop is cleared from the guide stop Adjusting the Temperature After you ignite the oven burner as explained before you can adjust the temperature inside the oven as you require using the numbers on the control Larger numbers mean higher temperatur...

Страница 12: ...inium or polished steel trays reflect the heat away and give less browning of the bottom of the food Do not place baking trays or the supplied oven tray directly on the oven base as it interferes with the oven air circulation and can lead to burning of the food Use the lower shelf position The thermostat settings detailed below are a guide only and refer to the temperature in the centre of the ove...

Страница 13: ...ckwise Release the Ignition switch once the burner is lit 2 Continue to hold the Oven Grill control in for approximately 10 seconds after the burner has lit You will see blue flames at the top on the grill burner Releasing the control too soon will extinguish the flame due to the flame failure safety feature Manual Ignition in case of electricity failure To ignite the grill burner press and turn t...

Страница 14: ...the handle is left in position when grilling it will get very hot If the grill burner does not light within 15 seconds turn the control off and wait for at least 90 seconds before trying again To switch the grill burner off turn the control anti clockwise to the OFF O position and you will hear the safety click After use always turn the controls to the OFF O position 4 When turning the grill off t...

Страница 15: ...ng Before you start cleaning your cooker please Read the cleaning instructions and the Safety Warnings sections Turn the cooker off at the wall and disconnect the plug from the socket Allow the cooker to cool fully before cleaning Do not use a steam cleaner If you choose to use a commercial stainless steel cleaner please read the label to make sure it does not contain chlorine compounds as these a...

Страница 16: ...asive detergents Clean spills regularly before they become burnt on Do not wash these parts in a dishwasher After cleaning check that the burner ring and burner caps are dry before replacing correctly It is very important to check that the burner ring and burner caps have been correctly positioned Failure to do so can cause serious problems Burner Parts Replacing the burner parts Replacing the Hob...

Страница 17: ...he Oven Door The oven door can easily be removed as follows 1 Open the door completely 2 The swivel retainers of the right hand and left hand hinges are hooked onto the metal bar above them Lift the retainers as shown 3 Close the oven door gently until it meets the open retainer 6 To replace the door repeat the above steps in reverse order ensuring the bottom hinge slot engages over the bottom of ...

Страница 18: ...e for high temperatures 300 C Refit the glass lens by turning clockwise Ensure that the cooker is switched off before replacing the lamp to avoid the possibility of electric shock Bulb specifications 230 240V 50 Hz 25W E14 Replacing the Oven Lamp All images are for indication only please refer to your individual unit for actual item ...

Страница 19: ...e FSD is operating Hold in the control for approximately 10 seconds after the burner has lit Releasing the control too soon will extinguish the flame The flame goes out at low settings The gas supply pressure may be low Check this with your approved service agent The low setting may have been adjusted incorrectly Check this with your approved service agent My burners do not turn down much when run...

Страница 20: ...e Volume 50 Litres Oven Lamp 25W Features and specifications are subject to change without prior notice Burner Output According to the Gas Type LPG Natural Gas G 30 31 G 20 Large Burner Fast Power kW 3 00 kW 3 00 kW Standard Burner Power kW 1 75 kW 1 75 kW Small Burner Small Power kW 1 00 kW 1 00 kW Grill Burner Power kW 2 20 kW 2 20 kW Oven Burner Power kW 2 80 kW 2 80 kW ...

Страница 21: ...e cooker must be made of heat resistant material check with your furniture supplier The veneered synthetic material and the glue used must be resistant to a temperature of 100 C in order to avoid ungluing or deformations The cooker may be located in a kitchen a kitchen diner or bed sitting room but not in a room containing a bath or shower Flammable materials such as curtains wood wallpaper etc mu...

Страница 22: ...Cooker Stability Bracket The supplied stability bracket or a recognized cooker stability device must be fitted Using the fitted adjustable feet is MANDATORY For safety reasons and to ensure adequate ventilation the cooker chassis MUST NOT sit directly on the floor a plinth or other support surface Two people must always raise the cooker as shown to prevent damaging the adjustable feet Do not lift ...

Страница 23: ... Gas Installation Regardless of room size all rooms containing the appliance must have direct access to the outside air via a window that opens or equivalent Where there are other fuel burning appliances in the same room the latest edition of BS 5440 2 should be consulted to determine the correct amount of free area ventilation requirements This cooker uses and is ready to use NATURAL GAS only and...

Страница 24: ...e connecting tube made to BS669 Only a suitably qualified and Gas Safe Registered Engineer may convert the appliance to a different gas type When using Butane gas a supply pressure of 28 30 mbar is required When using Propane gas a supply pressure of 37 mbar is required Flexible hoses can be used where the sited ambient temperature of the hose does not exceed 70 C These hoses must be manufactured ...

Страница 25: ...3 To avoid damage to the appliance gas rail inlet pipe tighten the fittings using two suitable spanners 4 Using a suitable leak detection fluid solution check each gas connection one at a time by brushing the solution over the connection The presence of bubbles will indicate a leak If there is a leak tighten the fitting and then recheck for leaks Do not use a naked flame to test for leaks ...

Страница 26: ...ce is disconnected from the mains supply and the gas feed is on To determine the minimum position ignite the burners and leave them on in minimum position With the help of a small screwdriver tighten clockwise or loosen anti clockwise the adjustment screw around 90 angular degrees When the flame has a length of at least 4 mm the gas is well distributed Make sure that the flame does not die out whe...

Страница 27: ...Oven Burner Injector The Oven Burner Injector is not accessible to change or service this part please contact a qualified engineer Adjusting the Reduced Flame Position For the oven burner operate the oven burner at minimum position for 5 minutes then open and close the oven door 2 3 times to check the burner s flame stability Reduced flame position adjustment is not required for grill burners The ...

Страница 28: ... h Small Burner Simmer Injector mm 0 500 0 720 Nominal Rating kW 1 1 Consumption 72 7 gr h 95 2 lt h Oven Burner Injector mm 0 760 1 200 Nominal Rating kW 2 8 2 8 Consumption 203 6 gr h 266 7 lt h Grill Burner Injector mm 0 680 1 100 Nominal Rating kW 2 2 2 2 Consumption 160 gr h 209 5 lt h Lubrication of the Gas Taps A Gas Safe Registered Engineer must lubricate the gas taps All intervention rega...

Страница 29: ...he mains cable is damaged it must be replaced by the manufacturer its service agent or similarly qualified persons in order to avoid a hazard Ensure that the Earth lead is of sufficient length to remain connected after the Live and Neutral wires are removed if the lead is pulled Ensure all terminal screws are adequately tightened Do not over tighten as you may risk damaging the screw threads L N L...

Страница 30: ...ation See Gas Installation for modification to other gas types This appliance can only be installed in a room with adequate ventilation See the Ventilation requirements in the installation instructions Operation and Maintenance This appliance is NOT intended for use by persons including children with reduced physical sensory or mental capabilities or lack of experience and knowledge unless they ha...

Страница 31: ...en or install a mechanical ventilation device mechanical extractor hood Prolonged intensive use of the appliance may call for additional ventilation for example opening of a window or more effective ventilation for example increasing the level of mechanical ventilation where present Take care when handling parts with glass knocks chips heavy handling and dropping could cause the glass to shatter T...

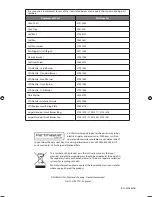
Страница 32: ...rner Ring 37001476 37001477 37001478 Large Standard Small Burner Cap 37001479 37001480 37001481 This symbol on the product or in the instructions means that your electrical and electronic equipment should be disposed at the end of its life separately from your household waste There are separate collection systems for recycling in the EU For more information please contact the local authority or yo...

Отзывы: