background image

Chapter 3. Operation 

 
If a password is required to login, please enter the 4 digit password previously set. Please see 

3.5.2.1 System Configuration

 regarding setting and clearing the password.  

 
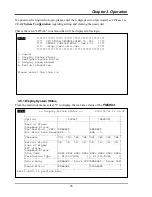
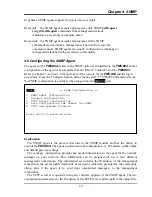
This is the main "LOCAL" root menu that will be displayed after login. 


LOCAL

       ******************************************* 

            ****  CTC UNION TECHNOLOGIES CO.,LTD   **** 
            ****  FMUX04 CONSOLE MODE   Ver 1.00   **** 
            ****  <http://www.ctcu.com>            **** 
            ******************************************* 
 
0. Logout 
1. Display System Status 
2. Configure System Status 
3. Display Alarm Record 
4. Device Information 
 
 
Please select the item 0~4 
 

3.5.1 Display System Status 

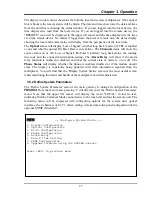
From the main root menu, select "1" to display the real-time status of the 

FMUX04

.  


LOCAL

         << Display System Status >>        2006/02/16 16:03:06 

 
    +--------------------+-------------------+-------------------+ 
    |Optical             |     [LOCAL]       |     [REMOTE]      | 
    +--------------------+-------------------+-------------------+ 
    |Loss of Signal      |                   |                   | 
    |Loopback Status     |                   |                   | 
    |Far End Fault (FEF) |ENABLED            |ENABLED            | 
    |Bit Error Rate Alarm|BER = 0            |BER = 0            | 
    +--------------------+-------------------+-------------------+ 
    |Channels            |CH1  CH2  CH3  CH4 |CH1  CH2  CH3  CH4 | 
    +--------------------+-------------------+-------------------+ 
    |Service Status      |ON   ON   ON   ON  |ON   ON   ON   ON  | 
    |Loss of Signal      |                   |                   | 
    |BPV status          |                   |                   | 
    |Loopback Status     |                   |                   | 
    |Line Code           |HDB3 HDB3 HDB3 HDB3|HDB3 HDB3 HDB3 HDB3| 
    |Termination Type    |[ E1/120/RJ45     ]|[ E1/120/RJ45     ]| 
    +--------------------+-------------------+-------------------+ 
    |Alarm Relay         |ENABLED / Alarm OFF|ENABLED / Alarm OFF| 
    +--------------------+-------------------+-------------------+ 
    |Phone Status        |ENABLED            |DISABLED           | 
    +--------------------+-------------------+-------------------+ 
Press <ESC> to previous menu. 


26 

Содержание FMUX04

Страница 1: ...USER MANUAL FMUX04 Fiber Optical Multiplexer Standalone Rack Type 4 Channel Fixed Design G 703 E1 T1 DS1 SNMP Manageable Optional FXS Order Wire Optional ...

Страница 2: ......

Страница 3: ...ly approved by the party responsible for compliance could void the user s authority to operate the equipment 2 Shielded interface cables and AC power cord if any must be used in order to comply with the emission limits CISPR PUB 22 Class A COMPLIANCE This device complies with EMC directive of the European Community and meets or exceeds the following technical standard EN 55022 Limits and Methods o...

Страница 4: ...r T1 Version 1 0 Mar 2006 This manual supports the following models FMUX04 This document is the first official release manual Please check CTC Union s website for any updated manual or contact us by E mail at info ctcu com Please address any comments for improving this manual or to point out omissions or errors to marketing ctcu com Thank you The information and specifications in this document are...

Страница 5: ...al Structure 15 1 7 1 T1 link line rate 15 1 7 2 T1 link line coding 15 1 8 Applications Capabilities 15 Chapter 2 Installation 17 2 1 General 17 2 2 Site Preparation 17 2 3 Unpacking 17 2 4 Mechanical Assembly 18 2 5 Electrical Installation 19 2 5 1 Power connection AC 19 2 5 2 Power connection DC 19 2 6 Rear Panel Connectors 20 2 7 Front Panel Switches Connectors and Indicators 20 2 8 Removal Re...

Страница 6: ...4 8 Web Based Interface 46 4 8 1 Security Login 46 4 8 2 Unit Select 46 4 8 3 Display System Status 47 4 8 4 Realtime Display 47 4 8 5 System Configuration 48 4 8 6 Optical Configuration 48 4 8 7 E1 T1 Configuration 49 4 8 8 Phone Configuration 49 4 8 9 Alarm Configuration 50 4 8 10 Date Time 50 4 8 11 SNMP Setup 51 4 8 12 Display Alarm Status 53 4 8 13 Display Information 54 4 9 Telnet Management...

Страница 7: ...ions The FMUX04 provides an economic optical connection solution in low density E1 or T1 installations such as between remote offices where multiple high speed synchronous TDM Time Division Multiplexing communications are required over a single fiber pair By utilizing a fixed channel design the unit is extremely cost effective and provides quick return on investment 1 2 Functional and Feature Desc...

Страница 8: ... without regard to master or slave timing The FMUX04 is completely transparent to clocking and data transmission This makes configuration of the MUX extremely simple However the FMUX04 provides no system clock or clock source for the E1 or T1 connection Therefore the connected device on one side must provide the required E1 or T1 clock timing either internal clock or recovery timing When the FMUX0...

Страница 9: ...missions The status of the error rate on the optical connection may then be monitored via LED indicators on the front panel of the FMUX04 1 3 Features List Simple DIP switch or serial console setting AC or DC models Non redundant fiber for multi mode and single mode 2 to 120KM Transceiver options include ST SC FC or LC WDM Wave Division Multiplexing RJ 45 and BNC connectors for E1 and T1 connectio...

Страница 10: ... with the Order Wire and SNMP options installed E1 BNC Connectors AC Power Switch Switching Power AC Console Port and Alarm Relay Contacts Optical Transceiver DIP Switches Order Wire Module SNMP Module Mainboard SNMP Ethernet jack E1 RJ45 Connectors LED Indicators Order Wire phone Figure 1 1 FMUX04 Major Components 10 ...

Страница 11: ...U T G 703 and G 823 Interface Connectors RJ 45 120 ohm USOC RJ 48C BNC 75 ohm Test Loops LLB Local Loop Back RLB Remote Loop Back RRLB Request Remote Loop Back 1 5 2 T1 Link Ports 4 fixed ports Framing Unframed transparent Bit Rate 1 544 Mb s 50ppm Line Code AMI B8ZS Line Impedance Balanced 100 ohms RJ 45 Receiver sensitivity 36dB long haul Pulse Amplitude Nominal 3 00V 20 for 100 ohms Zero Amplit...

Страница 12: ...onfig by console or SNMP E1 T1 Mode Stateful Green E1 mode 75 ohm Green Flash E1 mode 120 ohm Off T1 mode 100 ohm Red flash Error in termination setting Remote Error Stateful Green remote no error Red remote has errors Off unknown or no optical link Optical BER Bit Error Rate Stateful Green 0 error rate Green flash 0 to 10 6 error rate Red flash 10 6 to 10 3 error rate Red more than 10 3 error rat...

Страница 13: ...0 Rx 1310 Rx 1550 Rx 1310 BER 10 11 10 11 10 11 10 11 10 11 10 11 10 11 10 11 10 11 Sensitivity 31dBm 32dBm 35dBm 36dBm 35dBm 32dBm 32dBm 32dBm 32dBm Output Power 20dBm 20dBm 15dBm 8dBm 0dBm 18dBm 15dBm 10dBm 7dBm Power Margin 11dB 12dB 20dB 28dB 35dB 14dB 17dB 22dB 25dB Return Loss 12dBm 12dBm 12dBm 12dBm 12dBm 14dBm 14dBm 14dBm 14dBm ST v v v v v SC v v v v v v v v v LC v v v v v MT RJ v v v v v...

Страница 14: ...ternate Mark Inversion AMI or HDB3 rule In the AMI format ones are alternately transmitted as positive and negative pulses whereas zeros are transmitted as a zero voltage level AMI is not used in most 2 048Mb s transmissions because synchronization loss occurs during long strings of data zeros In the HDB3 format a string of four consecutive zeros is replaced with a substitute string of pulses cont...

Страница 15: ...vide high pulse density so that the receiving equipment is able to maintain synchronization with the received signal When configured for T1 the 4 CHANNEL T1 Ports support one of two T1 line codes AMI coding B8ZS coding The 4 CHANNEL T1 Ports support only transparent unframed format ie The T1 will pass through with its original framing structure completely intact 1 8 Applications Capabilities In th...

Страница 16: ...Chapter 1 Introduction 16 This page left blank intentionally ...

Страница 17: ...nstall the FMUX04 Number 2 Phillips screwdriver for the 3mm and the 12 24 rack installation screws Wrist strap or other personal grounding device to prevent ESD occurrences Antistatic mat or antistatic foam to set the equipment on 2 2 Site Preparation Install the FMUX04 within reach of an easily accessible grounded AC outlet or site DC power The outlet should be capable of furnishing 100 to 240 VA...

Страница 18: ...y be rack mounted as required with an optional mounting kit The rack installation only requires 1U space 1 3 4 in a standard EIA 19 inch rack The FMUX04 is delivered completely assembled No provision is made for bolting the FMUX04 to a tabletop Figure 2 2 Single and tandem rack mounting of FMUX04 18 ...

Страница 19: ...C installations AC Input 2 5 2 Power connection DC For a model with DC power supply DC 24V 18 36VDC or DC 48V 36 72VDC is connected to the detachable terminal block The DC power connector uses a Molex type connector with detachable terminal block Please take extra caution to observe the proper polarity of the DC when wiring the connector The FMUX04 should always be grounded through the protective ...

Страница 20: ...ed E1 T1 Figure 2 4 Rear Panel Connections 2 7 Front Panel Switches Connectors and Indicators The front panel of the FMUX04 holds the optical interface LED display DIP switches and RS 232 Console port Alarm Relay connector The optical interface is fixed at the factory per order The FMUX04 supports single mode or multimode transceiver with SC ST or FC connector in powers that support 2 15 30 50 or ...

Страница 21: ...telephone off hook The remote telephone will ring To install or remove the OW option 1 Loosen the captive thumb screws on the rear of the FMUX04 until the threads are disengaged from the housing 2 Gently pull the PCB assembly straight out the rear of the housing Remove the Order Wire module PCBA from it s protective wrapping Refer to the graphic on page 10 for the location of the Order Wire option...

Страница 22: ...e housing 3 Gently pull the PCB assembly straight out the rear of the housing Remove the SNMP module PCBA from it s protective wrapping Refer to the graphic on page 10 for the location of the SNMP option 3 Align the connector pins as in the following photos seat the module insert the three securing screws and tighten lightly 4 Return the PCBA to the housing and tighten the thumb screws The unit is...

Страница 23: ...3 E1 T1 In Service 3 OFF CH 3 E1 T1 Out Of Service ON CH 4 E1 T1 In Service 4 OFF CH 4 E1 T1 Out Of Service ON CH 1 RRLB enable 5 OFF CH 1 RRLB Off ON CH 2 RRLB enable 6 OFF CH 2 RRLB Off ON CH 3 RRLB enable 7 OFF CH 3 RRLB Off ON CH 4 RRLB enable 8 OFF CH 4 RRLB Off ON Far End Fault FEF Enable 9 OFF Far End Fault FEF Disable ON Alarm Cut Off active 10 OFF normal ON Reserved 11 OFF Reserved ON Con...

Страница 24: ...le port communication with the FMUX04 are 19 2K baud 8 bits no parity 1 stop bit and no flow control In the HyperTerminal program terminal window click the properties icon and set the communication parameters as in the following graphics Click the Configure button in the properties window and set the port settings When set properly click OK Figure 3 2 HyperTerminal port settings for FMUX04 3 4 Con...

Страница 25: ...ate connections start the terminal application apply power to the FMUX04 then press ENTER on the PC keyboard If you are using HyperTerminal the display should look like the following Welcome to FMUX04 NMS System 3 3 Terminal Connection Pressing the Enter key will open the terminal Login screen 3 5 0 Local or Remote Login Press the 1 key to immediately enter into the Local Unit Terminal Mode CTC UN...

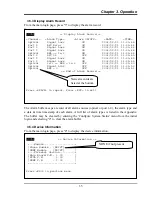
Страница 26: ...nformation Please select the item 0 4 3 5 1 Display System Status From the main root menu select 1 to display the real time status of the FMUX04 LOCAL Display System Status 2006 02 16 16 03 06 Optical LOCAL REMOTE Loss of Signal Loopback Status Far End Fault FEF ENABLED ENABLED Bit Error Rate Alarm BER 0 BER 0 Channels CH1 CH2 CH3 CH4 CH1 CH2 CH3 CH4 Service Status ON ON ON ON ON ON ON ON Loss of ...

Страница 27: ...bled or disabled and what the current state of alarm is on or off The Phone Status will display whether the phone is enabled disabled or if the module doesn t exist The display is constantly being updated with fresh information reported from the multiplexer You will find that the Display System Status screen is the most useful screen when monitoring the status and health of the multiplexer and its...

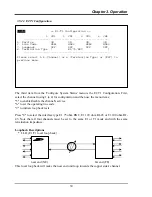
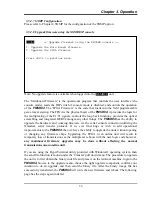
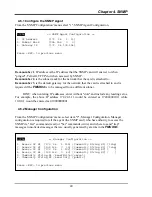
Страница 28: ...and match entering 4 zeros 0000 will clear the password 0770 is the backdoor password if it is forgotten but will not work from a Telnet session 3 5 2 2 Optical Configuration From the Configure System Status menu press 2 to enter the Optical Configuration menu LOCAL System Configuration 1 Save User Setting 2 Load User Setting 3 Load Default Setting 4 Clear Alarm Record 5 Modify Password Press ESC ...

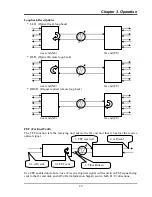
Страница 29: ... NE far end FE FEF Far End Fault The FEF function lets the receiving unit advise the far end unit that it has lost the receive optical signal 1 Fiber Broken 2 2 FEF sent 3 FEF received 2 1 AIS sent 4 AIS sent In a FEF enabled unit above loss of received optical signal will result in an FEF signal being sent to the far end unit and AIS Alarm Indication Signal sent in both E1 T1 directions 29 ...

Страница 30: ...guration First select the channel using 1 to 4 for configuration and then use the menu items 5 to enable disable the channel s service 6 to set the operating line code 7 to initiate loop back tests Press 8 to select the interface type E1 75 ohm BNC E1 120 ohm RJ 45 or T1 100 ohm RJ 45 Note that all four channels must be set to the same E1 or T1 mode and with the same termination impedance Loopback...

Страница 31: ...unit to request a channel to do a remote loop back 3 5 2 4 Phone Configuration LOCAL Phone Configuration Phone Configuration ENABLED 1 Phone Enable 2 Phone Disable Press ESC to previous menu The fourth item from the Configure System Status menu is the Phone Configuration The FMUX04 has the option of installing an Order Wire feature that will allow voice connection between both near and far end uni...

Страница 32: ... Press ESC to previous menu LOCAL Date Time Setting 1 Date 2006 02 16 2 Time 16 03 06 Press ESC to previous menu The sixth item on the Configure System Status menu is the date and time setting function The FMUX04 has a battery backed up real time clock that is used for time stamping performance monitored data and alarm events Select 1 to set the date and select 2 to set the time Within each field ...

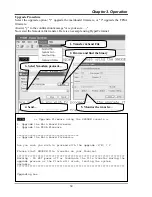
Страница 33: ...rade the hardware and working firmware via the serial console connection utilizing the Xmodem serial transfer protocol If we ever find bugs or wish to add operational improvements to the FMUX04 then we have the ability to upgrade the units without opening or changing any firmware chips Upgrading the FPGA in an online unit will result in temporary loss of transmissions as the multiplexer reboots wi...

Страница 34: ... Browse and find the binary 3 Select Xmodem protocol 4 Send 5 Monitor the transfer LOCAL Upgrade Firmware using the XMODEM console 1 Upgrade the Main Board Firmware 2 Upgrade the FPGA Firmware Upgrade the Main Board Firmware Are you sure you wish to proceed with the upgrade Y N Y Please start XMODEM file transfer on your Terminal Warning DO NOT power off or terminate the file transfer during the u...

Страница 35: ... Alarm ON OFF DATE TIME Optical Signal Loss ON 2006 02 21 11 35 44 Port 2 BPV Error ON 2006 02 21 11 35 44 Port 2 Signal Loss ON 2006 02 21 11 35 44 Port 2 Signal Loss ON 2006 02 21 11 35 44 Optical BER 1e 3 ON 2006 02 21 11 35 44 Port 2 BPV Ok OFF 2006 02 21 11 35 45 Port 2 Signal Loss ON 2006 02 21 11 35 45 Port 2 Signal Loss ON 2006 02 21 11 35 45 Optical 1e 6 BER 1e 3 OFF 2006 02 21 11 35 50 O...

Страница 36: ...tween the two multiplexers carries not only the multiplexed data from the E1 T1 transmissions it also carries the integrated optical BER channel the Order Wire voice channel and the EOC embedded operations channel The EOC provides the communication path for console and SNMP between the local and remote units Obviously if that channel is compromised either by loss of optical signal or by an optical...

Страница 37: ...TP SMTP etc All management traffic is initiated by the SNMP based network management station Only the addressed managed entity agent answers the polling of the management station except for trap messages 4 2 SNMP Operations The SNMP protocol includes four types of operations getRequest Command for retrieving specific value of an instance from the managed node The managed node responds with a getRe...

Страница 38: ...collection of MIB s can also be organized in a similar structure under the supervision of the Internet Activities Board IAB any parameter included in a MIB that is recognized by the IAB is uniquely defined To provide the flexibility necessary in a global structure MIB s are classified in various classes branches one of them being the experimental branch another being the management mgmt branch and...

Страница 39: ...s available when logged into the REMOTE unit LOCAL SNMP Configuration 1 SNMP Agent Configuration 2 Manager Configuration 3 TFTP Server Configuration 4 Save Configuration and Reboot the SNMP 5 TFTP and Upgrade Firmware Press ESC to previous menu Explanation The SNMP agent is the process that runs in the SNMP module and has the ability to control the FMUX04 The agent requires network configuration i...

Страница 40: ...1 would be entered as 010000000001 4 6 2 Manager Configuration From the SNMP Configuration menu select item 2 Manager Configuration Manager configuration is required to tell the agent the SNMP card who has authority to access the SNMP via Get commands read or Set commands write and where to send trap messages unsolicited messages that are usually generated by alarms in the FMUX04 LOCAL SNMP Agent ...

Страница 41: ... receive any trap messages After all settings have been made press ESC to the SNMP Configuration menu and press 4 Save Configuration and Reboot the SNMP 4 6 3 TFTP Server Configuration LOCAL TFTP Server Configuration 1 TFTP Server IP 172 24 1 125 2 File name of SNMP Firmware c fmux04v1 0 bin 3 File name of Main Board Firmware c cpu1v0 bin 4 File name of FPGA Firmware c fpga1v0 bin Press ESC to pre...

Страница 42: ...or any changes to be remembered in the agent please select item 4 to Save Configuration and Reboot the SNMP LOCAL SNMP Configuration 1 SNMP Agent Configuration 2 Manager Configuration 3 TFTP Server Configuration 4 Save Configuration and Reboot the SNMP 5 TFTP and Upgrade Firmware Press ESC to previous menu Saving the SNMP configuration Please wait LOCAL SNMP Configuration 1 SNMP Agent Configuratio...

Страница 43: ...ain Board Firmware 3 Upgrade the FPGA Firmware Upgrade the Main Board Firmware Are you sure you wish to proceed with the upgrade Y N Y Warning DO NOT power off or terminate the file transfer during the upgrade process or the Flash will crash leaving the system unstable Upgrading now DO NOT INTERRUPT POWER DURING SAVE OPERATION OR THE FLASH MEMORY MAY BECOME CORRUPT After the upgrade is complete an...

Страница 44: ...er any path information in the SNMP agent This simplifies the settings considerably just enter the binary filename in the TFTP filename location in the SNMP agent If you have a firewall enabled please disable it before running the TFTP server or doing the upgrade Start the CTCU TFTP Server program just before executing the upgrade on the multiplexer After initiating the upgrade the TFTP server wil...

Страница 45: ...s our device you still need the car management software running on a workstation in order to drive The FMUX04 with SNMP is provided with a MIB Management Information Base file The MIB supported by the FMUX04 SNMP Agent follows RFC 1158 MIB II standard The formal description of the managed objects and the MIB structure is provided in a special standardized format called Abstract Syntax Notation 1 o...

Страница 46: ...ndard web browser 4 8 1 Security Login To connect to the FMUX04 use the device s IP address as the URL location For example with our setup unit enter http 192 168 0 253 and Enter A login security prompt will display The default user name is admin The password is the terminal password if it has been set or if no terminal password is set the default is 0000 4 zeros 4 8 2 Unit Select Our first page i...

Страница 47: ...at the navigation menu is in the frame on the left side The Local designation means we are viewing the local unit from the SNMP card s standpoint The system status displays both local and remote 4 8 4 Realtime Display The Realtime Display shows the active state of front panel LEDs and the current DIP settings 47 ...

Страница 48: ...nd load user settings load default settings clear the alarm buffer record and change the login password refer to 3 5 2 1 4 8 6 Optical Configuration The Optical Configuration page allows enabling the FEF function clearing the BER Alarm and setting the optical loop backs refer to 3 5 2 2 48 ...

Страница 49: ...ts the channel service line code and termination type for the E1 T1 It also sets the loop back types see 3 5 2 3 4 8 8 Phone Configuration The Phone Configuration allows enabling or disabling the phone function if the order wire phone option is installed refer to 3 5 2 4 49 ...

Страница 50: ...The Alarm Relay page allows enabling or disabling the alarm relay function refer to 3 5 2 5 4 8 10 Date Time The Date Time page allow setting the real time clock The clock is used for timestamping alarm and performance data refer to 3 5 2 6 50 ...

Страница 51: ...up 4 8 11 1 SNMP Agent Configuration Configures the agent IP subnet mask and default gateway refer to 4 6 1 4 8 11 2 Manager Configuration Configures the information for up to 4 management workstations plus the community strings 51 ...

Страница 52: ...ration Configures the SNMP card for TFTP upgrade refer to 4 6 3 4 8 11 4 Save Configuration and Reboot The Save Configuration page allows the settings to be written to non volatile flash followed by rebooting of the SNMP agent refer to 4 6 4 52 ...

Страница 53: ...erly configured this page is used to execute the upgrade for SNMP mainboard firmware or main unit FPGA firmware refer to 4 6 5 4 8 12 Display Alarm Status This option page will display the contents of the alarm buffer with newest entries at the bottom refer to 3 5 3 53 ...

Страница 54: ...dow for Win98 WinME WinNT and Win2000 HyperTerminal in TCP IP mode works well for all versions of Windows Clients which we have found experience some difficulties with the agent are command mode Telnet in WinXP Telnet from Linux or FreeBSD and Windows packages such as Putty In command mode of WinXP the terminal characters are echoed locally on screen including the password as it is typed In Linux ...

Страница 55: ... login Password The above examples are Telnet using Windows HyperTerminal utility The screen displays in Telnet are the same as those from local console RS 232 connection Please refer to 3 3 Terminal mode for operation details ...

Страница 56: ...tion Remark 1 2 TD Transmit Data IN Towards FMUX04 3 RD Receive Data OUT From FMUX04 4 NO Relay Normally open Closed if power fail 5 SG Signal Ground 6 COM Relay Common 7 CTS Clear To Send OUT From FMUX04 8 RTS Request To Send IN Towards FMUX04 9 NC Relay Normally closed Closed if no alarm A 2 Alarm Relay Connection Detail The following are examples of wiring audio or visual alarms to the console ...

Страница 57: ...connector located on the front panel of the FMUX04 The center two pins connect to a standard dial telephone Pin Signal Description 1 NC No connection 2 NC No connection 3 Ring Phone connection 4 Tip Phone connection 5 NC No connection 6 NC No connection A 5 E1 T1 RJ 45 pin assignment Pin Signal Description 1 RRing Receive 2 RTip Receive 3 NC No connection 4 TRing Transmit 5 TTip Transmit 6 NC No c...

Страница 58: ... auto polarity A 7 SNMP Trap Messages and Alarms Trap Code Description Alarm 00 Alarm Buffer Overflow 01 System Fail ON 02 Power Turn ON 03 DIP Sw Configuration Mode 04 NMS Configuration Mode 05 Login 06 Logout 07 Remote Side Login 08 Remote Side Logout 09 Auto Logout 10 Signal Loss ON 11 Signal Link 12 FEF Signal Loss ON 13 FEF Signal Link 14 BPV Error ON 15 BPV Ok 16 Loopback ON 17 Loopback OFF ...

Страница 59: ... local_optical_Configuration Local_loopback RW remote RO 0 off 1 Local_Loopback 2 Remote_Loopback 3 Request_Remote_Loopback local_Far_End_Fault RW 0 disable 1 enable local_clear_Bit_Error_Rate_Alar m RW 0 disable 1 enable local_insert_Error_Bit RW 0 disable 1 enable local_e1_t1_Configuration local_ch1_service ch2 4 RW 0 off 1 on local_ch1_linecode ch2 4 RW 0 hdb3 b8zs 1 ami local_ch1_loopback ch2 ...

Страница 60: ...l_alarm_record1 2 100 local_1_channel 2 100 RO 0 none 1 port1 2 port2 3 port3 4 port4 5 optical 6 phone local_device_information local_phone_module RO 0 not_exist 1 exist local_main_version RO Octet string local_fpga_version RO Octet string local_snmp_version RO Octet string Path iso org dod private enterprise ctc fmux04 remote The remote follows the same object structure as the local Except remot...

Страница 61: ......
Страница 62: ...eries CTC Union Technologies Co Ltd Far Eastern Vienna Technology Center Neihu Technology Park 8F No 60 Zhouzi Street Neihu Taipei Taiwan Phone 886 2 2659 1021 Fax 886 2 2799 1355 E mail info ctcu com http www ctcu com ...

Отзывы: