// The loop routine runs over and over again forever:
void loop()
{
// Read analog inputs (do the round robin)
DoDrawbar(ADCcnt, analogRead(ADCmap[ADCcnt]));
if (++ADCcnt > 8) ADCcnt = 0;
// Read Button
if (digitalRead(BUTTON) == LOW)
{
if (debounce_timer > 0) --debounce_timer;
} else {
debounce_timer = DEBOUNCE_TIME;
}
if (debounce_timer == 2)
{
mode = !mode; // Reverse
set_mode(); // and Set!
}
}
PLEASE NOTE: before compiling the sketch, make sure you have installed the
required libraries (see next chapter).
Connect the D9U to your comptuer using the provided USB cable, start the
IDE, load the sketch, then:
1. From the TOOLS menu, select BOARD -> Arduino Leonardo;
2. From the TOOLS menu, make sure the selected PORT points to Leonardo;
3. Click the icon with the arrow pointing right, this will compile the
sketch and upload it to the board.
PLEASE NOTE: once the sketch is properly uploaded to the board, the USB
port will not be seen by the IDE because it changes its function to USB-
MIDI. To check that it is actually seen as a MIDI device, if you're using
Windows (preferred), download and install the free application MIDI-OX and
check that the ARDUINO MIDI device is listed among your MIDI ports, select
it as an input port to MIDI-OX and check that it is correctly sending the
expected CC messages.
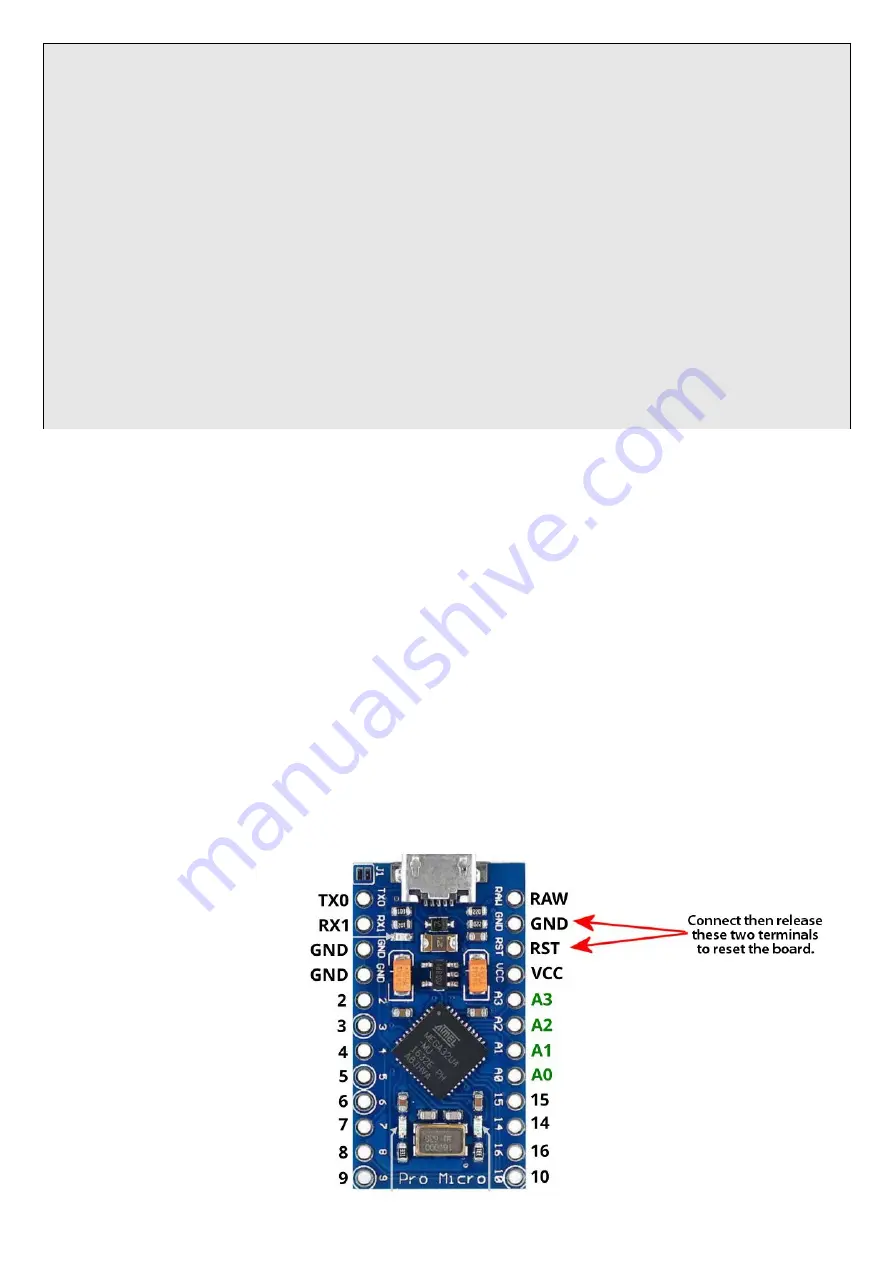
In case you need to
reprogram the board,
one second before
clicking the "LOAD"
icon in the Arduino
IDE, you have to
"reset" the board by
making a contact
between the terminals
labeled RST and GND
using
a
small
screwdriver.


