Crossfire PC 375 Скачать руководство пользователя страница 12

Page   of 15 

10

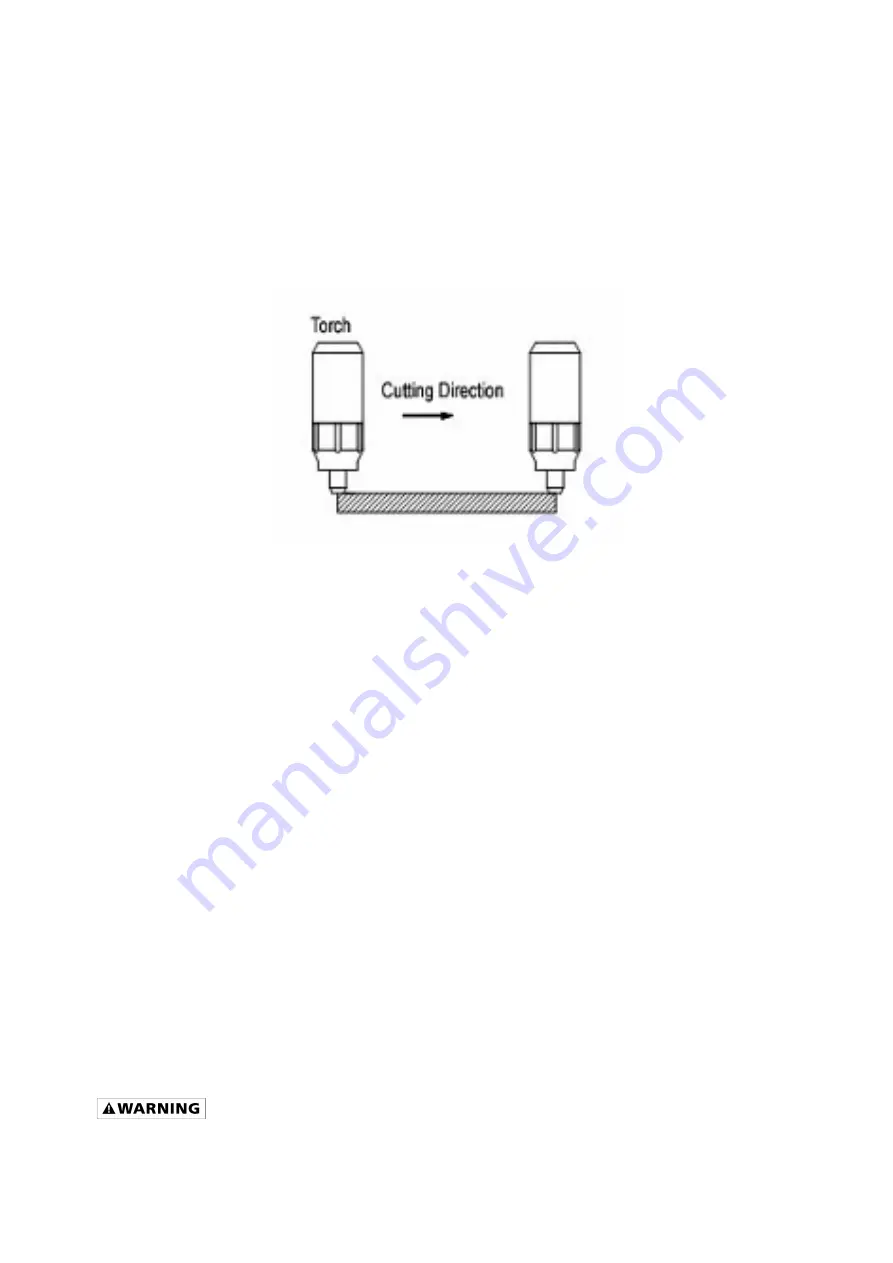
2. CUTTING OPERATION 
2.1. Metal Sheet Cutting 
- Put the torch’s nozzle at the start of the work piece. Turn on the torch switch to ignite the plasma 
pilot. After the work piece is cut thorough, move the torch along the cutting direction uniformly.    The 
cutting speed is determined by watching to see if the cutting goes all the way through.    If the speed 
is too fast, the work piece won’t be cut thorough, or if too slow, the cut quality would be affected, 
excessive warping may occur, or the arc could stop. 
- When you’ve completed the cutting process, turn off the torch; the plasma pilot arc will stop. 


2.2. Metal Mesh Cutting 
-Fix the work piece and connect the earth cable with the work piece. 
-Put the cutting nozzle onto the workpiece, lift torch up slightly from the work piece and turn on the 

switch to cut. 

2.3. Notice while cutting 
- Unnecessary igniting of the pilot arc in the air will reduce the life-span of the torch’s electrode and 
nozzle. 
- It is best to start cutting at the edge of the work piece, unless you are piercing the work piece. 
- Keep a space between the nozzle and the work piece. Pressing the nozzle on the work piece could 
cause the nozzle to stick, reducing the smoothness of the cutting action creating an undesirable 
result. 
- Keep the torch’s nozzle vertical against the work piece, and watch to be sure the arc is moving 
along the cutting line. 
- For thin materials reduce the amperage setting to get the best cutting quality, reduce excessive 
warping and to extend the life of the electrode and nozzle. 
- Do not rapidly switch the torch trigger on and off; this will damage the pilot arc system and work 
piece. 
- The plasma cutter’s working air pressure range is 50-90psi. Notice: the internal pressure switch will 
shut off when the air pressure falls below 50psi. The switch only works when the pressure rises to 
50psi or above. 
- Every 4-8 hours, check the air filter on your air supply and remove excess moisture. Too much 
moisture in the cutter or torch may lead to operational trouble. 
 

Always unplug the power supply before checking for and removing moisture.


Содержание PC 375

Страница 1: ...S MANUAL WARNING Read carefully and understand all ASSEMBLY AND OPERATION INSTRUCTIONS before operating Failure to follow the safety rules and other basic safety precautions may result in serious per...

Страница 2: ...rch parts nozzle electrode di user cover are considered consumable items and are not covered under warranty 90 days Parts for Cross re spool guns welding carts and welding cabinets This warranty cover...

Страница 3: ...a travel speed of 10 inches per minute Plasma cutting does require a source of compressed air and this unit in particular requires a compressed air source that can provide 60 PSI at a rate of 4 5 CFM...

Страница 4: ...utting in free from flammable materials Always keep a fire extinguisher within reach Always have a qualified person install and operate this equipment Make sure the area is clean dry and well ventilat...

Страница 5: ...and fingers away from moving parts Do not point the Plasma torch at any body part or at anyone else Always use this plasma cutter in the rated duty cycle to prevent excessive heat and failure 1 4 Spec...

Страница 6: ...people in your cutting area when you are going to strike an arc so they can protect themselves Fire Hazards Do not cut on containers or pipes that contain or have had flammable gaseous or liquid combu...

Страница 7: ...and fittings for the specific application Proper Care Repair and Maintenance Always have power disconnected when working on internal components Do not touch or handle PC board without being grounded w...

Страница 8: ...sma cutter with thermal overload protection a Trafimet torch and a built in gas regulator This easy to use plasma cutter has the power to cut up to 3 8 in materials and a pilot arc that makes cutting...

Страница 9: ...the front of the machine Push on to snap in place This is the control cable for the torch Torch Arc Starting Cable Connection This connector is for the red cable of the torch It is used to help the a...

Страница 10: ...recommend an extension cord because of the voltage drop they produce This drop in voltage can affect the performance of the welder If you need to use an extension cord we recommend you check with a qu...

Страница 11: ...d correctly and is in good working condition as described in INSTALLATION Section and that it complies with safe operation requirements as noted in the IMPORTANT SAFETY CONSIDERATIONS Section Switch o...

Страница 12: ...e and nozzle It is best to start cutting at the edge of the work piece unless you are piercing the work piece Keep a space between the nozzle and the work piece Pressing the nozzle on the work piece c...

Страница 13: ...end the torch cable sharply this may damage the air hose Nobody other than the operator should be allowed to access the working area Always turn off the power supply prior to repairing or moving the m...

Страница 14: ...If it is not the torch head has seized and the torch will need to be replaced Install an air dryer to your compressed air supply to prevent corrosion of the torch head Arc Start Circuit Defective Con...

Страница 15: ...Page of 15 13 Circuit Chart...

Страница 16: ...7 2 6 2 5 2 4 2 3 2 2 2 1 2 0 1 9 1 8 1 7 1 6 1 5 1 4 1 3 1 2 1 1 1 0 9 8 7 6 5 4 3 2 1 Reference Part Description Qty 1 2 05 08 019 HANDLE 1 2 1 1 01 01 0226 ENCLOSURE 1 3 2 05 17 020 POWER CORD HOL...

Страница 17: ...NEL 1 23 1 1 05 09 0007 ARC CONTROL PCB 1 24 2 05 03 104 CONNECTION POLE 1 25 2 07 57 967 QUICK CONNECTOR 1 26 1 2 07 03 0793 GROUNDING CABLE 1 27 2 20 08 258 CUTTING TORCH 1 28 1 1 02 02 0411 OUTPUT...

Отзывы: