background image


CPS2OEM60DEB.DOC 


20 

The cross-section of the battery cables must be higher than 16mm2. 
The rating of the upstream circuit-breakers should match the equipment's requirements. 
The installer should choose the types of cable (H07-VK, MX…) according to the type of application and the 
applicable standards. 

4.2.2 Precautions regarding electromagnetic disturbance generated by the appliance 


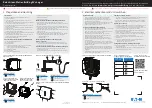
Use shielded cables for all the connections (*). The shielding should be earthed at both the transmitting and the 
receiving ends. 
Keep cable length and shielding connections down to a minimum. 
Route cables as close as possible to conductive parts ("loose" cables or loops should be avoided – cables should 
be flattened against conductive parts). 
Keep power cables separate from battery cables. 
Keep power cables separate from control cables (at least 200mm). 
The cables should only supply power to this appliance; any branch-offs or short-outs intended to power another 
appliance are prohibited. 
(*) This is a recommendation for installation rather than an obligation. The installing electrician should decide 
whether or not to use shielded cable depending on the EMC environment. 


5


COMMISSIONING 


This paragraph lists all the tasks required to bring the equipment into service. 
These instructions should be followed to the letter before first turning on the appliance. 

5.1 

ELECTRICITY NETWORK 


The CPS2 OEM 12V/60A chargers can operate automatically and equally on single-phase networks from 85 to 265VAC 
and from 47 to 63Hz. 

 
Generators 

The Cristec battery charger is designed to operate on a generator. In certain cases, generators can produce high surges. 
Before connecting the charger, check its compatibility with the generator's characteristics: power, voltage, surges, 
frequency, current etc. 

5.2  

CHARGER COMPATIBILITY AND SETTINGS ACCORDING TO BATTERY TYPE 


Before switching on, be sure to check the compatibility of voltage, current and settings according to the type of

 batteries 

connected. 


Checking the load voltage  


Before connecting the batteries to the charger, you must check the polarity of the accumulators. Also check the voltage of 
the batteries with the aid of a calibrated voltmeter. A low voltage on certain types of accumulators may indicate they have 
sustained irreversible damage, thereby precluding any possibility of recharging. 

5.3  

TURNING THE CHARGER ON AND OFF 


The  CPS2 OEM 12V/60A charger starts operating as soon as it is switched on (input power cable connected and 
powered). 
 
The CPS2 OEM 12V/60A charger stops operating when it is no longer powered up (input power cable disconnected or 
the installation's circuit-breaker in the OFF position). 
 

Содержание CPS2 OEM 12V/40A

Страница 1: ...rs Bedienungsanleitung CPS2 OEM 12V 60A Batterieladeger te Manual del usuario cargadores CPS2 OEM 12V 60A Manuale d uso caricabatterie CPS2 OEM 12V 60A S A S CRISTEC 47 rue Pierre Mend s France 29000...

Страница 2: ...DOC 2 Manuel d utilisation en Fran ais Page 3 Operating Manual in English Page 13 Bedienungsanleitung Deutsch Seite 23 Manual de instrucciones en Castellano P g 33 Manuale d uso in Italiano Pag 43 An...

Страница 3: ...4 2 CONNECTIQUE 9 4 2 1 C blage 9 4 2 2 Dispositions vis vis des perturbations lectromagn tiques g n r es par l appareil 10 5 MISE EN SERVICE 10 5 1 RESEAU D ENTREE 10 5 2 COMPATIBILITE ET CONFIGURATI...

Страница 4: ...r L appareil doit tre positionn dans un endroit sec et bien ventil Dispositions vis vis des mat riels inflammables Le chargeur ne doit pas tre utilis proximit de mat riels liquides ou gaz inflammables...

Страница 5: ...ur de batteries 2 SPECIFICATIONS TECHNIQUES Entr e Tension De 85 265VCA monophas Fr quence De 47 63Hz Intensit de consommation 230 115VCA 4 6A 9 4A Facteur de puissance 0 9 aux conditions nominales Re...

Страница 6: ...apr s s lection pr alable du type de batterie et du type de charge Il peut rester raccord de fa on permanente aux batteries et ne n cessite pas d tre d connect lors du d marrage moteur application mar...

Страница 7: ...les switchs et ventuellement ajuster la tension de sortie via le potentiom tre RV1 accessible par l ext rieur en bas du chargeur utiliser l outil ad quat pour tourner la vis du potentiom tre en foncti...

Страница 8: ...rption Floating 0 I out charger t I nom U out charger t Boost Absorption Floating 0 4 Hrs Boost en position OFF Dans cette configuration le chargeur CPS2 OEM 12V 60A d livre une courbe de charge de ty...

Страница 9: ...aissance de ce manuel d utilisation et devra informer les utilisateurs des dispositions relatives l utilisation et la s curit contenues au paragraphe 5 4 1 MONTAGE DU CHARGEUR Le chargeur CPS2 OEM 12V...

Страница 10: ...ind ou non 5 MISE EN SERVICE Ce paragraphe num re les op rations effectuer pour la mise en service de l quipement Il convient de respecter strictement ces instructions avant la premi re mise sous tens...

Страница 11: ...tous les 5 ans Ce contr le technique g n ral peut galement tre r alis en nos usines 6 3 REPARATION DES EQUIPEMENTS D connecter le chargeur de batteries du r seau alternatif et des batteries pour toute...

Страница 12: ...ur les environnements r sidentiels commerciaux et de l industrie l g re NF EN 61000 6 2 Compatibilit lectromagn tique CEM Partie 6 2 normes g n riques Immunit pour les environnements industriels NF EN...

Страница 13: ...STALLATION 19 4 1 SITING THE CHARGER 19 4 2 WIRING 19 4 2 1 Cable lead in 19 4 2 2 Precautions regarding electromagnetic disturbance generated by the appliance 20 5 COMMISSIONING 20 5 1 ELECTRICITY NE...

Страница 14: ...and well ventilated place Precautions regarding inflammable materials The charger should not be used near inflammable materials liquids or gases The batteries can emit explosive gases please follow th...

Страница 15: ...ing the battery charger 2 TECHNICAL SPECIFICATIONS Input Voltage From 85 to 265VAC single phase Frequency De 47 to 63Hz Current intensity 230 115VAC 4 6A 9 4A Power factor 0 9 in rated conditions Effi...

Страница 16: ...charger is entirely automatic It can remain connected to the batteries and does not need to be disconnected when starting up an engine marine application because it is equipped with rectifier diodes...

Страница 17: ...on BAT D BAT 1 or BAT 2 approx 0 4V 3 2 4 Settings The charger s factory settings are TYPE 2 BAT Sealed Lead see table above BOOST in ON position The installer should set the switches excluding input...

Страница 18: ...voltage has reached the maximum Boost level The current level starts falling These two phases combined last a maximum of 4 hours The current depends on how charged the battery is Floating Phase starts...

Страница 19: ...charger should be installed as near as possible to the batteries in a dry well ventilated and fully damp proof and dust free room Air circulation should be unhindered The recommendations specified in...

Страница 20: ...ng the equipment into service These instructions should be followed to the letter before first turning on the appliance 5 1 ELECTRICITY NETWORK The CPS2 OEM 12V 60A chargers can operate automatically...

Страница 21: ...gineer is recommended every five years This can also be done at our plant 6 3 EQUIPMENT REPAIR Disconnect the battery charger from the AC power network and disconnect the batteries before undertaking...

Страница 22: ...ic standards Immunity for residential commercial and light industrial environments NF EN 61000 6 2 Electromagnetic compatibility EMC Part 6 2 generic standards Immunity for industrial environments NF...

Страница 23: ...29 4 INSTALLATION 29 4 1 MONTAGE DES LADEGER TES 29 4 2 VERKABELUNG 29 4 2 1 Kabeleintritt 29 4 2 2 Ma nahmen gegen von dem Ger t erzeugte elektromagnetische St rungen 30 5 INBETRIEBNAHME 30 5 1 EING...

Страница 24: ...rufen Das Ger t muss an einem trockenen und gut bel fteten Ort eingebaut werden Ma nahmen gegen brennbare Stoffe Das Ladeger t darf nicht in unmittelbarer N he brennbarer Stoffe Fl ssigkeiten oder Gas...

Страница 25: ...der Bedienung des Batterieladeger tes verantwortlich gemacht werden 2 TECHNISCHE SPEZIFIKATIONEN Eingang Spannung 85 265VAC einphasig Frequenz 47 63Hz Verbrauchsst rke 230 115VAC 4 6A 9 4A Leistungsf...

Страница 26: ...detyps vollkommen automatisch Es kann st ndig an die Batterien angeschlossen bleiben und muss beim Starten des Motors nicht abgetrennt werden Einsatz auf See da es mit R cklaufsperrdioden ausgestattet...

Страница 27: ...es Werkes wie folgt konfiguiert BAT TYP 2 Blei dicht siehe obenstehende Tabelle BOOST in Position ON Der Installateur muss ohne Eingangs und Ausgangsspannung bei ausgeschaltetem Ger t die Switche konf...

Страница 28: ...Spannung den maximalen Boost Wert erreicht hat Der Strom beginnt sich zu verringern Diese beiden Phasen zusammengenommen dauern maximal 4 Stunden Der Strom h ngt vom Ladezustand der Batterie ab Float...

Страница 29: ...3297 Der Installateur muss diese Bedienungsanleitung zur Kenntnis nehmen und die Benutzer ber die Bedienungs und Sicherheitsvorkehrungen in Abschnitt 5 informieren 4 1 MONTAGE DES LADEGER TES Das Lade...

Страница 30: ...abel benutzt oder nicht 5 INBETRIEBNAHME In diesem Abschnitt werden die Arbeiten aufgez hlt die durchzuf hren sind um das Ger t in Betrieb zu nehmen Es ist angebracht diese Anweisungen vor dem ersten...

Страница 31: ...ahre wird empfohlen Diese allgemeine technische Kontrolle kann auch in unseren Werken vorgenommen werden 6 3 R PARATUR DER GER TE Bei allen Reparaturarbeiten das Batterieladeger t vom Wechselstromnetz...

Страница 32: ...6 1 generic standards Immunity for residential commercial and light industrial environments NF EN 61000 6 2 Electromagnetic compatibility EMC Part 6 2 generic standards Immunity for industrial enviro...

Страница 33: ...EADO 39 4 2 1 Llegada de los cables 39 4 2 2 Disposiciones respecto a las perturbaciones electromagn ticas generadas por el aparato 40 5 PUESTA EN SERVICIO 40 5 1 RED DE ENTRADA 40 5 2 COMPATIBILIDAD...

Страница 34: ...l aparato debe instalarse en un lugar seco y bien ventilado Disposiciones respecto a los materiales inflamables El cargador no debe utilizarse cerca de materiales l quidos o gases inflamables Las bate...

Страница 35: ...da o debido a la utilizaci n del cargador de bater as 2 ESPECIFICACIONES T CNICAS Entrada Tensi n De 85 a 265VAC monof sica Frecuencia De 47 a 63Hz Intensidad de consumo 230 115VAC 4 6A 9 4A Factor d...

Страница 36: ...de bater as es totalmente autom tico despu s de haber seleccionado previamente el tipo de bater a y el tipo de carga Puede estar conectado de forma permanente a las bater as y no es preciso desconect...

Страница 37: ...damente 3 2 4 Ajustes El cargador ha sido configurado en salida de f brica BAT TIPO 2 Plomo estanca v ase el cuadro m s arriba BOOST en posici n ON El instalador debe configurar fuera de tensi n entra...

Страница 38: ...ensi n ha alcanzado el valor m ximo del Boost La corriente comienza a disminuir Estas dos fases acumuladas duran 4 horas como m ximo La corriente depiende del estado de carga de la bater a Fase Floati...

Страница 39: ...e informar a los usuarios de las disposiciones relativas a la utilizaci n y a la seguridad que figuran en el apartado 5 4 1 MONTAJE DEL CARGADOR El cargador CPS2 OEM 12V 60A debe instalarse lo m s cer...

Страница 40: ...ndo en cuenta el entorno CEM 5 PUESTA EN SERVICIO Este apartado enumera las operaciones que hay que realizar para la puesta en servicio del equipo Es conveniente respetar estrictamente estas instrucci...

Страница 41: ...alice una inspecci n t cnica completa Este control t cnico general tambi n puede realizarse en nuestras f bricas 6 3 REPARACI N DE LOS EQUIPOS Para cualquier operaci n de reparaci n desconectar el car...

Страница 42: ...atibility EMC Part 6 1 generic standards Immunity for residential commercial and light industrial environments NF EN 61000 6 2 Electromagnetic compatibility EMC Part 6 2 generic standards Immunity for...

Страница 43: ...CABLAGGIO 49 4 2 1 Arrivo dei cavi 49 4 2 2 Disposizioni relative alle perturbazioni elettromagnetiche generate dall apparecchio 50 5 MESSA IN SERVIZIO 50 5 1 RETE D INGRESSO 50 5 2 COMPATIBILIT E CON...

Страница 44: ...uogo asciutto e ben ventilato Disposizioni relative ai materiali infiammabili Il caricabatteria non deve essere utilizzato nelle vicinanze di materiali liquidi o gas infiammabili Le batterie sono susc...

Страница 45: ...danni dovuti all uso del caricabatteria 2 SPECIFICHE TECNICHE Ingresso Tensione Da 85 a 265VAC monofase Frequenza Da 47 a 63Hz Intensit di consumo 230 115VAC 4 6A 9 4A Fattore di potenza 0 9 alle con...

Страница 46: ...dei caricabatterie interamente automatico una volta selezionato il tipo di batteria ed il tipo di carica Pu restare collegato permanentemente alle batterie e non necessita di essere scollegato al mom...

Страница 47: ...2 0 4V circa 3 2 4 Regolazioni Il caricatore configurato all uscita dalla fabbrica BAT TYPE 2 Piombo a tenuta stagna vedere tabella precedente BOOST in posizione ON L installatore deve configurare sen...

Страница 48: ...ando la tensione ha raggiunto il valore massimo del Boost La corrente comincia a decrescere Queste due fasi cumulate durano al massimo 4 ore La corrente dipende dallo stato di carica della batteria Fa...

Страница 49: ...ni relative all uso ed alla sicurezza contenute al paragrafo 5 4 1 MONTAGGIO DEL CARICABATTERIA Il caricabatteria CPS2 OEM 12V 60A dovr essere installato il pi vicino possibile alle batterie in un loc...

Страница 50: ...enumera le operazioni da effettuare per la messa in servizio dell attrezzatura Rispettare scrupolosamente queste istruzioni prima di collegare l apparecchio all alimentazione 5 1 RETE D INGRESSO I car...

Страница 51: ...ni 5 anni Questo controllo tecnico generale pu anche essere effettuato nelle nostre fabbriche 6 3 RIPARAZIONE DELLE ATTREZZATURE Scollegare il caricabatteria dalla rete alternata e dalle batterie per...

Страница 52: ...Part 6 1 generic standards Immunity for residential commercial and light industrial environments NF EN 61000 6 2 Electromagnetic compatibility EMC Part 6 2 generic standards Immunity for industrial e...

Страница 53: ...CPS2OEM60DEB DOC 53 Annexe...

Страница 54: ...tage Einstellung der Ausgangsspannung Ajuste de la tensi n de salida Regolazione della tensione d uscita SW1 SW2 SW3 SW4 SW5 Switchs de configuration Settings switches Konfigurations Switche Switchs d...

Страница 55: ...t Absorption Floating deplazada Optionze LED ON Boost Absorption Floating a LD1 Carte chargeur Charger board Ladeger tkarte Tarjeta cargador Scheda caricatore 12V 60A 17 03 2007 N 09472 10A F1 F2 K1 R...

Страница 56: ...rie auxiliaire BAT 2 Auxiliary battery BAT 2 Hilfsbatterie BAT 2 Bater a auxiliar BAT 2 Batteria ausiliaria BAT 2 BAT 1 BAT 2 Chargeur 3 Sorties 3 Output charger Ladeger t 3 Ausg nge Cargador 3 salida...

Страница 57: ...n rondelle piante e rondelle di bloccaggio adeguate 17 03 2007 N 09472 11A Ne rien d poser sur le chargeur Nichts auf dem Ladeger t ablegen Non poggiare nulla sul caricabatteria CHARGEUR CHARGER LADEG...

Страница 58: ...CPS2OEM60DEB DOC 58 Note...

Страница 59: ...CPS2OEM60DEB DOC 59...

Отзывы: