20
CraftBot 3
19. ADJUSTING THE LIGHTING
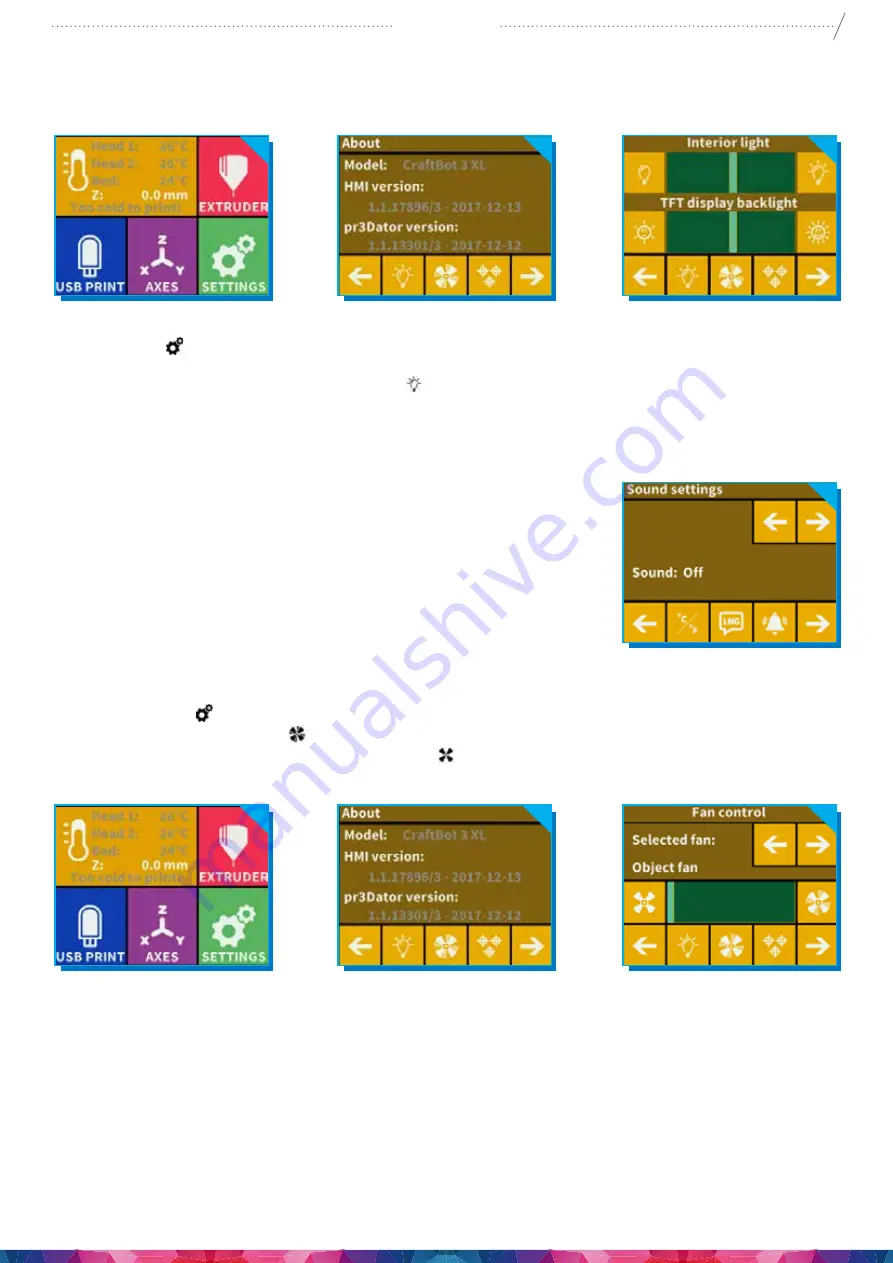
21. ACTIVATING THE FANS
CraftBot has five fans: object 1 fan, extruder 1 fan, object 2 fan, extruder 2 fan, case fan, dome fan.
•
Select Settings on the LCD screen.
•
Select the fan control icon.
•
Switch between fans by pressing the fan icon. The name of the fan to be controlled is displayed
at the top of the screen.
Fan Control: Activate and deactivate the fans before or during printing to match your preferences.
Extruder and case fan settings automatically reset to default after 60 seconds.
22. USING CRAFTWARE TO CONVERT 3D DESIGN INTO PRINTING COMMANDS
To print a 3D object, CraftBot needs toolpath information generated from 3D object files like .obj or .stl.
Toolpath information is simply called “gcode”. CraftWare software converts 3D designs into printing
commands for the CraftBot 3D printer. CraftWare has been developed by CraftUnique with the aim of
easing and perfecting the printing process.
20. SOUND SETTINGS
By using the arrows in the top right corner you can choose between
3 options: Sound On, Sound Off and Warnings Only.
Select Settings on the LCD
screen.
Select the light control icon
by touching the light bulb
button.
You will see a
variance pop up on the
screen: two different touch-
screen sliders.
Adjusting the lighting: Move
the line from the left to the
right to vary the brightness
of either the interior LED
lighting of the CraftBot or
the LCD display backlighting.
Содержание CraftBot 3 Supervisor
Страница 1: ......


