


14
OPERATION
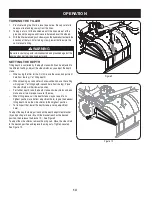
TUrning The Tiller
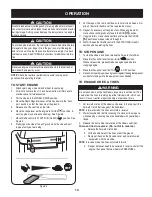
Practice turning the tiller in a level, open area. Be very careful to
1.
keep your feet and legs away from the tines.
To begin a turn, lift the handlebars until the tines are out of the
2.
ground and the engine and tines are balanced over the wheels.
With the tiller balanced, push sideways on the handlebar to steer in the
3.
direction of the turn. After turning, slowly lower the tines into the
soil to resume tilling.
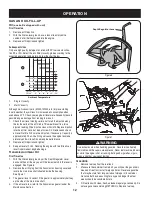
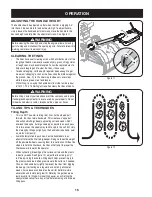
SeTTing The DePTh
Tilling depth is controlled by the depth stake which can be adjusted to
five different settings. Adjust the side shields as you adjust the depth
stake.
When using the tiller for the first time, use the second adjustment
•
hole from the top (1” of tilling depth).
When breaking up sod and for shallow cultivation, use the setting
•
which gives 1” of tilling depth (second hole from the top). Place
the side shields in their lowest position.
For further depth, raise the depth stake and side shields and also
•
make one or two more passes over the area.
When tilling loose soil, the depth stake may be raised to its
•
highest position (use bottom adjustment hole) to give the deepest
tilling depth. Raise the side shields to their highest position.
To transport tiller, lower the depth stake (use top adjustment
•
hole).
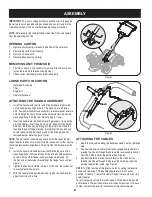
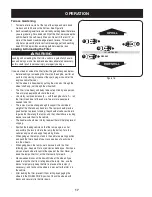
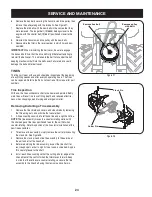
To adjust the depth stake, pull back on the depth adjustment bracket
(A) and push up or down (B) until the bracket reaches the desired
position, then release the bracket (C). See Figure 9.
To adjust the side shields, remove the wing nuts. Move the side shield
to the desired position and replace the wing nuts. Tighten securely.
See Figure 10.
Warning
Be certain spark plug wire is disconnected and grounded against the
engine when performing any adjustments.
Figure 10
A
B
C
Figure 9