background image


Door

Highest Point

of Travel

Header

Wall

Pivot

Distance

Header Wall

Highest Point

of Travel

Door

Distance

Jamb

Hardware

The Chamberlain Group, Inc.
Position Header Bracket
One Piece Door Without Track
1/30/92 - 4/7/92 

Header Wall

Vertical

Centerline

Vertical

Centerline of

Garage Door

2x4

Unfinished

Ceiling

Structural

supports

2x4

OPTIONAL CEILING MOUNT

FOR HEADER BRACKET

Door

Highest Point

of Travel

Header

Wall

Pivot

Distance

Header Wall

Highest Point

of Travel

Door

Distance

Jamb

Hardware

The Chamberlain Group, Inc.
Position Header Bracket
One Piece Door Without Track
1/30/92 - 4/7/92 

Header Wall

Vertical

Centerline

Vertical

Centerline of

Garage Door

2x4

Unfinished

Ceiling

Structural

supports

2x4

OPTIONAL CEILING MOUNT

FOR HEADER BRACKET

• Close the door and mark the

inside vertical centerline of
your garage door. Extend
the line onto the header wall
above door.

If headroom clearance is
minimal, you can install the
header bracket on the
ceiling. See page 14.

• 

If you need to install the
header bracket on a 2x4 (on
wall or ceiling), use lag
screws (not supplied) to
securely fasten the 2x4 to
structural supports as
shown.


EXAMPLE

Distance from top of door 
(at highest point of travel) to floor...........................92"

Actual height of door .............................................-88"

Remainder................................................................4"

Add .........................................................................+8"

Bracket height on header wall ..............................=12"

(Measure UP from top of CLOSED door.)

Proceed to Step 2, page 14.

13

Door

Highest Point

of Travel

Header

Wall

Pivot

Distance

Header Wall

Highest Point

of Travel

Door

Distance

Jamb

Hardware

The Chamberlain Group, Inc.
Position Header Bracket
One Piece Door Without Track
1/30/92 - 4/7/92 

Header Wall

Vertical

Centerline

Vertical

Centerline of

Garage Door

2x4

Unfinished

Ceiling

Structural

supports

2x4

OPTIONAL CEILING MOUNT

FOR HEADER BRACKET

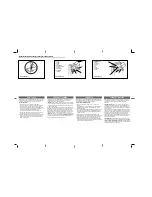
ONE-PIECE Door Without Track

• Open your door to the highest point of travel as

shown. Measure the distance from the top of the
door to the floor. Subtract the actual height of the
door. Add 8" to the remainder. (See Example).

• Close the door and draw an intersecting horizontal

line on the header wall at the determined height.

If the total number of inches exceeds the height
available in your garage, use the maximum
height possible, or refer to page 14 for ceiling
installation.

One-piece door without track

pivot hardware

One-piece door without track

jamb hardware

Read the Safety instructions on page 12. They also apply to doors without tracks.

Содержание 139.18847

Страница 1: ...ty rules and operating instructions before first use of this product Fasten the manual near the garage door after installation The Chamberlain Group Inc Cover SEARS 4 16 92 Safety Precautions Assembly Installation Adjustment Care and Maintenance Operation Troubleshooting Parts List MD MD Sears Canada Inc Toronto Ontario M5B 2B8 ...

Страница 2: ...t door arm to trolley one piece door 27 Adjustment section pages 28 30 Travel limit adjustments 28 Force adjustments 29 Test the safety reversing sensor 30 Test the safety reverse system 30 Operation safety instructions 31 Care of your opener 31 Maintenance schedule 31 Operation of your opener 32 Receiver and remote control programming 33 Having a problem 34 35 Repair parts rail assembly 36 Repair...

Страница 3: ...are under extreme tension and can cause serious injury or death Do not try to loosen move or adjust them yourself Ropes left on a garage door could cause someone to become entangled and killed Remove all ropes connected to the door before installing and operating the opener To avoid damage to the garage door and opener disable locks before installing and operating the opener Use a wood screw or na...

Страница 4: ...2 Alternate floor mounting of the safety reversing sensor will require hardware not provided Step 11 page 24 Do you have a steel aluminum fiberglass or glass panel door If so horizontal and vertical reinforcement is required Look at the garage door where it meets the floor It must close on the floor all the way across Otherwise the safety reverse system may not work properly See page 30 Floor or d...

Страница 5: ...ay want to review these steps before beginning Step 1 page 13 Look at the wall or ceiling above the garage door The header bracket must be securely fastened to structural supports Step 5 page 17 Do you have a finished ceiling in your garage If so a support bracket and additional fastening hardware not supplied may be required Safety reversing sensor page 21 Depending on garage construction wood bl...

Страница 6: ...d Sections Hanging Brackets 2 Conductor Bell Wire White White Red Trolley Light Lens 2 Safety Reversing Sensors 1 Sending Eye and 1 Receiving Eye with 2 Conductor White White Black Bell Wire attached Standard Control Console Door Bracket Security Three Function Remote Control with Visor Clip 2 Opener Carton Inventory Your garage door opener is packaged in two cartons which contain all parts illust...

Страница 7: ...x1 2 4 Hex Screw 5 16 18x7 8 3 Master Link 2 Ring Fastener 3 7 Trolley Threaded Shaft 1 Screw 6ABx1 2 Lock Washer 5 16 6 Lag Screw 5 16 9x1 5 8 2 Lock Nut 1 4 20 4 Carriage Bolts 1 4 20x1 2 4 Safety Reversing Sensor Installation Hardware Kit 41A4116 Hex Screw 1 4 20x1 1 2 2 Screw 10 32x3 8 4 Lock Nut 10x32 4 Wing Nut 2 Insulated Staples 20 RAIL GREASE NO 83A4 Rail Grease Lag Screw 1 4x1 1 2 4 Clev...

Страница 8: ...Section Cable pulley bracket attaches to FRONT END of T rail T rail End Section Brac Brace Square Carriage Bolt Holes T O G A R A G E D O O R Hex Screws 5 16 18x7 8 Cable Pulley Bracket Rail Bracket T rail Must Be Aligned Lock Washer 5 16 Nut 5 16 Assemble Tee Rail attach Ca SEARS 92 52 4 16 89 6 27 89 3 9 9 Right Wrong When tightening the screws be sure to keep bracket parallel to the rail Otherw...

Страница 9: ...o the trolley with the lock washer and nuts as shown As a temporary stop insert a screwdriver into the hole in the front end of the T rail Slide the trolley assembly along the rail to the screwdriver stop If trolley hits against any nuts on the T rail the bolts and nuts were attached from the wrong side and must be repositioned Review Step 1 Temporary Stop Screwdriver Trolley T O G A R A G E D O O...

Страница 10: ...g Carton to Prevent Kinking Dispensing Carton Keep Chain and Cable Taut When Dispensing Opener Sprocket Detach the cable loop from the carton and fasten it to the trolley with a master link from the hardware bag See master link procedure Figure 1 With the trolley against the screwdriver dispense the cable around the pulley Proceed back around the opener sprocket Figure 2 Be sure sprocket teeth eng...

Страница 11: ...her hardware must be made by a professional service person before installing opener 3 Disable all locks and remove all ropes connected to the garage door before installing the opener Ropes connected to a garage door can cause entanglement and death 4 If possible install door opener 7 feet or more above floor with the emergency release handle mounted 6 feet above the floor 5 Do not connect the open...

Страница 12: ... 30 92 4 6 92 SECTIONAL DOOR AND ONE PIECE DOOR WITH TRACK Vertical Guideline Finished Ceiling Vertical Guideline Header Wall 2x4 Structural Supports 2 Header Wall Highest Point of Travel 2 SECTIONAL Door and ONE PIECE Door With Track Close the door and mark the inside vertical centerline of the garage door Extend the line onto the header wall above the door Remember you can fasten the header brac...

Страница 13: ...ctural supports as shown EXAMPLE Distance from top of door at highest point of travel to floor 92 Actual height of door 88 Remainder 4 Add 8 Bracket height on header wall 12 Measure UP from top of CLOSED door Proceed to Step 2 page 14 13 Door Highest Point of Travel Header Wall Pivot Distance Header Wall Highest Point of Travel Door Distance Jamb Hardware Header Wall Vertical Centerline Vertical C...

Страница 14: ...ollow the instructions which will work best for your particular requirements Fasten the Header Bracket to the Wall Center the bracket on the vertical guideline with the bottom edge of the bracket on the horizontal line as shown with the arrow pointing toward the ceiling Mark either set of bracket holes do not use the holes designated for ceiling mount Drill 3 16 pilot holes and fasten the bracket ...

Страница 15: ...et Use packing material as a protective base If the door spring is in the way you ll need help Have someone hold the opener securely on a temporary support to allow the T rail to clear the spring Position the cable pulley bracket against the header bracket Align the bracket holes and join with a clevis pin as shown Insert a ring fastener to secure 15 Installation Step 3 Attach the T rail to the He...

Страница 16: ...ONE PIECE Door without Track With the door fully open and parallel to the floor measure the distance from the floor to the top of the door Using a stepladder as a support raise the opener to the same distance as the door from the floor it will be at a slight angle as shown The top of the door should be level with the top of the opener Do not position the opener more than 2 above this point T rail ...

Страница 17: ...chée Bracket Not Supplied Lag Screws 5 16 18x1 7 8 Not Supplied 5 16 18x7 8 Screw 5 16 Lock Washer 5 16 18 Nut FINISHED CEILING 5 16 18x7 8 Screw 5 16 Lock Washer 5 16 18 Nut Hidden Support Measure Distance Lag Screws 5 16 18x1 7 8 Structural Supports 5 16 18x7 8 Screw 5 16 Lock Washer 5 16 18 Nut Tire fond de 5 16 de po 18 x 1 7 8 de po Solives Mesurer la distance Vis de 5 16 de po 18x7 8 de po r...

Страница 18: ...er à cet endroit INSTALLATION PRÉ CÂBLÉE POUR ENLEVER ET REMETTRE LE COUVERCLE Figure 1 Figure 2 Fil de sonnerie 24 V à 2 Conducteurs Sears DoorContrls RearView 7 95 Bell Wire Terminal Screws STANDARD CONTROL BACK VIEW Top Mounting Hole Bottom Mounting Hole WHITE 2 RED 1 Locate the door control within sight of the door at a minimum height of 5 feet where small children cannot reach and away from a...

Страница 19: ...until the sensor beam is connected and properly aligned See Safety Reversing Sensor instructions beginning on page 21 Installation Step 8 Attach the Emergency Release Rope and Handle Do not use the red handle to pull the door open or closed The rope knot could become untied and you could fall Use the emergency release only to disengage the trolley and if possible only when the door is closed Garag...

Страница 20: ...ord Connect the black line wire to the screw on the brass terminal the white neutral wire to the screw on the silver terminal and the ground wire to the green ground screw The opener must be grounded Reinstall the cover 20 To prevent electrocution or fire installation and wiring must be in compliance with local electrical and building codes Do NOT use an extension cord 2 wire adapter or change the...

Страница 21: ...ther side of the door or add a piece of wood at each location if installing in masonry construction The invisible light beam path must be unobstructed No part of the garage door or door tracks springs hinges rollers or other hardware can interrupt the beam while the door is closing If it does use a piece of wood to build out each sensor mounting location to the minimum depth required for light bea...

Страница 22: ...mounting brackets having square holes using the hardware shown in Figure 2 Connect each assembly to a slotted bracket using the hardware shown in Figure 3 Note the alignment of the brackets for left and right sides of the door Finger tighten the lock nuts Use bracket mounting holes as a template to locate and drill 2 3 16 diameter pilot holes on both sides of the garage door 4 6 above the floor bu...

Страница 23: ...nvisible light beam path is not obstructed alignment is required Loosen the sending eye wing nut and re adjust aiming directly at the receiving eye Lock in place Loosen the receiving eye wing nut and adjust sensor vertically and or horizontally until it receives the sender s beam When the green indicator light glows steadily tighten the wing nut 23 1 4 20 x 1 1 2 Hex Bolt C Wrap Sensor with Wire W...

Страница 24: ...the bracket on the face of the door within the following limits A The top edge of the bracket 2 4 below the top edge of the door B The top edge of the bracket directly below any structural support across the top of the door Mark and drill 5 16 left and right fastening holes Secure the bracket as shown in Figure 1 if there is vertical reinforcement If your installation doesn t require vertical rein...

Страница 25: ...IECE Door Installation Procedure Center the bracket on the inside face of the door in line with the header bracket as shown Mark either the left and right or the top and bottom holes Drill 5 16 pilot holes and fasten the door bracket with hardware supplied 25 Please read and comply with the warnings and reinforcement instructions on page 24 They apply to one piece doors also Carriage Bolt 5 16 18x...

Страница 26: ...apart as possible to increase door arm rigidity Figure 3 If holes in curved arm are above holes in straight arm disconnect straight arm Cut about 6 from the solid end Reconnect to trolley with cut end down as shown Bring arm sections together Find two pairs of holes that line up and join with screws lock washers and nuts Proceed to Adjustment Step 1 page 28 Trolley will re engage automatically whe...

Страница 27: ...stment Decrease UP limit Turn the UP limit adjustment screw counter clockwise 5 1 2 turns Press the Door Control push button The trolley will travel to the fully open position Manually raise the door to the open position parallel to the floor and lift the door arm to the trolley The arm should touch the trolley just in back of the door arm connector hole Refer to the fully open trolley door arm po...

Страница 28: ...ent screw clockwise One turn equals 2 of travel NOTE To prevent the trolley from hitting the cover protection bolt keep a minimum distance of 2 4 between the trolley and the bolt If door does not open at least 5 feet Adjust the UP open force as explained in Adjustment Step 2 If the door does not close completely Increase down travel Turn the DOWN limit adjustment screw counterclockwise One turn eq...

Страница 29: ...h adjustment run the opener through a complete travel cycle If the door doesn t open at least 5 feet Increase UP Open force by turning the control clockwise Make 10 degree turn adjustments until door opens completely Re adjust the UP limit if necessary After each adjustment run the opener through a complete travel cycle If the door reverses during the down close cycle and the opener lights aren t ...

Страница 30: ...t The Safety Reversing Sensor Press the remote control push button to open the door Place the opener carton in the path of the door Press the remote control push button to close the door The door will not move more than an inch and the opener lights will flash Professional service is required if the opener closes the door when the safety reversing sensor is obstructed The garage door opener will n...

Страница 31: ... sight until it is completely closed NO ONE SHOULD CROSS THE PATH OF THE MOVING DOOR 4 Check safety reversal system monthly See page 30 The garage door MUST reverse on contact with a 2x4 board laid flat on the floor If an adjustment is made to either the force or the limit of travel both adjustments may be needed and the safety reversal system must be checked Failure to properly adjust the opener ...

Страница 32: ...se Opener Light will turn on under the following conditions When the opener is initially plugged in when the power is interrupted when the opener is activated They will turn off automatically after 4 1 2 minutes or provide constant light when the Light feature is activated SECURITY models Lights will also turn on when someone walks through the open garage door Bulb size is 75 watts maximum The loc...

Страница 33: ...l 18795 Follow the instructions below to program your opener to match any additional remotes you may purchase See Accessories on page 38 To Add A Remote Control 1 Press and hold the selected remote control push button See Figure 1 2 Then press and release the SRT learn button on the back panel of the opener Figure 2 The indicator light on the back panel will begin to blink and the opener light wil...

Страница 34: ...edure with all remote controls The remote control has short range The garage door opens and closes by itself 1 Be sure that all remote control push buttons are not stuck in the ON position 2 Remove the bell wire from the Door Control terminals and operate from the remote control only If this solves the problem the Door Control is faulty replace or there is an intermittent short on the wire between...

Страница 35: ...he opener motor hums briefly then won t work 1 The garage door springs are broken See above 2 If the problem occurs on the first operation of the opener door may be locked Disable the door lock If the chain was removed and reinstalled the motor may be out of phase Remove the chain cycle the motor to the down position Observe the drive sprocket When it turns in a clockwise direction and stops in th...

Страница 36: ... control console 2 41A5032 3 function remote control housing no circuit board 3A 10A19 3V 2016 Lithium battery 2 Required 3B 10A20 3V 2032 Lithium battery 1 Required 4 29B134 Visor clip 5 41A2828 Emergency rope handle assy 6 41A4353 Header bracket w clevis pin fastener 7 217A238 2 conductor bell wire white white red 8 178B35 Curved door arm section 9 41A5047 Door bracket w clevis pin fastener 10 4...

Страница 37: ... Roll pins 2 4 41B4245 Line cord 5 41A4352 End panel 6 175B88 Light socket 7 108D48 2 Lens 8 30B363 Capacitor 1 2 h p 9 12A373 Capacitor bracket 10 41A3150 Terminal block w screws KEY PART NO NO DESCRIPTION 11 41D3058 Universal replacement motor and bracket assembly Complete with Motor worm bracket bearing assembly RPM sensor 12 41D328 4 Cover 1 2 h p 13 41A2818 Helical gear and retainer w grease ...

Страница 38: ...ted to a programmable number of hours or entries Available May 1997 Outdoor Key Switch Opens the garage door automatically from outside when remote control is not handy Door Clearance Brackets For Sectional Doors Only Replace top brackets and rollers on door to reduce height of door travel For use when installing opener in garage with low headroom clearance 10 ft Rail Extension To allow a 10 foot ...

Страница 39: ...28 Problems that might require limit adjustments 34 35 Safety warnings 28 31 Manual Emergency Release Rope Handle Lockout feature 32 Manual disconnect 32 Safety warnings 11 19 31 32 Opener Terminals Door control connections 18 Safety reversing sensor connections 23 Operational Noise Sprocket noise 11 Vibration noise isolator kit 34 Receiver and Remote Control Programming the receiver 33 Erasing al...

Страница 40: ...fter 1 year and through 5 years Sears will furnish replacement parts for any defective parts in motor free of charge You pay for the labor WARRANTY SERVICE IS AVAILABLE BY SIMPLY CONTACTING THE NEAREST SEARS STORE OR SERVICE CENTER This warranty gives you specific legal rights and you may also have other rights which vary from province to province SEARS CANADA INC TORONTO ONTARIO M5B 2B8 1997 Sear...

Отзывы: