


INSTALLATION MANUAL
INSTALLATION
39
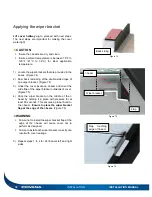
Non-permanent mounting plates
installation
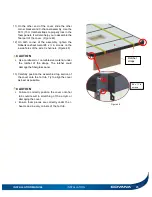
This setup is only available for base dimensions
larger than 82” wide for Standard Covana Units and
87” wide for Long Side Covana Units.
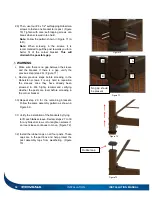
1)
After the unit has been installed, but BEFORE
installing the seal, proceed with the non-
permanent mounting plates installation. Using
the key switch, lift the Covana cover up to give
room for maneuvering the tub.
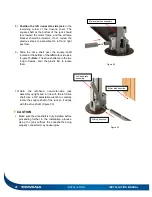
2)
Have three installers present. Two of them
should lift the tub at one end approx. 4 inches off
the ground while the third one slips the non-
permanent mounting plates under the hot tub
and hooks them over the driveshaft extrusions.
3)
Repeat on the other side as shown on Figure 84.
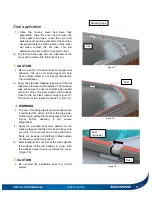
Note:
The plates must be installed over the
driveshaft extrusions (two on each side).
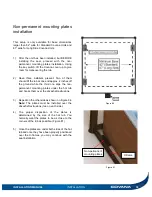
4)
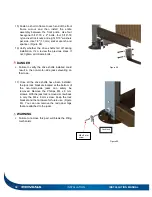
The proper disposition of the plates is
determined by the size of the hot tub. You
normally want the plates to be as close to the
corners of the tub as possible. (Figure 81)
5)
Once the plates are under both sides of the hot
tub and once they have been properly positioned
over the U-frames, you may continue with the
seal installation.
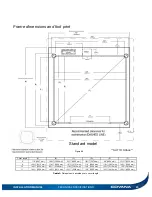
Figure 80
Figure 81
Non-permanent
mounting plates
U-frame
Содержание Evolution GHSC
Страница 1: ...1 INSTALLATION MANUAL Revision 1 2017 05 29 Revision 2 2017 11 10...
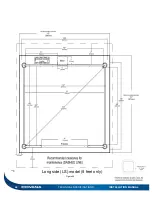
Страница 44: ...44 TECHNICAL SPECIFICATIONS INSTALLATION MANUAL Figure 85 NOT TO SCALE Long side LS model 8 feet only...
Страница 49: ...INSTALLATION MANUAL APPENDIX 49 APPENDIX...
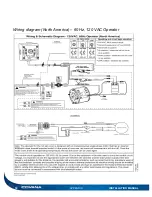
Страница 50: ...50 APPENDIX INSTALLATION MANUAL Wiring diagram North America 60 Hz 120 VAC Operator...
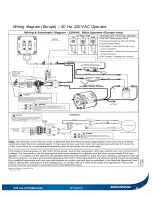
Страница 51: ...INSTALLATION MANUAL APPENDIX 51 Wiring diagram Europe 50 Hz 220 VAC Operator...
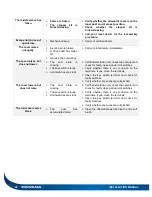
Страница 53: ...INSTALLATION MANUAL INSTALLATION CHECKLIST Customer copy 53...
Страница 56: ...56 INSTALLATION MANUAL...


