
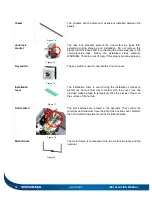

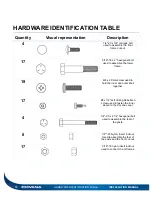


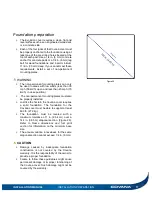


INSTALLATION MANUAL
INSTALLATION
21
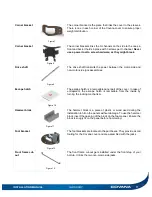
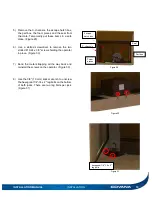
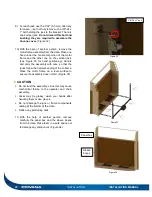
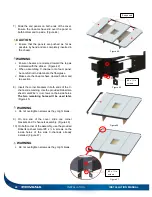
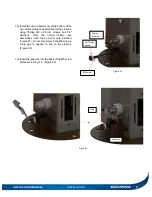
12) Pry off the three base plates of the crate using
your hand or a hammer if needed. (Figure 35)
CAUTION
Do not damage the components under the base
plates.
Flatten any protruding nails.
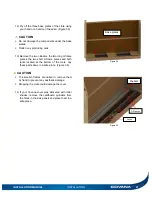
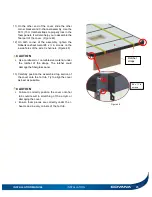
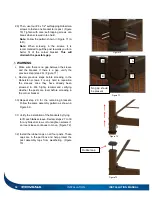
13) Remove the two I-Beams, the two long U-frame
pieces, the two short U-frame pieces and both
jacks located at the bottom of the crate. Lay
these parts down in a safe place. (Figure 36)
CAUTION
The small U-frames are nailed in; remove them
by hand to prevent any aesthetic damage.
Dropping the crate could damage the cover.
14) If your Covana cover was delivered with roller
shades, remove the cardboard cylinders from
the holes in the side panels and place them in a
safe place.
Jacks
U-Frames
Figure 36
I-beams
Figure 35
Base plates
Содержание Evolution GHSC
Страница 1: ...1 INSTALLATION MANUAL Revision 1 2017 05 29 Revision 2 2017 11 10...
Страница 44: ...44 TECHNICAL SPECIFICATIONS INSTALLATION MANUAL Figure 85 NOT TO SCALE Long side LS model 8 feet only...
Страница 49: ...INSTALLATION MANUAL APPENDIX 49 APPENDIX...
Страница 50: ...50 APPENDIX INSTALLATION MANUAL Wiring diagram North America 60 Hz 120 VAC Operator...
Страница 51: ...INSTALLATION MANUAL APPENDIX 51 Wiring diagram Europe 50 Hz 220 VAC Operator...
Страница 53: ...INSTALLATION MANUAL INSTALLATION CHECKLIST Customer copy 53...
Страница 56: ...56 INSTALLATION MANUAL...


