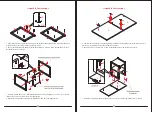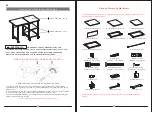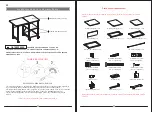
Parts and Hardware List
Please read completely through the instructions and verify that all listed parts and hardware are present
before beginning assembly.
Tools required: Hex wrench and open wrench (provided) and Phillips screwdriver (not provided).
A- Large Top Panel (Qty. 1)
B- Small Top Panel (Qty. 1) C- Fixed Shelf (Qty. 2)
D- Back Panel (Qty. 1)
E- Left End Frame (Qty. 1) F- Middle End Frame (Qty. 1)
G- Right End Frame (Qty. 1) H- Metal Bar (Qty. 2)
(1) Cam Lock (Qty. 8+1 extra) (2) Cam Bolt (Qty. 8+1 extra) (3) M6 x 12 mm Bolt (Qty. 4+1 extra)
(4) M6 x 25 mm Bolt
(5) M6 x 50 mm Bolt
(6) M4 x 15 mm Screw
(Qty. 2+1 extra) (Qty. 4+1 extra) (Qty. 18+1 extra)
(7) Locator Pin (Qty. 1) (8) Butt Hinge (Qty. 2) (9) Swivel Caster (Qty. 3)
(10) Locking Caster (Qty. 3) Hex Wrench (Qty. 1) Open Wrench (Qty. 1)
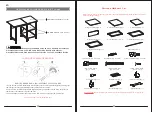
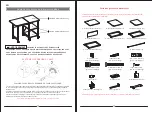
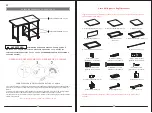
CAM LOCK SYSTEM OPERATION
HOW THE KNOCK DOWN (KD) ASSEMBLY SYSTEM WORKS
You are now ready to assemble the KD unit.
M A X IM UM REC O M M E N D E D W E IG H T L O AD S
THIS UNIT IS INTENDED FOR USE ONLY WITH THE MAXIMUM
WEIGHTS INDICATED. USE WITH LOAD HEAVIER THAN THE MAXIMUM
WEIGHTS INDICATED MAY RESULT IN INSTABILITY, CAUSING POSSIBLE INJURY.
MAXIMUM LOAD 200 lb. (90.7 kg)
MAXIMUM LOAD 50 lb. (22.6 kg)
1. Screw the cam bolt into the threaded inserts on the panel. Connect both panels together; making sure
cam bolt goes into the pre-drilled hole on the end of panel for cam lock.
2. Insert the cam lock into the pre-drilled large hole on the panel. Make sure the arrow on the face of
cam lock faces out and points towards cam bolt.
3. Take a Phillips screwdriver and rotate the cam lock clockwise to lock the cam bolt in place.
EN
02
03


