


Visit
www.vip-vision.com
for full user manual and support
9
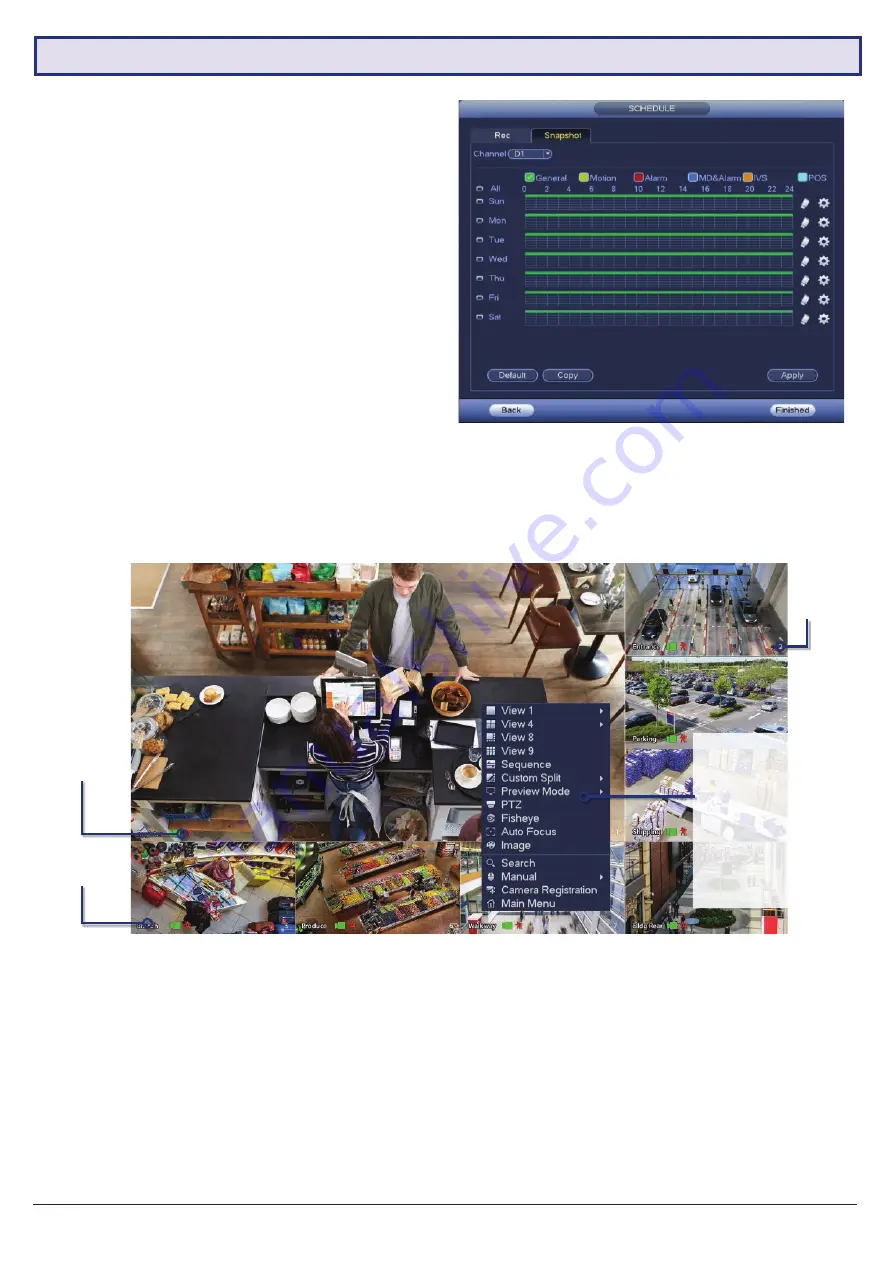
Camera Name
Camera
Status Icons
Camera
Number
Fig. 2.12:
Snapshot Schedule
Fig. 2.13: View 8
Liveview screen with right-click menu open.
Liveview Controls
• Double-click
on a camera window to make it full-screen;
double-click again to return to normal view.
• Right-click
to access the right-click menu.
• From the right-click menu, click
Main Menu
to access most configuration settings.
Main Menu Controls
• Mouse wheel scroll
to view more menu options.
• Left-click
to enter a menu.
• Right-click
to return to the Main Menu / return to the Liveview screen from the Main Menu.
2.1.8 Completed Setup
Startup setup is complete. Below is an example of a
View 8 Liveview
setup. Before mounting cameras, familiarise
yourself with the user interface and menu layout.
Right-click Menu:
•
Main Menu
•
Search Playback
•
PTZ/Focus Control
•
Viewing Options
•
Search Playback
•
Manual Record
•
Preview Mode
•
Colour Control
•
Image Snapshot
2.1 First Boot and Startup Wizard (continued)
Setting Snapshot Schedule
The
Snapshot Storage Schedule
is configured similarly
to the Recording Schedule. For consistency between
recording and snapshots, we recommend using the
same
settings used for the Recording Schedule.
You have now set up motion detection & intelligent
recording. This will be beneficial when it comes to
searching footage in playback (Section 4.0). This can be
edited any time from
Main Menu -> Storage -> Schedule
.


