Getting Started
25
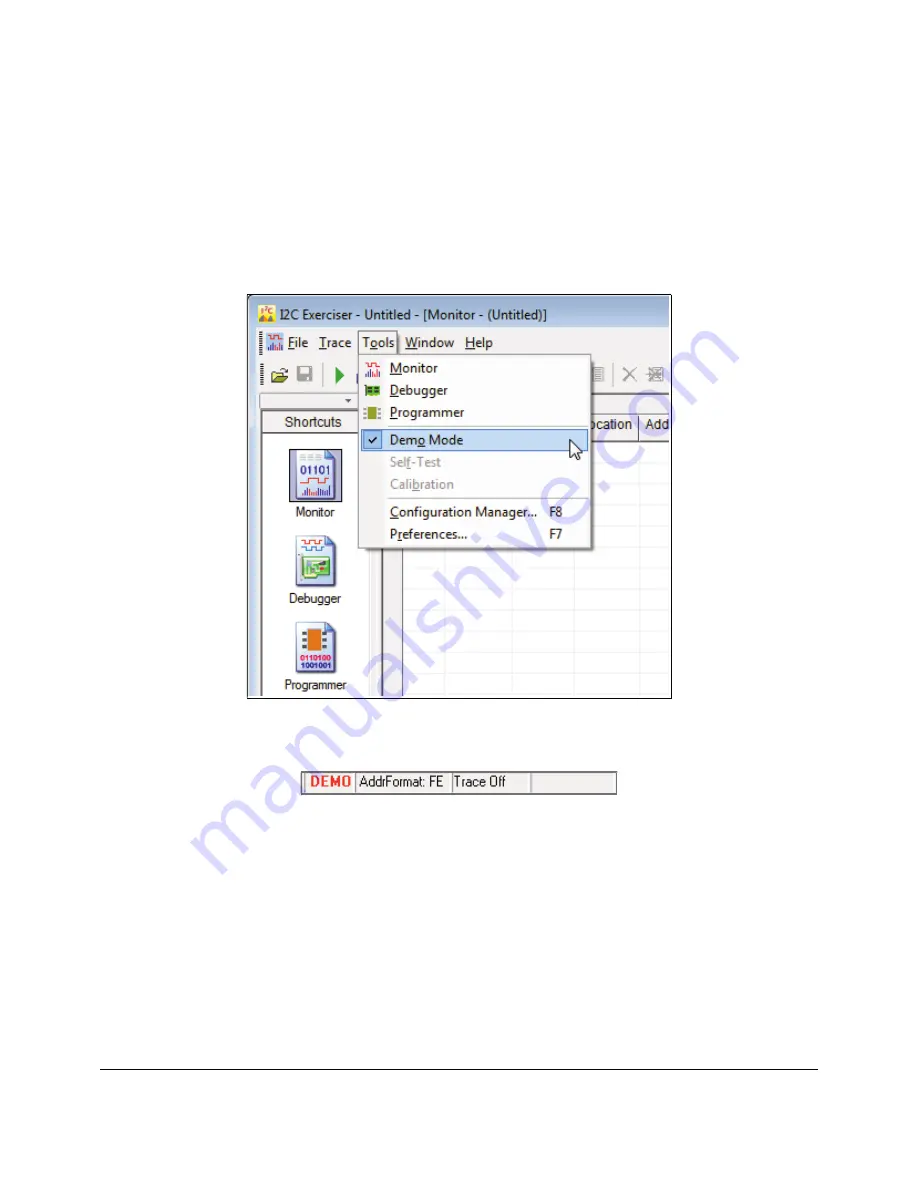
Step 2 – Enable Demo mode
Click on the
Tools
menu and verify that the
Demo Mode
menu item has a check mark next to it as shown
below in Figure 20. This indicates that the program is in Demo Mode. If the BusPro-I was connected to
the PC when you started I2C Exerciser, you will have to select this menu item to force the program into
Demo Mode. You can also verify that the program is in Demo Mode by observing the programs status bar
in the lower right corner of the main window as shown in Figure 21. The leftmost indicator will either
contain the bold red text
DEMO
or the plain text
LIVE
.
Figure 20.
Tools Menu Demo Mode Selection
Figure 21.
Status Bar Indicating Demo Mode
Содержание BusPro-I
Страница 2: ......
Страница 12: ......
Страница 36: ...22 Installation...
Страница 49: ...Getting Started 35 Figure 33 Monitor Window Trace List Showing Symbolic Address and Data Entries...
Страница 55: ...Getting Started 41 Figure 39 Monitor Window Trace List Data Column with Symbols Disabled...
Страница 126: ...112 Bus Traffic Monitor Figure 111 Filter Definition Dialog similar to Edit...
Страница 147: ...Bus Traffic Monitor 133 Figure 127 Active Trigger Operation Status...
Страница 162: ...148 Bus Traffic Monitor...
Страница 176: ...162 Interactive Debugger...
Страница 186: ...172 Serial EEPROM Programmer...
Страница 191: ...Configuration and Preferences 177 Figure 160 Filter Definition Dialog similar to Edit...
Страница 194: ...180 Configuration and Preferences Figure 163 SMBus Pane...
Страница 200: ...186 Configuration and Preferences Figure 166 Files Pane...
Страница 210: ...196 Configuration and Preferences...
Страница 246: ...232 Third Party Application Interface...


