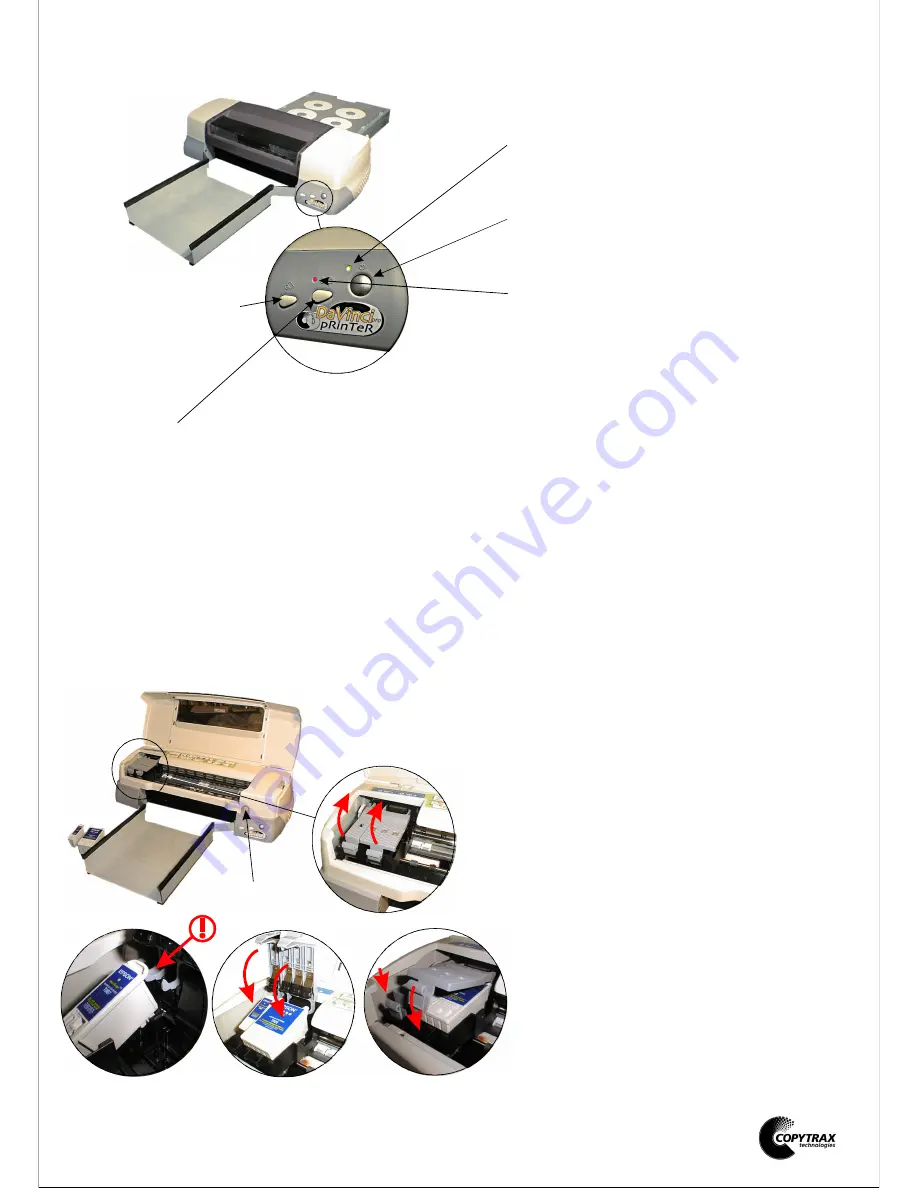
DaVinci Pro CD printer.
Control panel functions.
Installing the ink cartridges .
Controls.
The control panel on the front corner of the
printer has three buttons and two indicator
lights.
Installing new ink cartridges.
1. Lift the printer cover and press the On/Off
button. Wait for the print head to move
across to the cartridge change position.
2. Push back the release tabs and lift up the
cartridge clamps.
3. Remove the cartridges from their packing
and remove the yellow tape seals. Gently
position the cartridges in the head, with the
tab on the cartridge resting on the tab on the
underside of the opened cartridge clamp.
4. Close the cartridge clamps.
5. Push down to lock the cartridge clamps in
position and press the cartridge change
button.
6. The head will now move back and the
printer pump will charge the print head.
Feed/ink status indicator light.
A. On solid when the printer is ready for the
CD tray, or paper tray, to be pushed in. (After
spooling the image).
B. On solid if the printer is jammed during
printing.
C. Flashing when either of the ink cartridges is
low.
D. On solid when either of the ink cartridges
are empty.
E. Flashing slow when the print head is in the
cartridge change position and the black
cartridge requires changing.
F. Flashing fast when the print head is in the
cartridge change position and the colour
cartridge requires changing.
Printer status indicator light.
A. On solid when the printer is on but
inactive.
B. Flashing when the printer is active.
Roll paper button.
Not used on this model.
Feed/Clean button.
A. Feeds in the CD tray or paper tray.
B. Ejects the CD tray or paper tray.
C. Cleans the print head when pressed for 3
seconds with the Feed/ink status light off and
the CD tray out.
Moves the print head to the cartridge change
position when an ink cartridge is empty.
On/Off button
A. Used to turn the printer on and off.
B. Used to clear the printers memory if
pressed twice while the printer is on.
Ink change button
1
2
3
4
5
Содержание DaVinci pro 6 photo
Страница 2: ......


