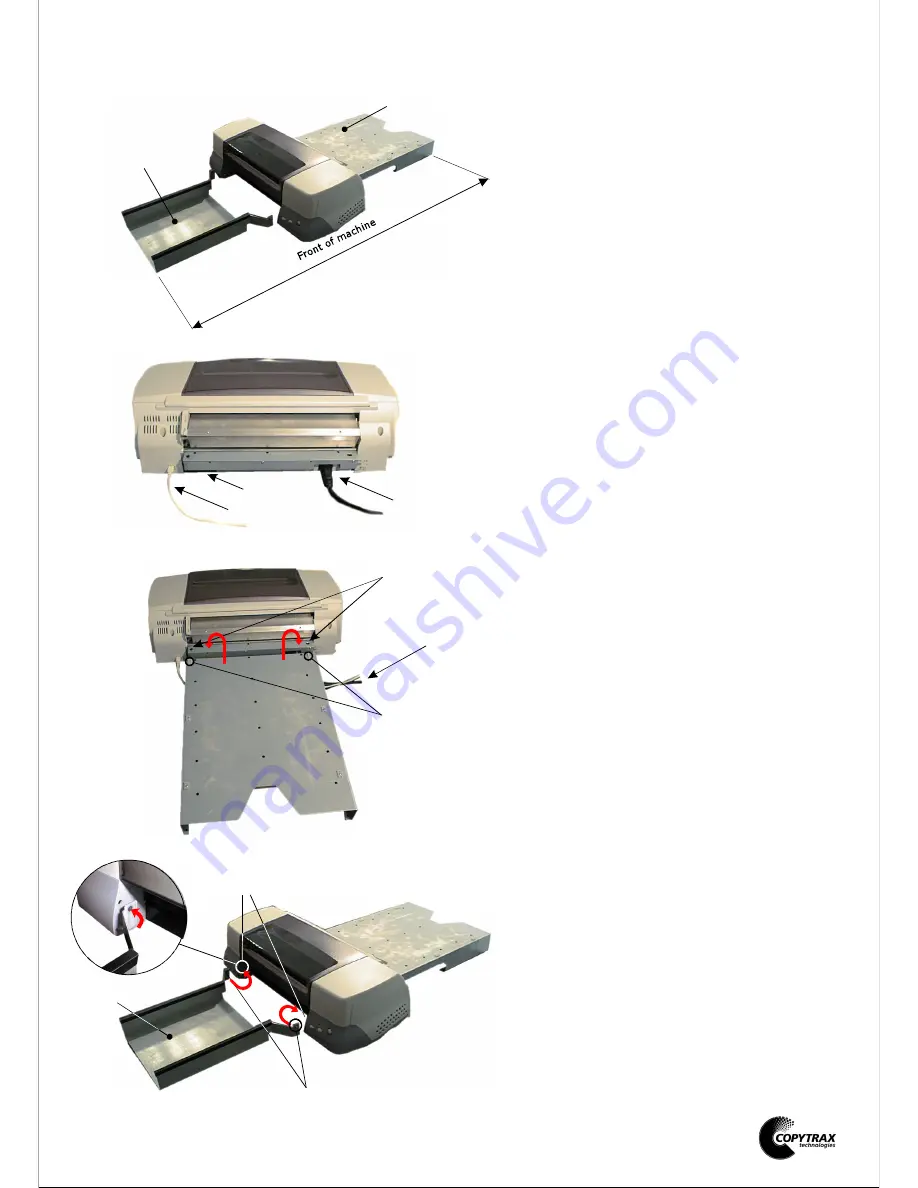
135cm
Mains
Cables
USB
Parallel
DaVinci Pro CD printer.
Setting up.
1.
Prepare an area of desk space to set up the
printer. A space of 135cm wide x 62 cm deep
is required.
The desk should be stable and level, in a
place free from dust, humidity, movement,
vibrations and away from direct sunlight.
Place the printer in the centre of the desk
space with the control end of the printer
nearest the front of the desk.
When using the printer you will be working
from the side of the printer and not from the
front as desktop printers are conventionally
used.
2.
Move the input guide aside. Do not connect
the mains cable to the mains supply at this
point, but plug it into the rear of the printer.
Plug in either the USB or parallel cable into
the rear of the printer.
3.
Locate the 2 pins on the underside of the
input guide into the location holes on the
metalwork on the rear of the printer.
Ensure that the input guide is sitting level on
the desk top and that the cables pass through
the opening in the side of the input guide and
are not trapped underneath it.
4.
Flex the two wings on the end of the output
support enough to locate the 2 pins on the
support into the 2 location holes in the printer
body.
Ensure that the support sits level on the
desktop and nothing is trapped underneath it.
Space to work.
Connecting the cables.
Fitting the input guide.
Fitting the output support.
Input guide
Output support
Locating holes
Pins under
input guide
Location holes
Pins
Output support
1
2
3
4
Содержание DaVinci pro 6 photo
Страница 2: ......


