19
ALL ABOUT IMAGE RECOGNITION & PROCESSING
15-VP16-HDD2 & 15-VP16-CDRW
3. Operation
4. MOTION SETUP
SYSTEM SETUP
CAMERA SETUP
TIME/DATE SETUP
RECORD SETUP
HDD MANAGEMENT
MISCELLANEOUS SETUP
TCP/IP SETUP
FACTORY DEFAULT
EDIT CAMERA TITLE
ADJUST COLOR
MOTION SETUP
SELECT : MENU EDIT : ENTER/
↑↓ ←→
CELL
ON
CAM 01
X08Y07
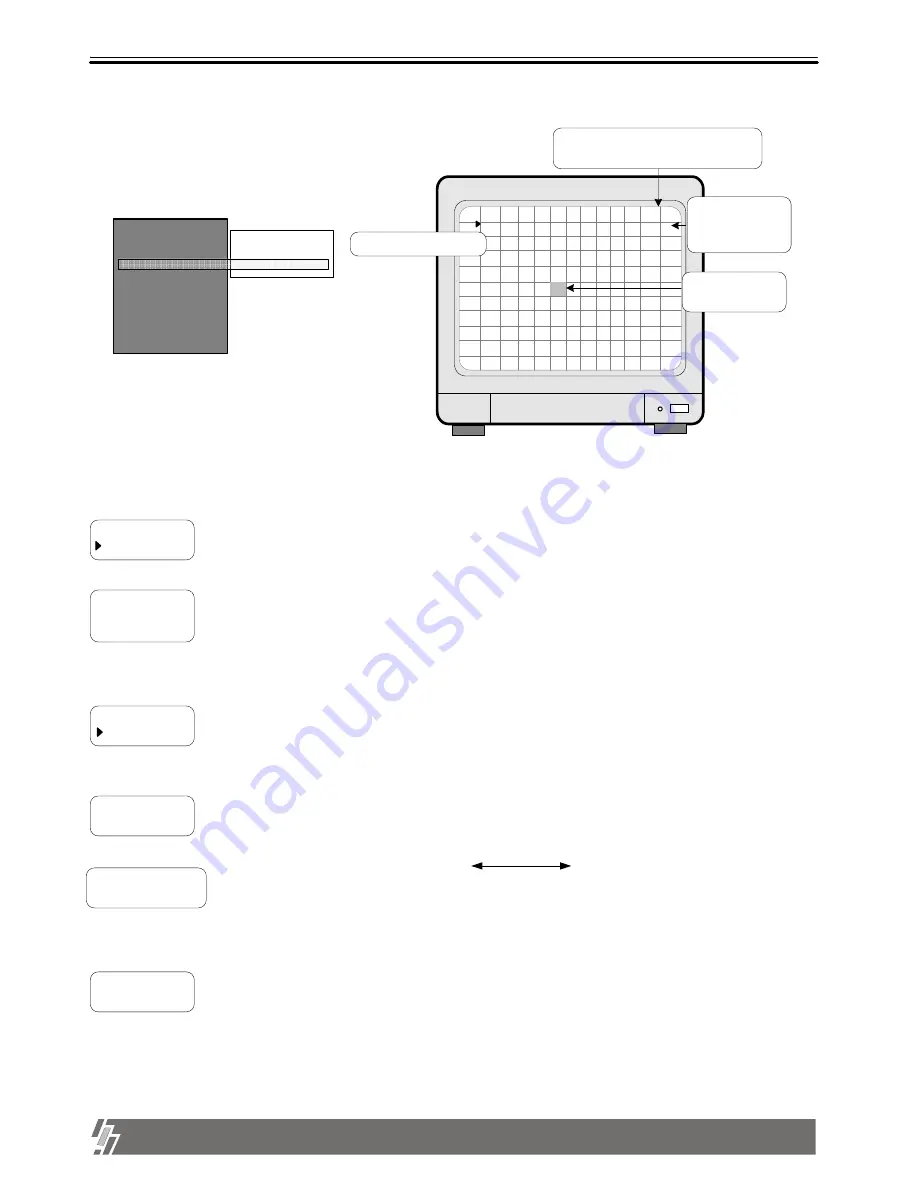
Motion detection menu
Channel in setting
and coordinates
of current cell
Current cell
Basic display : Press [MENU] button repeatedly until you find menu item to set, and select by
pressing [ENTER] button.
In basic display of MOTION SETUP, green colored cell represent motion detection area.
CELL
ON(OFF)
Using direction keys, select cell to set and press [ENTER] button. Color of cell set is changed to green.
Sets motion detection area and sensitivity of motion to be detected.
BLOCK ON
BEGIN
END
Sets motion detection area cell by cell.
Sets motion detection area by block(X x Y).
Using direction keys, select the first location of cell and press [ENTER] button, and then select the second location of
cell using direction keys and again press [ENTER] button.
You will see color of all cells inside 2 coordinates is changed to green, motion detection area.
ALL
OFF(ON)
All cells are set as a detection area or no detection area.
When it is in ALL-OFF, press [ENTER] make all cells no detection area. When it is in ALL-ON, press
[ENTER] to make all cells detection area.
SENSITIVITY
LEVEL 10
Sets sensitivity of motion detection.
Using [Up] and [Down] buttons, choose sensitivity level.
LEVEL 01(Dull) LEVEL 10(Sensitive)
DETECT WINDOW
NUMBER 01
Just in case numbers of cell detected (green colored) is more than set numbers, motion is detected.
If you set DETECT WINDOW NUMBER at bigger number, motion by small object is not detected.
Press [Up] and [Down] buttons to increase or decrease cell number.
Display of MOTION SETUP
Exit
To exit, press [ENTER] button.
When motion is detected, it is changed
to green color and glittering.


