2. If vacuum degree of
-14.5psi (
-0.1MPa
/
756mmHg)
pressure reaches 756mmHg or lower for
5.6 Vacuum Pumping and
Charging R
efrigerant
cause damages to the units.
(7)
Fully open the liquid valve.
balance.
an excess or a shortage of refrigerant
can
(5) Operate cool mode,
charge stated refrigerant.
(6) Confirm the capacity of charging refrigerant with
(4) Open adjusted valve to add refrigerant (must be
(3) Fully open the gas valve and liquid valve slowly.
check joint of liquid valve.
(2) Connect adjusted valve and charge kettle to
1.
the spindle valve at the end of opening
!
Do not apply an abnormal big force to
(5.0N m or smaller).
The back seat construction is not provided.
!
Do not loosen the stop ring. If the stop ring
is loosened, it is dangerous, since the
spindle will hop out.
(5) Connect the gauge manifold using
charging hoses with a nitrogen cylinder to
the check joints of the liquid line and the
gas line stop valves.
Perform the air-tight
ness
test.
Do not open the stop valves. Apply
nitrogen
gas pressure of
601psi(
4.15MPa
)
.
(6) Check for any gas leakage at the flare nut
connections, or brazed parts by gas leak
detector or foaming agent.
(1) Connect a mani-fold gauge to the check
joints at the both sides.
Continue vacuum pumping work until the
one to two hours.
After vacuum pumping work, stop the
mani-fold valve’s valve, stop the vacuum
pump and leave it for one hour. Check to
ensure that the pressure in the mani-fold
gauge does not increase.
Note:
This unit is only for the refrigerant R410A. The
manifold gauge and the charging hose should
be exclusive use for R410A.
is
not available, it is considered
a
gas leakage or
entering moisture. Check for any gas leakage
once again. If no leakage exists, operate the
vacuum pump for more than one to two hours.
refrigerant i
n
liquid).
14
.
Note:
Do not connect nut cap on test joint, which is used for
connecting refrigerant charging hose. It is normal that
the slight leak sound comes out when the seal cap of
the check joint and the valve spindle cap are opened,
which has no effect upon the unit's function.
Make air-tightness test after valve spindle is
turned off closely.
After pipe and nut cap connected,when make air
tightness
test ,
open the stop valve spindle cap,
make sure valve closed
already(clock wise).
!
Tighten nut cap below torque,
over
torque will
bring on refrigerant leakage of valve spindle.
!
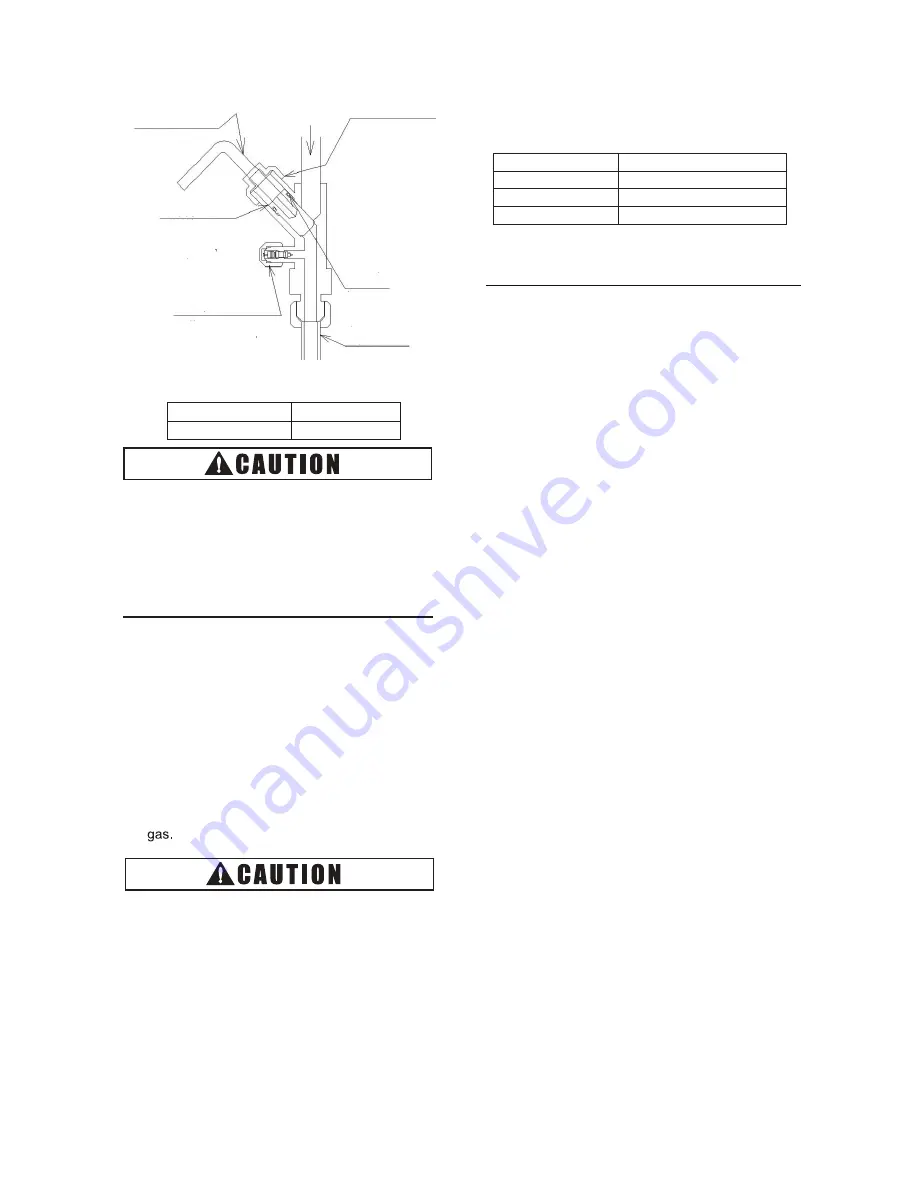
<Gas Valve>
Hexagonal Wrench Size
in.
(
mm
)
Gas
Liquid
Refrigerant Pressure
Hexagonal Wrench
(to open/close spindle valve)
Check joint
Spindle Valve
Counterclockwise---- Open
O Ring
Refrigerant Piping
(Rubber)
Clockwise----Close
(Closed before Shipment)
(Only charging hose can be connected)
Tighten the cap with a torque 6.6ft lbs
Pipe Size
1/4 in (6.35 mm)
3/8 in (9.52 mm)
1/2 in (12.7 mm)
5/8 in (15.88 mm)
Tightening Torque
10.3 - 13.3 ft ·lbs (14 - 18 N·m)
25.1 - 31.0 ft ·lbs (34 - 42 N·m)
36.1 - 45.0 ft ·lbs (49 - 61 N·m)
50.2 - 60.5 ft ·lbs (68 - 82 N·m)
5/32 ( 4 )
/ ( )
Cap
Tighten the cap with a
torque 21.7ft ·lbs (29.4N·m).
(7)
After the air tight
test, release nitrogen
Содержание CHV6-36URBM
Страница 16: ...5 3 Branch Pipe for Line Branch Unit in Inner Diameter Table 5 7 Shape Branch Pipe B 10 H 11 Branch Pipe...
Страница 31: ...26 Table 8 1 Checking of Wire Connection by Test Run...
Страница 32: ...SPWT J01 27 7...
Страница 34: ...able 8 3 Alarm Code T 29...


