


18
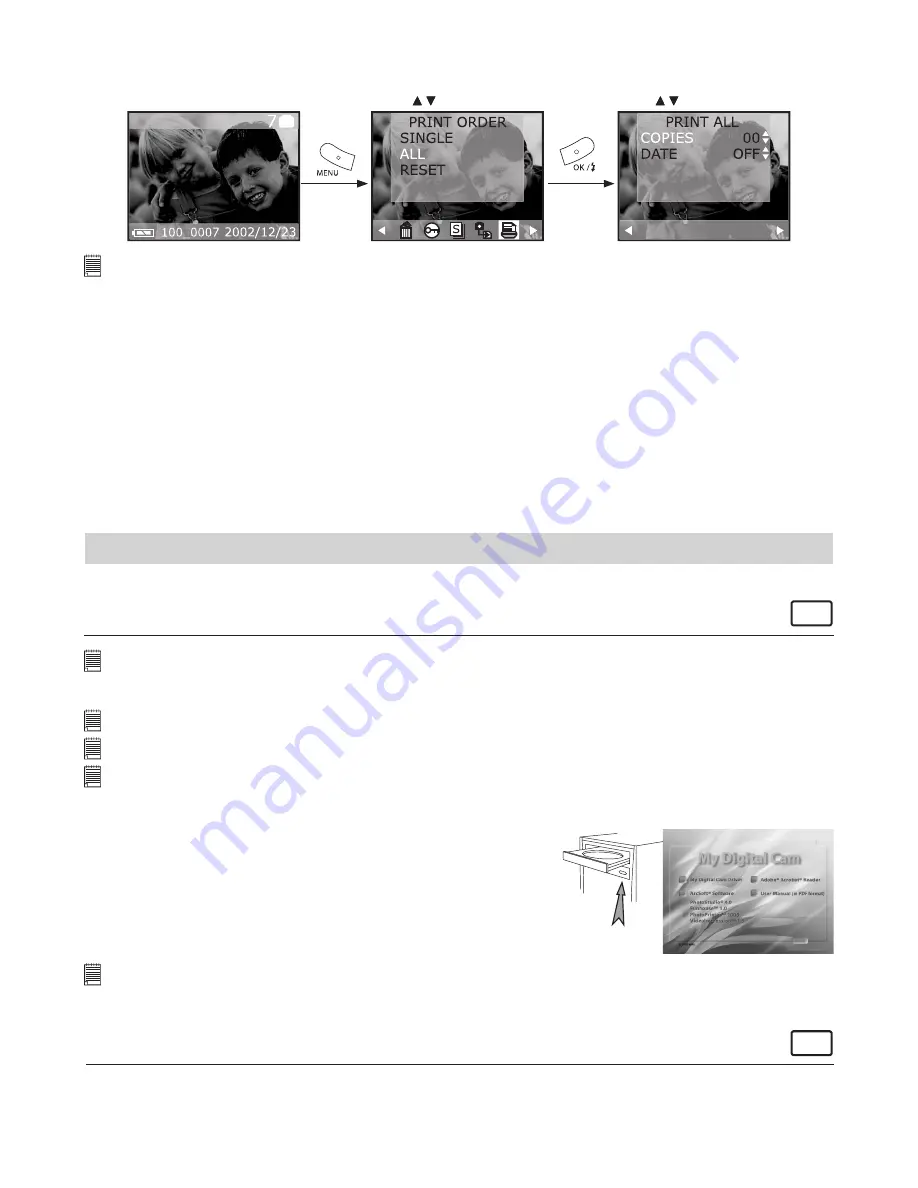
To print all pictures
1. Set the Mode selector to Playback mode.
2. Turn on the camera.
3. Press Menu button and use Right button to select “PRINT ORDER”.
Press to select item.
Press to select item.
IMPORTANT!
DPOF print settings can be configured for images on a memory card only, not for images in the camera’s built-in memory. To
configure DPOF print settings for images in the camera memory, you first need to copy the images to a memory card.
• P.I.M. (PRINT Image Matching)
This camera supports PRINT Image Matching. Images recorded with it include information about the mode
setting, camera setup, etc. When you print a picture on a printer that supports PRINT Image Matching, the
printer reads this data and adjusts the printed image accordingly, so your image comes out just the way
you intended when you recorded them. See the documentation that came with your printer for full details
about PRINT Image Matching.
Now your digital camera and your printer can speak the same language.
PRINT Image Matching technology ensures that PRINT Image Matching-enabled digital cameras and
printers work together perfectly to produce the best possible prints. Through this innovative technology,
the printer is able to instantly identify the print specific information for each image captured, to provide
superior colour, quality and detail in every print.
For more detailed information, please go to the PRINT Image Matching website http://www.printimagema
tching.com.
8 Installing the Software onto a Computer
• Installing the Software
For Windows® Users:
PC
IMPORTANT!
• Please backup all the necessary data before any driver/software installation.
• Our CD-ROM is tested and recommended to use under English Window OS.
IMPORTANT!
(For Windows® 98SE)
On Windows® 98SE Mass Storage function needs to install the
AQ 2100
Driver.
IMPORTANT!
(For Windows® ME, 2000, XP)
Directly plug-in the camera to transfer and play the pictures and video clips, no need to install the driver.
IMPORTANT!
– If the computer request you to install the Windows operating system during the software installation,
place the Windows CD into the computer CD-ROM drive. The computer will install the necessary files from the CD
automatically. When the Windows software appears to have finished the operation, close the Windows screen. Remove
the Windows CD and store safely.
Open & Close
1. Before you begin, close all other software applications open on
your computer.
2. Insert the CD supplied into the computer CD-ROM Drive.
3. The CD User Interface Screen will automatically launch.
4. With the mouse, click on each software interface button in turn
and follow the on screen instructions.
NOTE:
If the setup screen doesn’t appear after loading the CD, then you can manually start it by double-clicking the “My Computer”
Icon on your desktop, then double-clicking the icon for the CD-ROM drive. When the CD-ROM window opens, double-click the
“INSTALL-E.EXE” icon.
For Macintosh® Users:
MAC
1. Before you begin, close all other software applications opened on your computer.
2. Insert the CD supplied into the computer CD-ROM Drive.
3. Double click the CD-ROM icon “My Digital Cam”.
4. Install the software included.


