


12
4 Recording Video Clips
• Recording Video Clips
1. Set the Mode selector to Video mode.
2. Turn on the camera.
3. Frame your subject using the LCD screen.
4. Press Shutter button to start , if you want to stop, press the Shutter button again.
NOTE:
• In Video mode, you can record the video clip with audio.
• The resolution is set to 320x240 pixels.
• There is no zoom in and zoom out functions in Video mode.
• You can record video clip for up to approximately 70 seconds by using the internal memory.
• SD (Secure Digital)/MMC (MultiMediaCard) card increases the video recording time.
5 Playback Pictures and Video Clips
• Playback Pictures
Reviewing the pictures
1. Set the Mode selector to Playback.
2. Turn on the camera.
3. Press Left/Right button to view the pictures taken.
Zooming the displayed picture
When viewing a single image in Playback Mode, you can zoom the image you selected. The scale of zoom
is from X1.0 to X4.0.
1. Set the Mode selector to Playback mode.
2. Turn on the camera.
3. Zoom the image up to the desired scale of zoom by using the Up button.
4. Press the Down button to zoom back the original full size image.
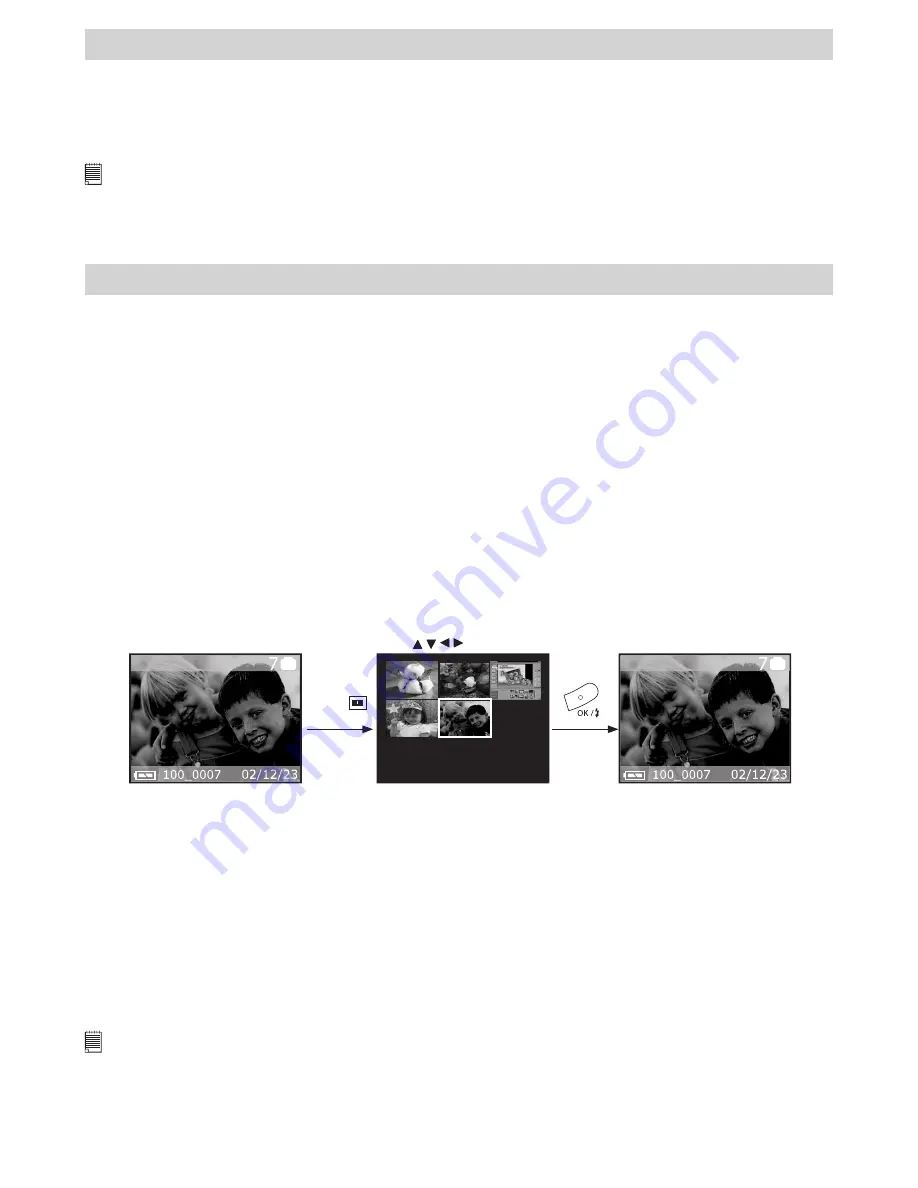
Reviewing the pictures in Thumbnail
You can view up to 9 pictures at a time by using the Thumbnail function.
1. Select the Mode selector to Playback mode.
2. Turn on the camera.
3. Press Display button, information display is off.
4. Press Display button again, the thumbnail display will highlight the image that had been showing at the
time.
Press to select item.
Press
twice
Running a slide show
View your pictures on the LCD screen by using the Slide Show feature. The pictures appear for a period of
5 sec. or 10 sec. upon the time you set.
1. Set the Mode selector to Playback mode.
2. Turn on the camera.
3. Press Menu button and use Right button to select “SLIDE SHOW “.
4. Press Up/Down button to select the seconds you want the pictures to appear on the LCD screen.
OFF – The Slide Show feature is off (default setting).
5 sec. – The pictures will appear on LCD screen for a period of 5 seconds.
10 sec. - The pictures will appear on LCD screen for a period of 10 seconds.
5. Press OK button to complete your setting and start to run the slide show.
6. Press OK button to stop slideshow.
NOTE:
• The slide show will automatically run from the first picture taken after you press the OK button.
• You may stop the slide show by pressing any key.
• The slide show will keep running as long as there is power supply.
• Recommend using AC power for long time slide show.


