background image

5

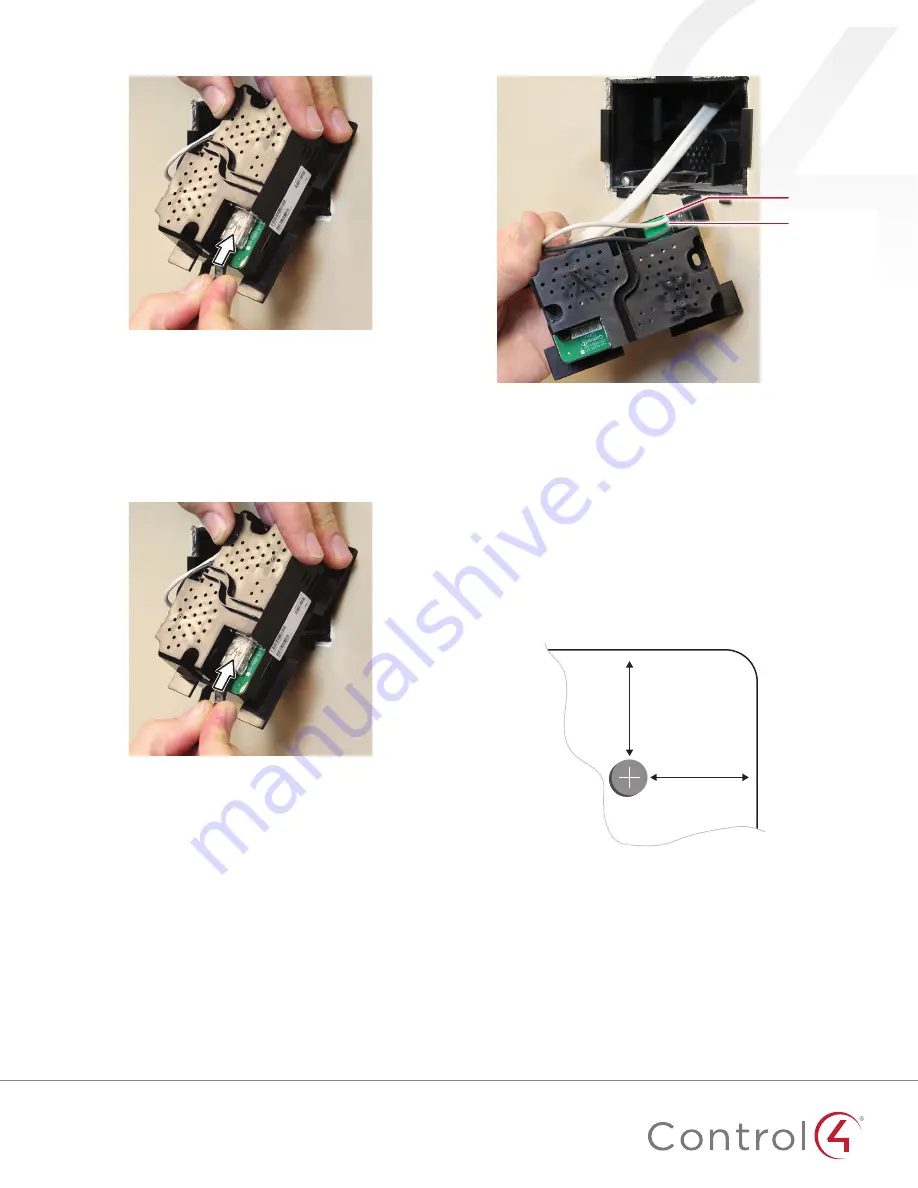
Figure 7: Insert Ethernet cable into power box

Go to “Attach the power box and touch screen” below.

Connecting standard Ethernet

To connect to a wired network:

Pull the in-wall Ethernet cable through the top left hole of 

the wall box, then plug it into the Ethernet jack on the top 

back of the power box (Figure 8).

Figure 8: Insert Ethernet cable into power box

Go to “Attach the power box and touch screen” below.

Connecting AC power

The steps below represent a typical U.S. installation. 

Connect the wires to the AC power source for the touch 

screen according to national and local electrical codes. 

Installation may require alternative wires and the use of a 

terminal block.

Thread the power cable through the upper back hole of the 

wall box to the terminal block (Figure 7).

Strip the black and white power wire ends to 1/4

"

 as 

necessary. Using a flat-head screwdriver, loosen the screws 

on the power box’s terminal block and connect the power 

wires to each terminal (Figure 9). 

Figure 9: Connect AC power

Cap the ground wire from the wall if you are using a plastic 

wall box. Attach the ground wire to the wall box if using a 

metal wall box.

Attach foam pads (optional)

Four foam pads are included to help stabilize the touch screen 

against the wall. Installation is not required.

To install the foam pads:

Peel off the adhesive backing.

Place onto the back of the touch screen near the corners, 

spaced about 1.25” (30 mm) from the edges.

Figure 10: Foam pad placement

~1.25"

(~30 mm)

Neutral (N)

Line (L)

Содержание C4-WALL10-BL

Страница 1: ...is used to power the touch screen Note 802 11b is not recommended for Video Intercom We recommend using Wireless N See Specifications and Power and Network Installation Options for more information B...

Страница 2: ...able d aucun dommage encouru avec l abus de ce produit Voyez que Warranty For more information visit the Products pages at dealer control4 com Specifications and requirements Specifications Model Numb...

Страница 3: ...xt table Camera LED color state Touch screen status Off Camera is off Green Camera is on Green blinking slowly Touch screen is booting Installation Warning Before installing the touch screen switch of...

Страница 4: ...User Guide for details about the touch screen s properties Wireless Network Limitations Many WiFi Access Points handle Multicasts WiFi simultaneously sent to multiple devices for example when the touc...

Страница 5: ...nd the use of a terminal block 2 Thread the power cable through the upper back hole of the wall box to the terminal block Figure 7 3 Strip the black and white power wire ends to 1 4 as necessary Using...

Страница 6: ...d then use the on screen keyboard to type the password if required Note If you need to enter a static IP address follow the instructions under To set a wireless static IP address below before proceedi...

Страница 7: ...m Custom Buttons Select to enable and label the two available custom buttons Alternate Camera Select to use an external camera for the video associated with the touch screen for example a security cam...

Страница 8: ...e Dealer Portal under Resources Regulatory Safety Information To review regulatory information for your particular Control4 products see the information located on the Control4 website at ctrl4 co reg...

Отзывы: