4
•
Sip Information
—Information for integrating the
touchscreen into your SIP/VoIP system.
•
Custom Buttons
—Select to enable and label the two
available custom buttons.
•
Alternate Camera
—Select to use an external camera for
the video associated with the touchscreen, for example, a
security camera mounted to the side of the entrance and
pointing at the door.
Mounting
Place the charging station on any level surface. While positioning
the touchscreen, consider the angle of the touchscreen’s camera
and the position of the people who will use it while it’s on the
charging station.
Portable use
You can set the touchscreen onto the charging station for
recharging and tabletop use, and lift the screen from the
charging station for portable use (like a tablet).
Tip:
For easy and smooth separation of the touchscreen from the
charging station, slightly rotate the touchscreen while lifting it.
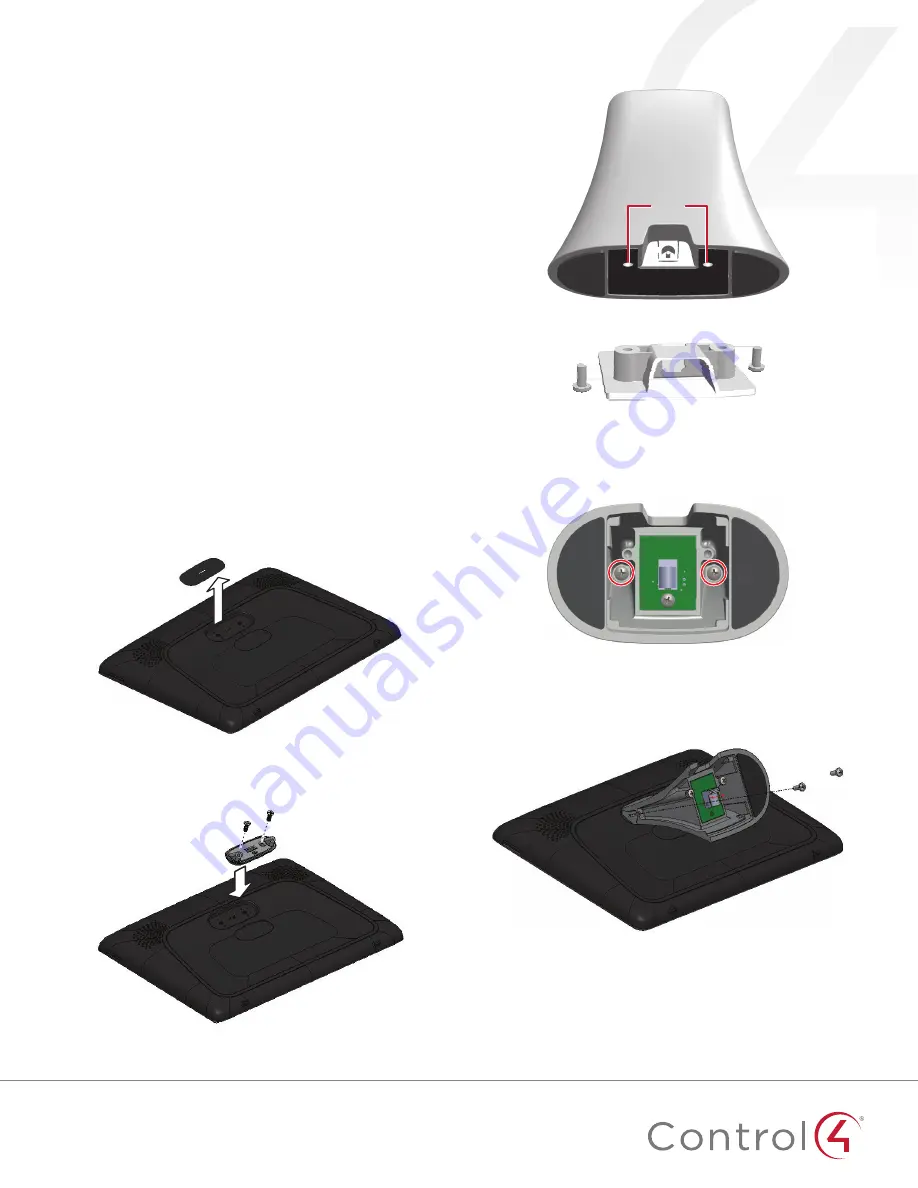
Permanent mount
You can mount a touchscreen permanently to a surface, such
as a table, using the optional T4 Tabletop Permanent Mount Kit
(C4-T4PMNT).
1
Peel off the plastic cover on the touchscreen’s docking
connector recess.
2
Use the Phillips-head flat screws provided in the kit to
install the permanent-mount adapter into the touchscreen’s
docking connector recess.
3
Remove the charging station’s bottom cover by removing
the two screws shown.
Base
screws
4
Save the cover and screws.
5
Using a #2 Phillips screwdriver inserted from the base of
the charging station, remove the two screws that secure
the charging station’s top docking connector cover (do not
remove the screw holding the PCB), then discard the two
screws you removed.
6
Screw the base to the back of the touchscreen as shown
using the new threaded, black screws provided
. DO NOT
ATTEMPT TO USE THE ORGINAL SCREWS REMOVED
IN STEP 5 OR YOU WILL PERMANANTLY DAMAGE THE
THREADS ON THE TOUCHSCREEN.
7
Reinstall the base bottom cover.


