


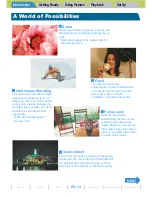


Introduction
Getting Ready
Taking Pictures
Playback
Set Up
EN-5
BACK
Contents
Glossary
Index
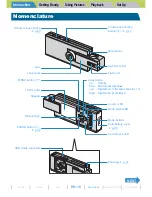
Nomenclature
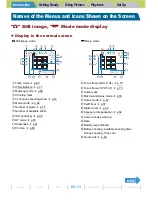
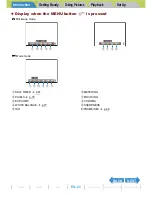
Menus and Settings
Troubleshooting
[FILE NO.] Starting Image File Numbers from 0001............................... EN-181
[MODE RESET] Resetting Function Settings ......................................... EN-183
List of Menu Items and Default Values ................................................... EN-184
Troubleshooting........................................................................................ EN-186
Problems and Solutions .................................................................................. EN-186
Messages and Responses.............................................................................. EN-189
Basic Digital Camera Glossary ................................................................ EN-191
Index........................................................................... EN-195