


Introduction
Getting Ready
Taking Pictures
Playback
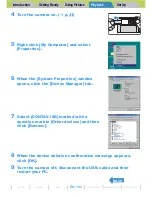
Set Up
EN-132
NEXT
BACK
Contents
Glossary
Index
Nomenclature
Menus and Settings
Troubleshooting
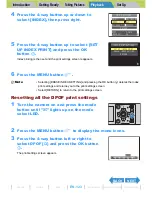
2
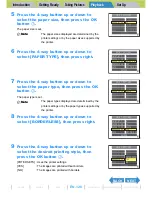
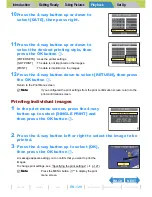
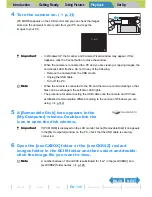
Press the 4-way button up to select
[EXECUTE], then press the OK button
E
.
A message appears asking you to confirm that you want to print the
images.
Refer to "Specifying the print settings" (
Æ
p.127) to change print
settings.
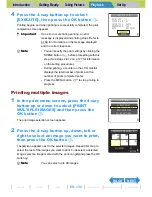
3
Press the 4-way button up to select
[EXECUTE], then press the OK button
E
.
Printing begins, and when printing is successfully completed, the print
completion screen appears.
B
Note
Press the MENU button
K
to display the print
menu screen.
A
Important
If an error occurs during printing, an error
message is displayed and printing stops. Refer to
p.189 for information on the message displayed
and the correct response.
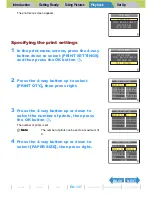
B
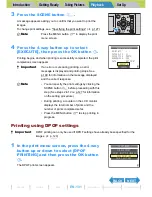
Note
• You can specify the print settings by clicking the
SCENE button
I
before proceeding with this
step. (See steps 2 to 12 on p.127 for information
on the setting procedure.)
• The number of copies and date imprinting
settings are not shown because the DPOF
settings take precedence.
• During printing, a counter on the LCD monitor
displays the total number of prints and the
number of prints completed so far.
• Press the MENU button
K
to stop printing in
progress.
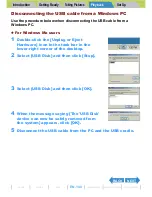
If the
F
symbol is displayed (PictBridge)
If the printer is connected using PictBridge, the
F
symbol may be displayed in the top left of the LCD
monitor. If this happens, a warning message has been received from the printer. Make sure to check the
printer.
Further, also make sure to refer to instructions provided with the printer.
EXECUTE
CANCEL
DPOF PRINTING
DPOF
3 PRTS
OFF
INDEX SET
EXECUTE
CANCEL
EXECUTE PRINT?
PAPER TYPE
BORDERLESS
DATE
2L
PRINT QTY.
PAPER SIZE
PHOTO
YES
––––
––––