


118
Different authentication type pops up different settings requests.
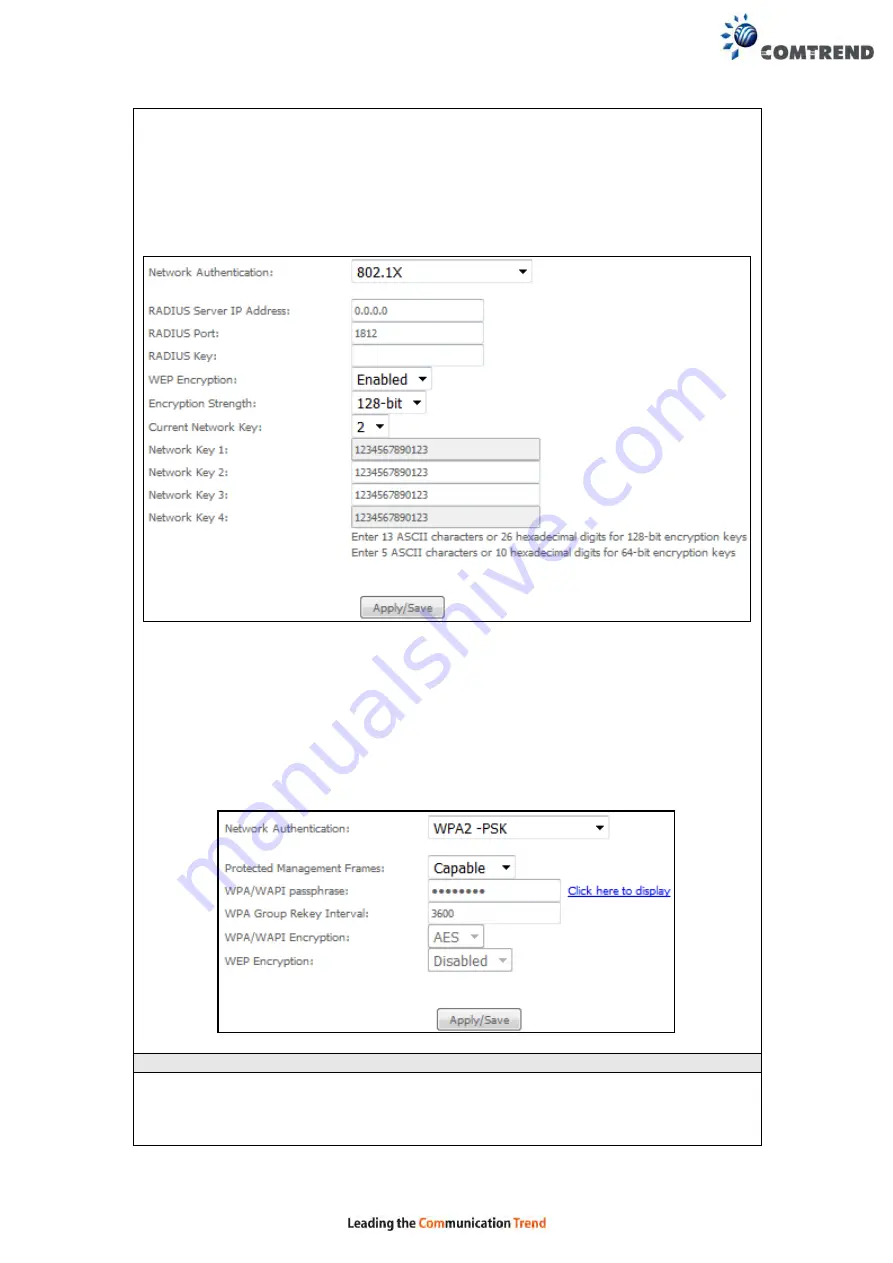
Choosing
802.1X
, enter RADIUS Server IP address, RADIUS Port, RADIUS key and
Current Network Key.
Also, enable WEP Encryption and select Encryption Strength.
Select the Current Network Key and enter 13 ASCII characters or 26 hexadecimal
digits for 128-bit encryption keys and enter 5 ASCII characters or 10 hexadecimal
digits for 64-bit encryption keys.
Choosing
WPA2-PSK
, you must enter WPA Pre-Shared Key and Group Rekey
Interval.
WEP Encryption
This option specifies whether data sent over the network is encrypted. The same
network key is used for data encryption and network authentication. Four network
keys can be defined although only one can be used at any one time. Use the Current
Network Key list box to select the appropriate network key.
Содержание VR-3060
Страница 1: ...261099 038 VR 3060 Multi DSL Router User Manual Version A1 0 December 22 2015...
Страница 18: ...17 This screen shows hardware software IP settings and other related information...
Страница 39: ...38 4 11 2 Site Survey The graph displays wireless APs found in your neighborhood by channel 5GHz...
Страница 40: ...39 2 4GHz...
Страница 58: ...57 5 3 3 UPnP Select the checkbox provided and click Apply Save to enable UPnP protocol...
Страница 71: ...70 A maximum of 100 entries can be added to the URL Filter list...
Страница 88: ...87...
Страница 139: ...138 Enter the MAC address in the box provided and click Apply Save...
Страница 160: ...159 Note Passwords may be as long as 16 characters but must not contain a space Click Save Apply to continue...
Страница 175: ...174 STEP 3 Click Next to continue when you see the dialog box below STEP 4 Select Network Printer and click Next...
Страница 177: ...176 STEP 7 Select driver file directory on CD ROM and click OK STEP 8 Once the printer name appears click OK...
Страница 178: ...177 STEP 9 Choose Yes or No for default printer setting and click Next STEP 10 Click Finish...
Страница 179: ...178 STEP 11 Check the status of printer from Windows Control Panel printer window Status should show as Ready...
Страница 203: ...202 F2 4 PPP over ATM PPPoA STEP 1 Click Next to continue...


