


16
Chapter 4 Device Information
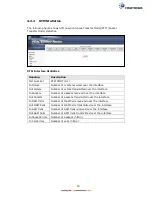
The web user interface window is divided into two frames, the main menu (on the
left) and the display screen (on the right). The main menu has several options and
selecting each of these options opens a submenu with more selections.
NOTE:
The menu items shown are based upon the configured connection(s) and
user account privileges. For example, user account has limited access to
configuration modification.
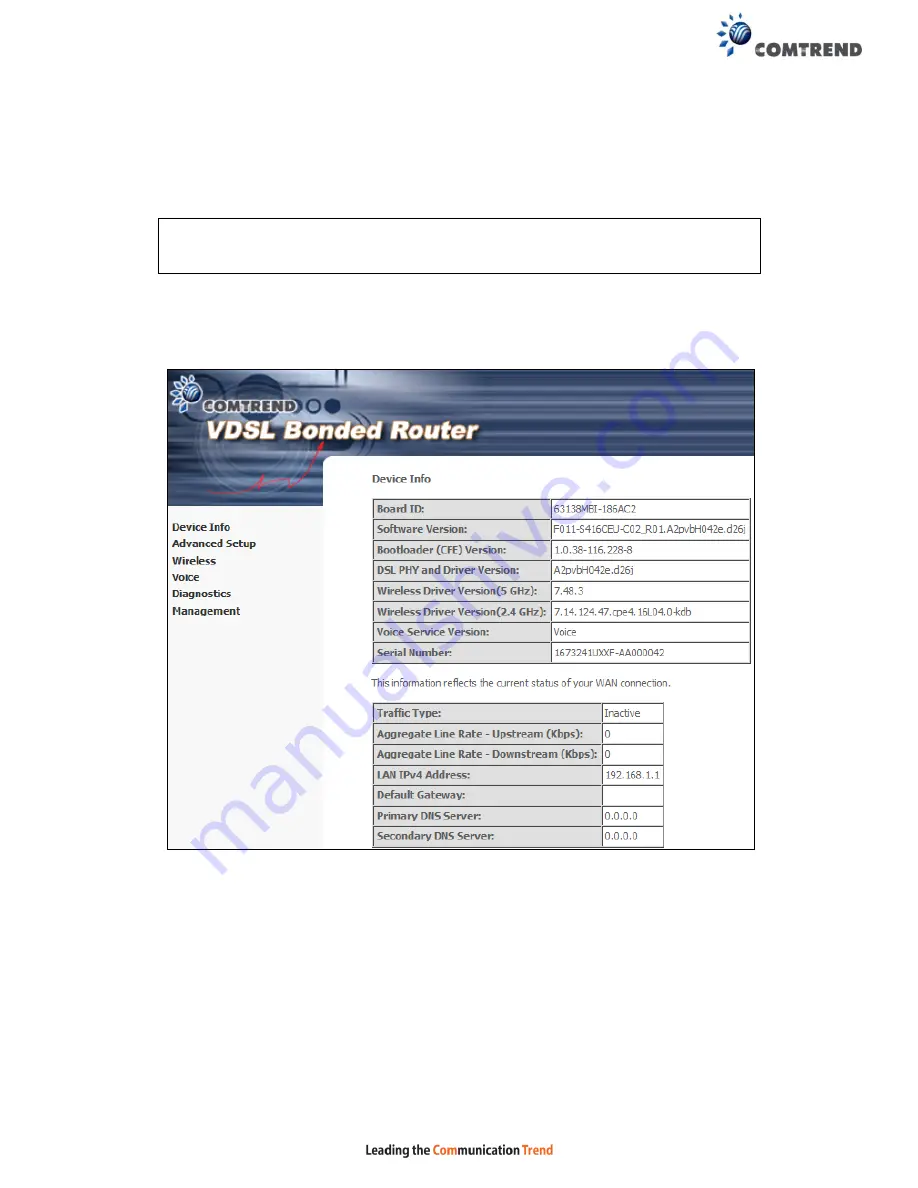
Device Info is the first selection on the main menu so it will be discussed first.
Subsequent chapters will introduce the other main menu options in sequence.
The Device Info Summary screen displays at startup.
This screen shows hardware, software, IP settings and other related information.
Содержание NexusLink 3241eu
Страница 1: ...261103 018 NexusLink 3241u 3241eu Bonding IAD User Manual Version A1 0 May 17 2017...
Страница 16: ...15 STEP 3 After successfully logging in for the first time you will reach this screen...
Страница 63: ...62 A maximum of 100 entries can be added to the URL Filter list...
Страница 66: ...65 Click Enable to activate the QoS Queue Click Add to display the following screen...
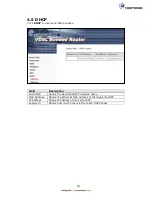
Страница 82: ...81 5 11 DSL Bonding This page displays the bonding status of the connected xDSL line...
Страница 83: ...82 5 12 UPnP Select the checkbox provided and click Apply Save to enable UPnP protocol...
Страница 103: ...102 Enter a certificate name and click Apply to import the CA certificate...
Страница 115: ...114 Enter the MAC address in the box provided and click Apply Save...
Страница 118: ...117...
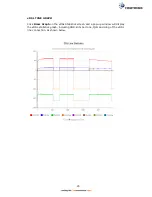
Страница 122: ...121 6 7 Site Survey 5GHz The graph displays wireless APs found in your neighborhood by channel...
Страница 133: ...132 Enter the MAC address in the box provided and click Apply Save...
Страница 139: ...138 6 15 Site Survey 2 4GHz The graph displays wireless APs found in your neighborhood by channel...
Страница 141: ...140 6 17 WiFi Passpoint Note This function is not supported on this release...
Страница 144: ...143 7 1 SIP Basic Setting...
Страница 149: ...148 7 2 SIP Advanced Setting...
Страница 150: ...149 7 2 1 Global Parameters This screen contains the advanced SIP configuration settings...
Страница 154: ...153 7 3 SIP Debug Setting This screen contains SIP configuration settings used for debugging...
Страница 157: ...156 7 4 SIP CCTK Setting The CCTK WEB setting allows the user to set up a digitmap for dialing number rule...
Страница 187: ...186 STEP 2 Click the Windows start button Then select Control Panel...
Страница 188: ...187 STEP 3 Select Devices and Printers STEP 4 Select Add a printer...
Страница 214: ...213 F2 4 PPP over ATM PPPoA IPv4 STEP 1 Click Next to continue...


