Chapter 2 Installation
2.1 Hardware
Installation
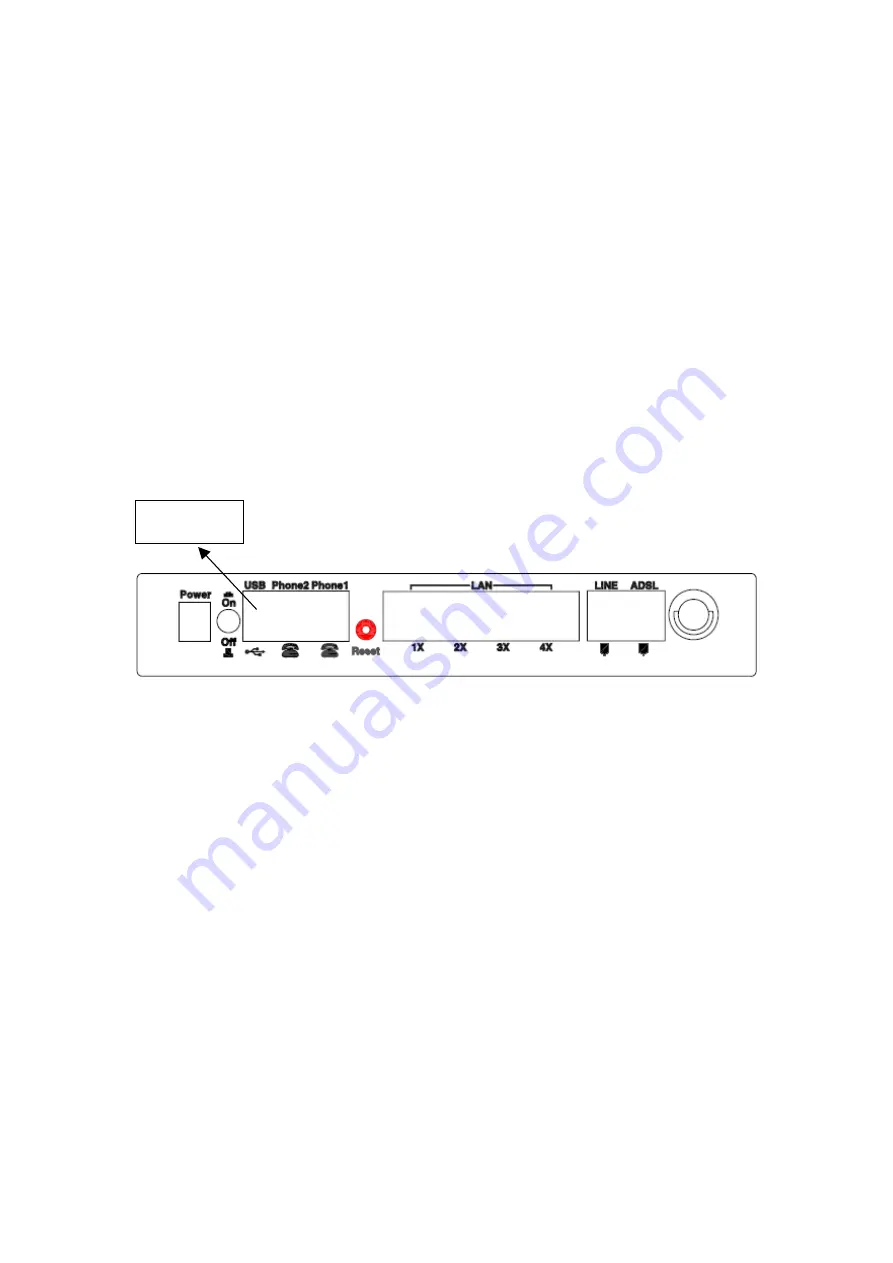
In the rear panel, there is a reset button. To load the factory default settings, hold
the reset button down for at least
5 seconds. If held down for more than 12 seconds,
the VoIP IAD will go into firmware update state and the user can update the VoIP
IAD from web-interface @192.168.1.1 without ID/Password.
USB Host
Follow the instructions below to complete the hardware connections.
Connection to ADSL port
Connect the ADSL line to the ADSL port with a RJ11 connection cable.
Connection to LINE port
If you wish to connect both the router and a telephone, connect the LINE port to a
POTS splitter with a RJ11 connection cable.
Connection to LAN port
To connect to a hub or PC, use a RJ45 cable. You can connect the VoIP IAD to up to
four LAN devices. The ports are auto-sensing MDI/X and either straight-through
cable or crossover cable can be used.
Connect the telephone set to the RJ11
Phone1/ Phone2 port
for VoIP service.
9
Содержание CT-6382T
Страница 1: ...CT 6382T Wireless ADSL2 2 VoIP IAD User s Manual Version A1 1 June 26 2007 261078 003 ...
Страница 7: ...1 2 Application The following diagram depicts the application of the CT 6382T 6 ...
Страница 17: ...16 ...
Страница 28: ...4 2 6 ARP Click ARP to display the ARP information 27 ...
Страница 29: ...4 2 7 DHCP Click DHCP to display the DHCP Leases information 28 ...
Страница 51: ...This screenshot is for Bridged encapsulation 50 ...
Страница 84: ...83 ...
Страница 112: ...111 ...
Страница 126: ...Step 6 Select driver file directory on CD ROM and click OK 125 ...
Страница 127: ...Step 7 Once the printer name appears click OK Step 8 Choose Yes or No for default printer setting and click Next 126 ...


