MULTIPLEXER CONTROLLING
TP4MD/CD / TP10MD/CD / TP16MD/CD
5
E
N
G
L
IS
H
CAMERAS DISPLAYING – LIVE
The camera displaying is an implicit mode, which is
started after the device has been switched on. Came-
ras are displayed according to the last chosen view.
Set up camera to the first position by pressing the
corresponding button 1 to 16; the following cameras
are arranged automatically. If the camera was at the
first position, it will be displayed at full screen. The TP
multiplexers omit the displaying of the disabled cam-
eras, that provides the better compatibility of display-
ing without empty frames among the cameras.
The first camera has the privilege of the zooming
function (ZOOM - PLAY mode only) and telemetry
controlling.
Pressing the button AUTO it switches the automatic
switching sequence on or off. Set up the sequence
parameters using the menu
Sequence, Displayed
cameras
and
Time multiplier (
see page 8 and 9).
PLAYBACK RECORDING - PLAY
The playback of the coded record from the VCR is
switched ON by pressing the PLAY button. The cam-
eras are displayed on the screen of the main channel
according to the topical view in this mode.
Pressing the button 1 to 16 set up the particular cam-
era to the first view position; the following cameras are
arranged automatically. The function of zooming
(ZOOM) is always available only for the first camera.
By another pressing the button PLAY, the multiplexer
switches into the LIVE mode.
DIGITAL ZOOM - ZOOM
Digital picture zoom can be switched on only in the
PLAY mode by pressing the button ZOOM+. When
you are using the zoom function, only the centre of the
whole picture is displayed on the monitor screen. The
picture can be moved using the direction arrows.
When the zoom is on, the title ZOOM is displayed on
the monitor status line. The zoom can be set up only
on the main channel. The digital zoom will be turned
off by pressing the button ZOOM- or ZOOM+.
PICTURE RECORDING - REC
The recording of the coded images is switched on by
pressing the button REC and it is indicated by red
point in the status line. Recording uses its own inde-
pendent channel without affecting the main channel.
Another pressing the REC button stops recording.
ANALOGUE CHANNEL CONTROLLING - SEQ
Controlling a spot analogue channel is switched on by
pressing the button SEQ. The buttons 1 to 16 are
used for displaying a corresponding camera, by press-
ing the button AUTO it is switched the automatic
switching sequence on or off. Set up sequential
switching parameters using the menu
Sequence,
Cameras in sequence
and
Time multiplier (
see page 8
and 9). By another pressing the button SEQ, the mul-
tiplexer switches back into the controlling of the main
channel.
DISPLAYING VCR INPUT - VCR
When playback does not work as expected, it is
probably caused by missing or improper signal at
VCR IN input.
Press and hold the PLAY key for at least 2 seconds to
display signal from VCR IN to the monitor controlled at
the moment. If you control LIVE or PLAY mode, the
picture is processed digitally (as real playback), when
you control analogue channel, the signal is displayed
as it is to the analogue output.
Releasing the PLAY key returns the multiplexer to its
previous mode.
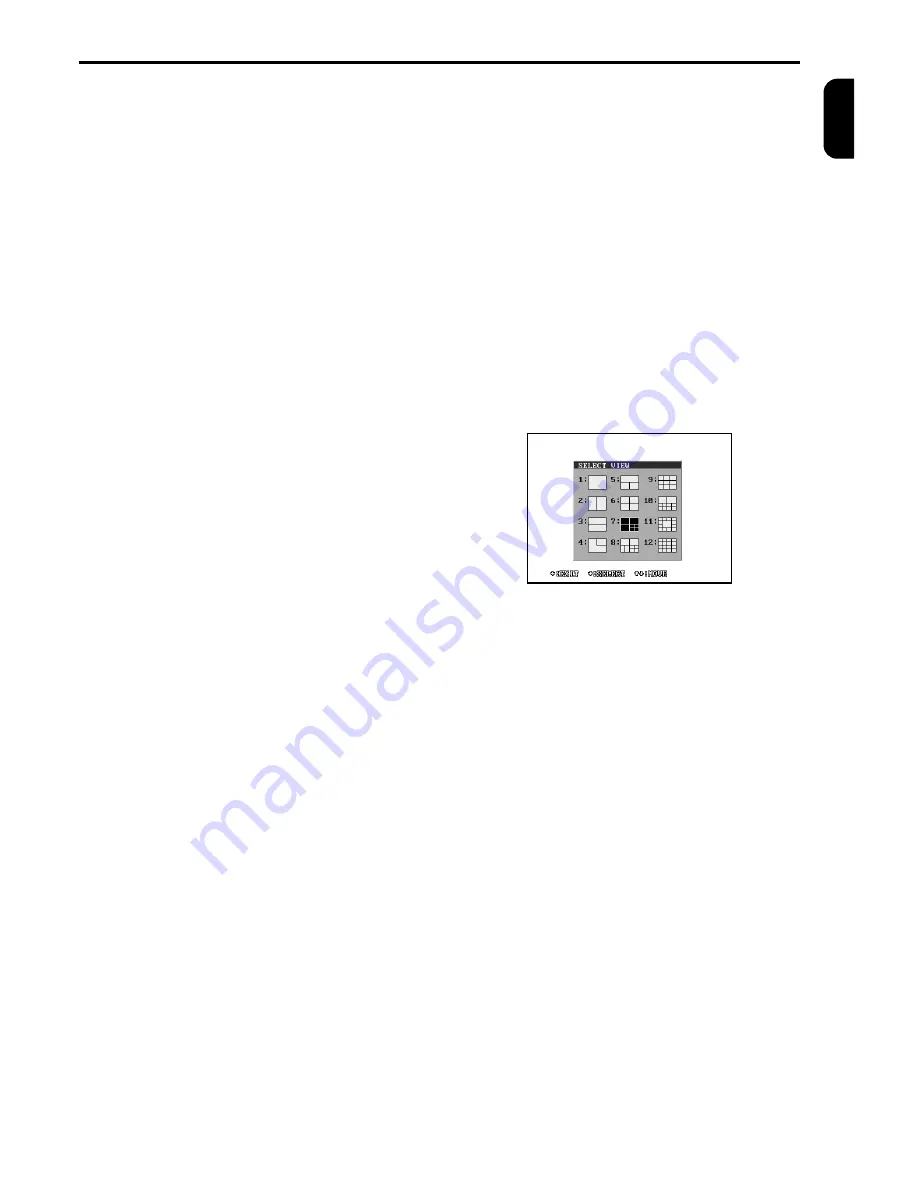
SELECT VIEW – VIEW
The view on the main monitor can be selected by
pressing the VIEW button. On the monitor screen the
following menu will be displayed and than the de-
manded view can be chosen by pressing the button 1
to 12. Only the first 6 displayed possibilities are avail-
able for 4 channel multiplexers and only the first 10 for
10 channel multiplexers.
TELEMETRY CONTROLLING
TP multiplexers offer remote controlling of cameras
using the RS 485 and the CAN interface. If a split
screen is being displayed, you can control the first
camera of the view (left top corner of the view or the
centre at the view no. 11). Only cameras with teleme-
try receiver address set up can be controlled. This
address is set up in the menu
Telemetry addresses
(
see page 9).
PAN/TILT unit and lens controlling:
PAN/TILT camera heads are controlled using the di-
rection buttons. The lens is controlled using the but-
tons ZOOM +/-, FOCUS +/-, IRIS +/-. Automatic focus
or iris is turn on by pressing the buttons PRESET,
AUTO, FOCUS+ or IRIS+, if camera support this.
Automatic function is turn off by start of manual con-
troll.
User AUX outputs controlling:
Multiplexer can control 2 user outputs (AUX1 and
AUX2) of the telemetry receiver. The user outputs
controlling is possible with the use of the buttons
PRESET (the button starts flashing) and one of the
buttons ZOOM. Allocation of the individual user out-
puts AUX to the buttons is as following:
AUX1 – ZOOM+
AUX2 – ZOOM-
The output function can be set up in the menu
Tele-
metry (
see page 16).
Содержание TP10CD
Страница 2: ......


