Canister and Header Installation
Shown here is the installation of a pair of MTW headers and
TD75k canisters, as included in the optional set available
from Composite-ARF. (see relevant webpage for details of
currently available accessories & options).
The assembled canisters and headers are inserted into the
fuselage through holes that you need to cut in the lower
surface of the motordome, as shown in the photo below, but
do not cut through the 25mm fibreglass joining tape in the
centre of the motordome.
Included in the kit are 2 cnc milled plywood mounts to suit
the TD75K canisters, or similar 70mm diameter cans (eg:
Zimmerman). Insert 20mm lengths of the (included) hard
silicone tube in the corner slots to make the isolation
mounts, in the same way as shown for tuned pipe mounts.
The plywood mounts can be screwed to the front of the
landing gear mount bulkhead with 2 of the Ø3.5 x 18mm
sheetmetal screws included in the hardware pack. No other
support is needed. Install 2 of the small sheetmetal screws
though each the teflon joiner into the canister entries and
headers to make sure that the cans cannot slide forwards
or backwards.
You can enlarge the semi-circular cutouts in the front of the
landing gear support if needed for larger diameter canis-
ters, but ensure a minimum 6mm (1/4”) gap between the
bottom of the cans and the carbon landing gear, as men-
tioned above, to prevent heat damage.
Motor Cooling
It is imperative that your chosen motor not only receives
sufficient air to cool it through the opening in the front of the
cowl, but that the air is forced to go through the cooling fins
of the cylinder(s) - otherwise the air will just take the easi-
est route and exit the bottom of the cowl without doing any
cooling. In this case you will overheat, and damage, your
valuable motor.
Depending on your motor you will need to make some sort
of baffle to force the air through the cooling fins, and this
can be made from scrap 1.5mm plywood or 3mm balsa.
The full-size template at the end of this manual fits the
cowling, positioned about 10mm below the bottom of the
front cutout, and the back edge of the baffle can be adjust-
ed slightly to suit your chosen motor.
Make the back edge of the baffle about 6mm (1/4”) clear of
the cooling fins of the cylinder(s) and the crankcase.
Glue the baffle plate into the cowl with epoxy. It looks
neater if you paint it matt black first, using heat-proof spray
Composite-ARF Extra 300SX
(2.6m span)
28
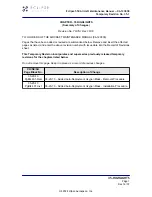
(above) Cut large enough holes to
insert the cans through the motor-
dome, taking note of the cooling
requirements mentioned here.
(below) Typical cnc milled ply-
wood canister/tuned pipe mount
& hard silicone tubing included in
the kit to suit Ø 49mm pipes, and
both Ø 70mm & 80mm canisters.
(above/below) 2 views of sample
engine baffles; the top one for a
DA-100 and the bottom for a 3W.