


Wings
The wings are 95% finished at the factory, and have
already been installed on your fuselage to set the align-
ment. Slide the wings onto the wing tube and check for a
perfect fit. You can sand the wing roots a little if needed.
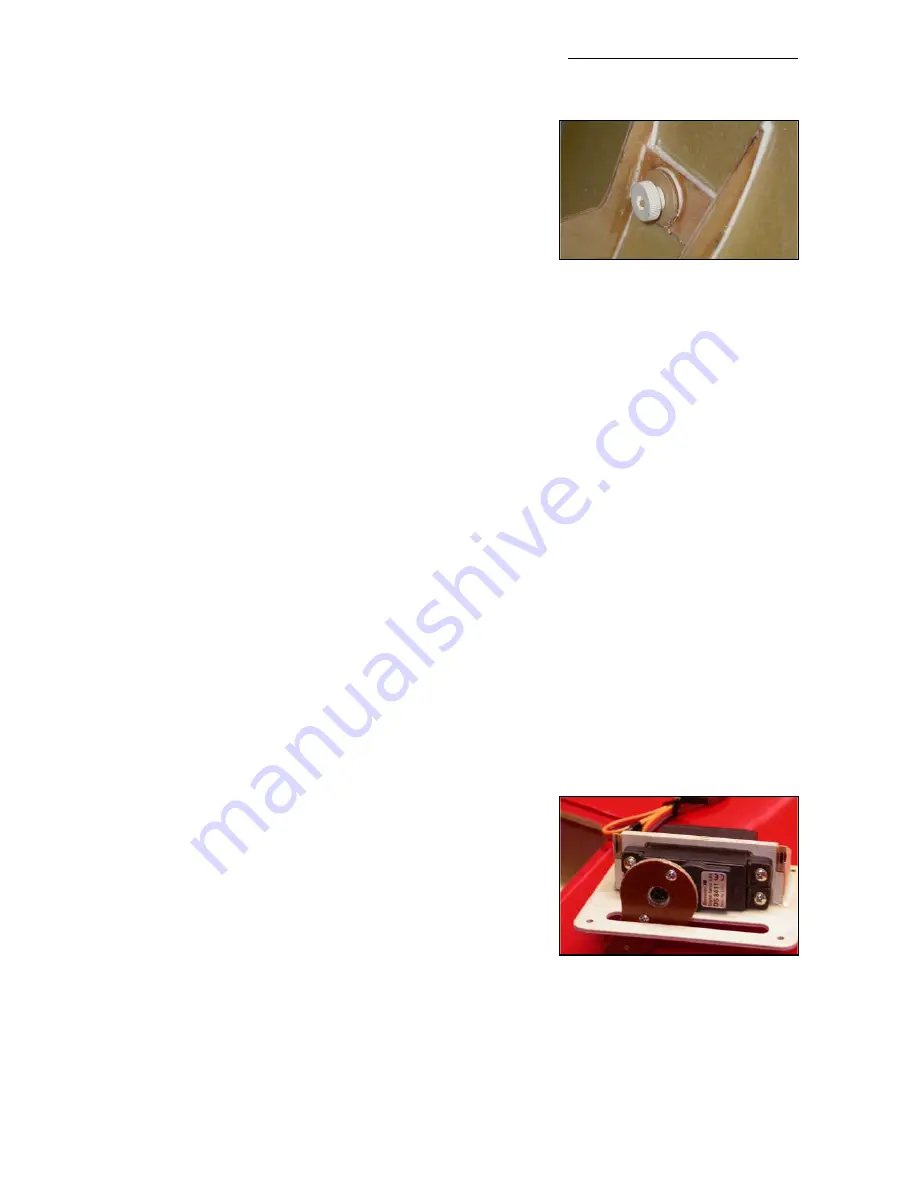
Fit the 4 plastic wing retaining nuts onto the M6 threaded
aluminium wing dowels. We have already installed plywood
reinforcement rings inside the fuselage for the back nuts,
but you need to glue on the 2 small rings of milled 3mm ply-
wood for the front nuts, parallel to the back surface of the plastic nuts. Sand a chamfer the ply-
wood rings so that they are only 0.5mm thick at the bottom edge. Use 30 min epoxy and micro-
balloons to glue in place, and fit the front nuts loosely while curing to set the alignment. Fill the
gap between the top of the rings and the plywood plates on the fuselage side with epoxy/micro
mixture. Don’t forget to wax or oil the front dowels and M6 threads first to prevent them being
glued in permanently!
Each wing has 2 servos for each aileron, and the openings for the servos and hatches are
already pre-cut in the wing for you, and supplied with matching servo covers and milled plywood
servo mounts (photo P11). Sand the inside surface of the servo hatch covers very well, and the
milled plywood parts that make up the servo mounts to make sure you have a good gluing sur-
face. This is very important ! We highly recommend that you mark the 4 hatch covers now so
that they are always fitted in the correct positions (eg: Starboard Inner/Outer etc).
Wing Tube
The wing tube is a 40mmØ T6 alloy tube, which slides inside a fibreglass tube in each wing, and
it should be 1040mm long. Please check the length to make sure that it passes through
both
ply-
wood ribs in the wing, that are about 350mm from the root, otherwise the wing could fail in flight.
Important:
Due to manufacturing tolerances on some early kits it is possible that the fibreglass
tubes are a little bit long, or the wing tubes a little bit short, allowing the wing tube to slide into
one wing further than the other - and then the alloy tube will not pass thru the both plywood ribs.
In this case, you
must
glue a 10mm thick scrap balsa block into the outer end of both fibreglass
tubes to make sure that the wing tube stays centred, and both ends pass thru’ the plywood ribs.
Servos
The choice of servos is similar to that for the elevators, a
pair of JR/Graupner 8411/8511/8611’s or a pair of Futaba
S9351’s in each wing. If using 8511/8611 servos you will
need to sand the inside of the plywood servo mounts about
0.5mm bigger all round for a good fit.
Install the servos with the output shafts towards the leading
edge. The ailerons have enough torsional flexibility to pre-
vent servo damage if each pair is not perfectly matched.
Servo arms
To obtain the maximum possible aileron throws quite long servo output arms are needed (30 -
35mm/1.25 -1.5”). In the kit we supply phenolic servo arm extensions for this purpose, which can
be fitted onto your servo output discs to achieve the throws. However, it is
mandatory
to secure
Composite-ARF Extra 300SX
(2.6m span)
21
(above) Plywood rings glued in
vertically for front nuts with thick
mixture of epoxy/micro-balloons.
(above) Phenolic servo arm exten-
sions may only be fixed to metal
servo output discs.


