


Chapter 5
Advanced Configuration
108
SECURITY CONFIGURATION : URL Filtering
The router supports URL Filtering that allows you to easily set up rules to block
objectionable web sites from your LAN users. Blocking only one IP address of that website
prevents users from using it. Especially parents can play a role in screening the
undesirable content (eg. pornographic, violence or hate-oriented content) that their
children have access to from the computer.
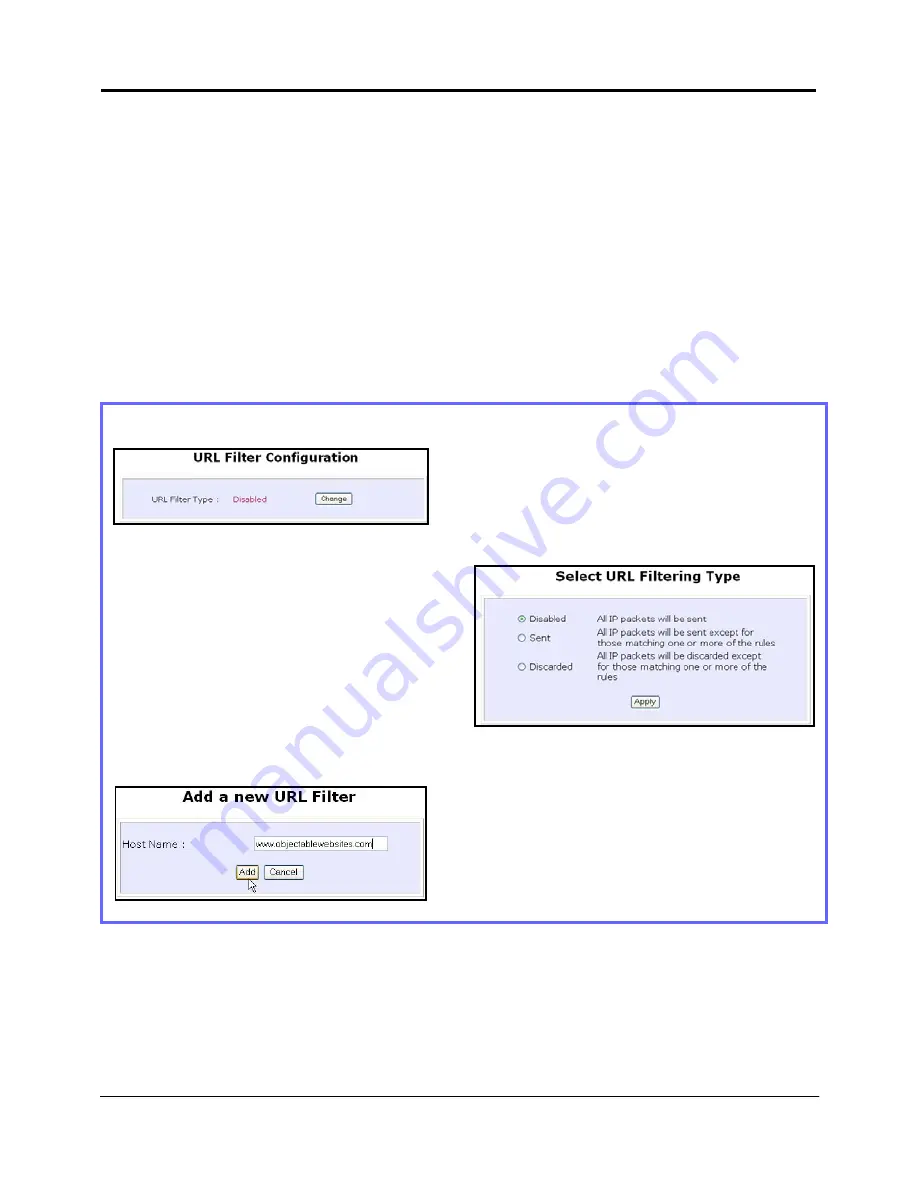
Steps to configure URL Filtering
Here are the configuration steps:
1. Under
the
SECURITY CONFIGURATION command menu, click on URL Filtering.
2. You may now define the URL Filter Type
by clicking the Change button.
3. Select from three choices: Disabled,
Sent, or Discarded, then click on the
Apply button. The default is
Disabled, which allows all packets
to be sent.
4. You will be returned to the page as
shown above, then click the Add
button.
5. For the Host Name field, input the web
site address that you wish to block. Then
click the Add button to complete your
setup.
Содержание NetPassage 28G
Страница 1: ......
Страница 9: ...viii Appendix G Technical Support Information 176...
Страница 16: ...Chapter 2 Getting to Know Your Product 7 Schematic Overview of the Router Top View Back View 13 12 11...
Страница 30: ...Chapter 4 Let s Get Going Software Setup 21...
Страница 87: ...Chapter 5 Advanced Configuration 78...