Model SH-2012AH-QG
Cutting Machine
(
C002
)
9
4)
[Emergency Stop] key: It is an external key with signal received from the input port(refer to "External Input
Ports" for details). If emergency stop is validated, all the movement will stop and no output will go on. It is
used for emergency case.
3.4.2. Adjustment of cutting position
3.4.2.1Situations necessary to adjust the position of cutting torch:
1)
If the cutting torch is blocked or replacement is necessary, the usual practice is to move the cutting torch to
somewhere safe and move it back to the starting point after the situation is resolved.
2)
When it is required to pierce along the exterior margin and not position the piercing point at the exterior
edge, the usual practice is to pinpoint an appropriate position in the exterior of workpiece for piercing and
then cut the workpiece back to the starting point along a straight line before continue normal machining
without stop.
3)
In case of transitional cutting, too many workpiece or large size of workpiece, it might be necessary to
relocate the cutting torch.
3.4.2.2Situations allowed to adjust the cutting position:
(1) pause process, (2) return process,(3) piercing process, (4) section selection, (5) hole
selection and (6) breakpoint restoration
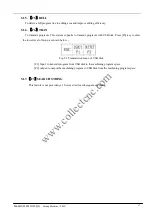
If operator intends to change the position of cutting torch in the above-mentioned states, it is allowed to
press [↑], [↓], [←] and/or [→] key to do so(in this case, it is manual multiplying factor, adjustable). When
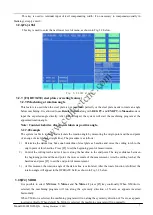
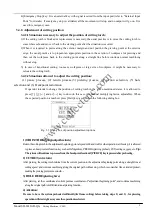
the expected position is reached, press [Start] key, as shown in the following dialog box:
1) ORI PATH RET(original path return)
Return the cutting torch to the adjustment beginning point at speed G00 and wait for other operation; at this step, it is allowed
to press an heavy-current function key such as IGN(ignition), PREHEA(piercing preheat), CUT(cutting oxygen), etc.
Tip:
The system will continue to process from the breakpoint location if [PIERCE] key is pressed after preheating.
2) CUT RET(cut return)
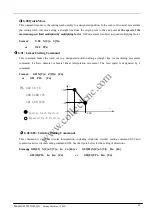
After piercing, the cutting torch returns from the current position to the adjustment beginning point along a straight line at
cutting speed and continue machining along the original path without stop, which is somewhat like extended pierced,
making the piercing point more smooth.
;
3) HOLE HERE(piercing here)
After piercing, set the coordinates at current point as coordinates of "adjustment beginning point", and continue machining
along the original path to fulfill transitional piercing function.
4) Attention:
Be sure to have the system preheated sufficiently(for flame cutting) before taking steps 2) and 3) , for piercing
operation will start right away once the operation is selected.
Fig. 3.3 Dialog box of position adjustment options
www.collectcnc.com
Содержание SH-2100AH-QG
Страница 55: ...w w w c o l l e c t c n c c o m...

