13
CM7015
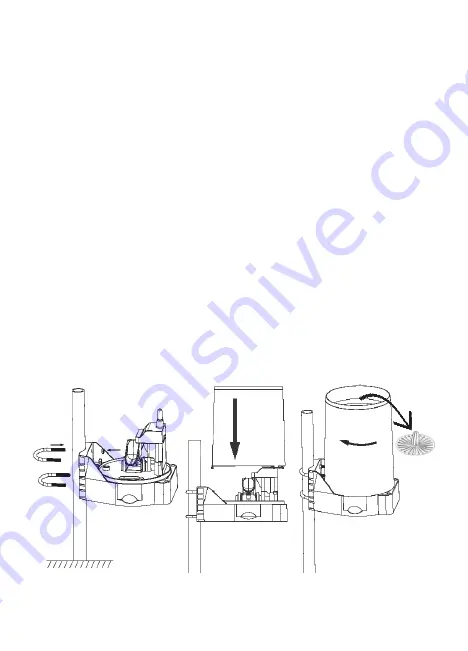
When you’ve decided on a location, you can use the mounting recess found at the back
of the Rain Gauge’s base to fasten this to a mounting pole, fence post or other suitable
support of up to 35mm in diameter. Use the two U-bolts and four nuts included in order
to secure this in place.
Alternatively, the Rain Gauge can be affixed to a vertical surface using the four self-
tapping screws provided. These can be inserted into the same four holes on the
mounting panel as the U-Bolts, affording some flexibility when setting the Rain Gauge
up. If using this method, just ensure that the rain cone sits above the top of this surface;
otherwise some falling rain may be blocked.
Once your Rain Gauge is secure, check the bubble level built into the base to make sure
that the instrument is level. The Rain Gauge uses a tipping mechanism, so it’s important
to make sure that the mechanism sits evenly and is able to tip properly from side to side.
If the Rain Gauge is not mounted correctly, this can lead to under-recording of rainfall.
When the Rain Gauge is level, re-attach the rain cone to the base and lock this back into
place by lining it up correctly and firmly turning it clockwise. Finally, make sure the Rain
Gauge Filter is placed inside the top of the cone to prevent falling leaves or other large
items from causing a blockage.


