background image

Each sub-directory containing compatible image files is treated as an individual album. For a more organized file
search, it is advisable to sort image files into sub-directories based on something, such as a particular event or a
certain period. To illustrate, a sub-directory containing pictures from your daughter

s birthday can be named 

Cassie

s

10th birthday

; or 

May 11 to June 24 log

for a sub-directory consisting of pictures taken during that period.

Using Photo

TToo  ooppeenn  PPhhoottoo::  

• 

Tap           on the Main Menu panel. 

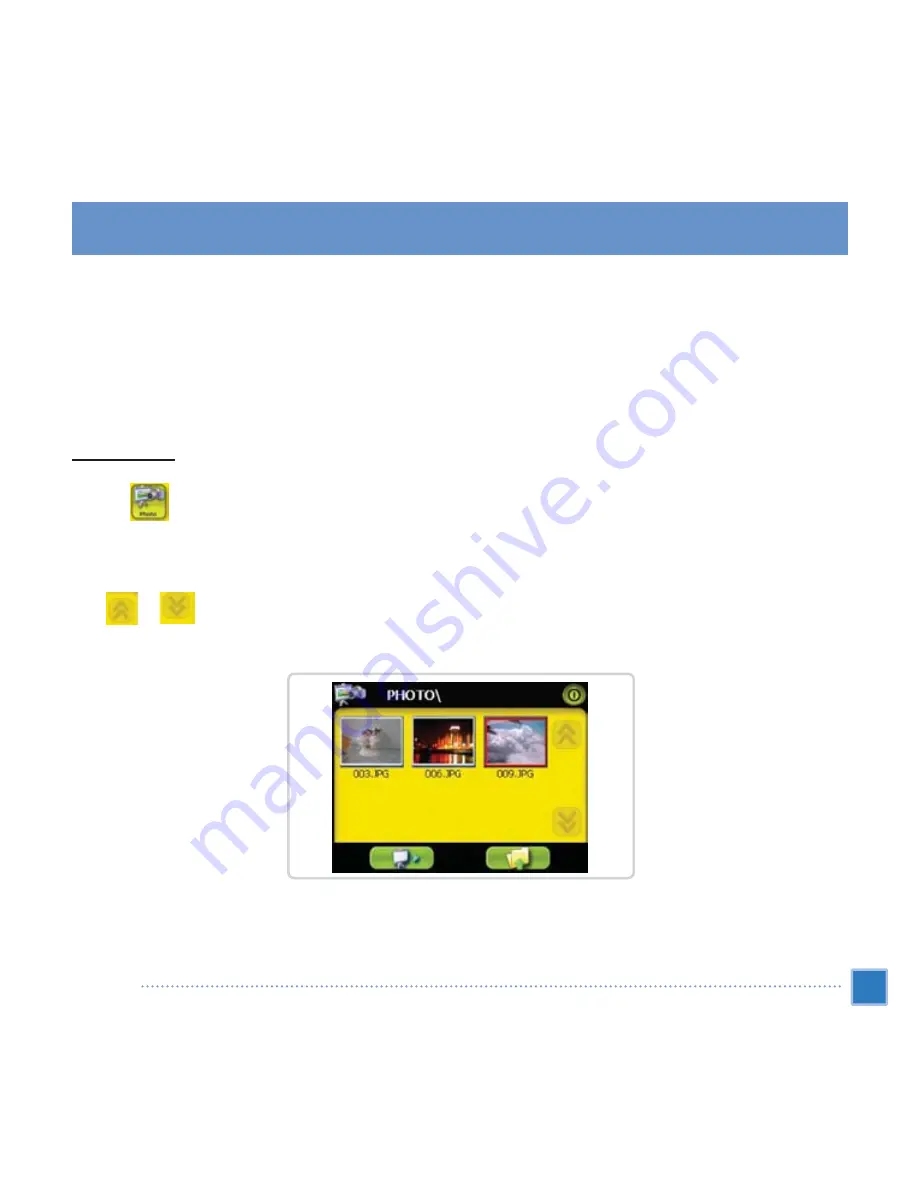
The program will automatically scan the device

s SD card for supported image files. Image files will be displayed as

thumbnails; only sub-directories containing compatible files will be displayed. 

Tap          /           or use the joystick to scroll through all available files. When a thumbnail is selected, a red border
appears around it. 

35

Multimedia mode 

Photo

Содержание Scout 355

Страница 1: ......

Страница 2: ... in this manual for your safety Please comply with the following important instructions to ensure safe driving Warning Do not set or search for a destination while you are driving Park your car at a safe place before inputting addresses or searching for a destination Warning Warning Voice guidance and map route can be different from actual road conditions Always be sure to comply with actual road ...

Страница 3: ... PHOTO 2 SYSTEM CONFIGURATION SYSTEM SETTINGS OVERVIEW CUSTOMIZING USER PREFERENCES SYSTEM MAINTENANCE AND USER SUPPORT USING YOUR SCOUT 355 SAFELY CLEANING THE SCOUT 355 TROUBLESHOOTING THE SCOUT 355 FAQS CUSTOMER SUPPORT SYSTEM SPECIFICATIONS HARDWARE FEATURES GPS SPECIFICATIONS SOFTWARE SPECIFICATIONS DESIGN AND ERGONOMICS ENVIRONMENTAL SPECIFICATIONS REGULATORY INFORMATION Table of Contents Ta...

Страница 4: ...the car in any way to install this device Doing so may negatively affect the safety devices on your vehicle Warning Warning The manufacturer will not be liable for any accident or damages arising out of the use of this product The user will bear sole responsibility Warning The suction cup mount may become dislodged from the windshield due to vibration sudden temperature changes or unexpected shock...

Страница 5: ...like detergent or solvent Caution Please do not remove the SD card while data is being accessed from it It will cause the device to become unstable and freeze This includes anytime the device is in the Audio player the Video player the Image Viewer or the navigation application If the device freezes turn off the system and reboot Warning Please follow the instructions in the Installing Product sec...

Страница 6: ...re connecting any audio video cables otherwise the product can be damaged Caution Do not install the product in a place with water humidity vapor dust oil or smoke Caution For the first time the device is taken out of the box and any time the device hasn t been used for a long time or after a cross country flight it may take 5 10 minutes to obtain GPS position Caution Do not put any objects that m...

Страница 7: ...Disc Stylus Pen Cradle Owner s Guide Disc Circular Disc Cigar Jack Quick Start Guide AC Adapter About Navigation System Components Specifications and design and contents are subject to change without notice Suction Cup Mount Quick Start Guide Map Disc ...

Страница 8: ...s it easy for users to carry it anywhere while driving or hiking Car mount kit for multi vehicle usage windshield or dashboard mounting On the road recharging options via the car charger Ergonomic features 3 5 inch 200 nit QVGA TMR LCD touch sensitive screen Accessible control hot keys with backlight illumination Simple easy to use user interface with large icons and command buttons Multi language...

Страница 9: ...also discussed System tour This section describes operation of the device hardware interface Rear and front panels 8 First things first N No o 1 I Ic co on n C Co om mp po on ne en nt t Power status LED indicator D De es sc cr ri ip pt ti io on n Indicates the battery power status Green The device is running on battery power Orange Battery charging System tour ...

Страница 10: ...vailable on your device It is touch sensitive and responds to finger taps Displays the Main Menu panel also called the Home panel Displays the Navigation panel When in navigation mode zooms in on the center of a map When in full screen mode in Photo zooms in on the displayed image Move in a left right or up down direction to scroll through displayed items Press to open if it s a file icon or launc...

Страница 11: ...o use audio image and map files stored in it for use with internal applications You can also use it to back up data from your device Connects to audio line out devices earphones headphones USB port is not used in USA USB port is used special features for European functions Connects the device to an AC power outlet This connector must be used with 5V power only Interface for an external GPS aerial ...

Страница 12: ...r LED indicator also turns off A As s a a b ba ac ck klli ig gh ht t c co on nt tr ro oll Press and hold to activate or deactivate the screen backlight Press to perform a soft reset if the device freezes i e device no longer responds to the buttons on the screen 11 First things first System tour N No o 19 20 21 I Ic co on n C Co om mp po on ne en nt t System interface External antenna Power connec...

Страница 13: ...llation tasks to start using the device straight out of the box 1 Unpack the device 2 Set up the device on a vehicle 3 Turn on and configure the device Setup the SCOUT 355 B on a vehicle The SCOUT 355 B comes with a car mount kit and a car charger with which you can set up the device on a vehicle Choose a position for the car mount kit on the windshield using the suction cup or on the dashboard us...

Страница 14: ... device will not obscure car controls nor restrict the driver s view of the road Far from the air bag deployment area T To o s se et t u up p t th he e d de ev vi ic ce e o on n a a v ve eh hi ic clle e This section shows how to install the car mount kit in a vehicle s windshield using the suction cup For dashboard installation procedures using the self adhesive power disc connector refer to the S...

Страница 15: ... c ca ar r m mo ou un nt t for the best viewing angle 7 After setting up the device on the car mount connect the car charger If the car engine is turned off you may be required to switch the vehicle ignition back into the Accessories position Consult your vehicle owner s manual e Connect the car charger to the power connector on the cradle f Plug the other end of the car charger to your vehicle s ...

Страница 16: ...on for instructions Start up the SCOUT 355 B After mounting the SCOUT 355 B on a vehicle it is ready to be used Turn it on to calibrate the screen After screen calibration proceed to system settings configuration T To o t tu ur rn n o on n a an nd d c ca alli ib br ra at te e t th he e d de ev vi ic ce e Turn on the device by pressing the power button on the top right panel of the device The Main ...

Страница 17: ...ing the language and date time settings first The rest of the user preferences can be set up later 1 Tap On the M Ma ai in n M Me en nu u panel 2 To set the system language settings tap h Tap under the T Te ex xt t and V Vo oi ic ce e settings until the language ice is displayed i Tap to apply the changes made 16 First things first SCOUT 355 B setup ...

Страница 18: ...set the system date and time tap 4 Tap Date j Tap under the Y Ye ea ar r M Mo on nt th h and D Da ay y settings to set the date values k Tap to apply the changes made 17 First things first SCOUT 355 B setup ...

Страница 19: ...ap to apply the changes mode For more information on the rest of the system configuration options go to S Sy ys st te em m c co on nf fi ig gu ur ra at ti io on n Congratulations Your new SCOUT 355 B is now ready for use Proceed to S SC CO OU UT T 3 35 55 5 B B f fu un nd da am me en nt ta alls s for more information on the device s user interface to start using the device in navigation mode 18 Fi...

Страница 20: ...c ch h s sc cr re ee en n b ba ac ck klli ig gh ht t Press and hold the power button until the backlight turns off Using the SD slot SCOUT 355 B has an SD slot compatible with a range of SD storage card that you can use to back up or transfer files and data Also the SCOUT 355 B s GPS navigation system has its core on the Destinator OP program Using this program requires that users load the digital...

Страница 21: ...ower depleted device will automatically If the battery level becomes low in the course of normal use recharge the device Normally please use the AC adapter to recharge the SCOUT 355 B However this may be difficult when there s no available AC power outlet on hand When the device battery is drained while on the road you can still recharge the device by using either the car charger cable or the USB ...

Страница 22: ...is also lit up 3 Once charging is complete as indicated when the power LED indicator lights up green disconnect the AC adapter cord from the device T To o r re ec ch ha ar rg ge e t th he e d de ev vi ic ce e u us si in ng g t th he e c ca ar r c ch ha ar rg ge er r Use the car charger to recharge the device while it is mounted on the vehicle Perform step 7 of the T To o s se et t u up p t th he e...

Страница 23: ...ions The function of the hot keys may be disabled in some screens For example the magnification level hot keys are inactive when viewing the MP3 directory U Us si in ng g t th he e j jo oy ys st ti ic ck k The multi directional joystick controls actions and scroll through functions in the device and at the same time act as an Enter key when pressed The function of the joystick may be disabled in s...

Страница 24: ...Full Screen mode hold and drag the image to pan it in different directions R Re et tu ur rn n Tap to apply any changes made and or revert to the previous screen Using the Main menu panel When the device turned on for the first time each day you ll see the Main Menu panel also called the Home panel From any other screen you can revert to it by pressing the Main Menu hot key M ME EN NU U The panel s...

Страница 25: ...ob bi ille e P Ph ho on ne e m mo od de e for more information This icon is valid in SCOUT 355B only Mobile Phone SCOUT 355B only This chapter contains information regarding the setup and use of the Bluetooth hands free feature with your Bluetooth capable phone Mobile Phone Overview In order to interact successfully with the SCOUT 355B your phone must be Bluetooth capable Some Bluetooth capable ph...

Страница 26: ...o on ns s f fo or r P Pa ai ir ri in ng g y yo ou ur r p ph ho on ne e w wi it th h t th he e S SC CO OU UT T 3 35 55 5B B 1 Press the Pairing button 2 Bluetooth setting on your mobile phone Turn on the Bluetooth feature on your mobile phone and set your phone to search for Bluetooth devices When DVSK_Headset is found register the device with your phone PIN number is 0000 When Pairing is complete ...

Страница 27: ... following screen on the SCOUT 355B display T To o M Ma ak ke e C Ca alllls s 1 Call the most recent number in SCOUT 355B memory Press the Redial button and the last dialed number from the unit or the last call number received by the unit whichever is latest will be dialed When you are finished with your call press the button to end your call 2 Input a number to dial Press the Number button and yo...

Страница 28: ...e Select the desired listing and press the button to dial the number 5 Call a number from the mobile phone caller ID list To use this feature your Bluetooth capable phone must support Phonebook data content download Press the Caller button and a window will display the caller ID list that has been downloaded from your mobile phone Select the desired listing and press the button to dial the number ...

Страница 29: ...wering incoming calls When you have an incoming call while your mobile phone is successfully connected with the SCOUT 355B unit the following window will pop up To answer the call Press the button to answer the call using the hands free feature of the SCOUT 355B unit To hang up the incoming call If you do not wish to take the incoming call you can press the button to immediately hang up the phone ...

Страница 30: ...dia scene To enable access of multimedia files from the device it should be located on the SD card not on the device s memory Do this either by Using a compatible card reader to directly copy digital music and image files to the SD card It is advisable to organize files into subfolders This will served as playlists and albums when you access the files from your device MP3 Enjoy your favorite music...

Страница 31: ...sable to named sub directories based on genre or listening preferences To illustrate a sub directory containing music you listen to when traveling can be named Journey favorites or Top alternative for a sub directory consisting of your favorite alternative songs Shuffle and repeat playback functions Using MP3 T To o o op pe en n M MP P3 3 Tap on the M Ma ai in n M Me en nu u panel The MP3 playback...

Страница 32: ...ick to scroll through all available files 3 Tap a file or press the joystick to start playback of the selected file When the file is located in the root directory tap the file for playback When the file is located inside a sub directory tap the sub directory icon then tap a file for playback Tap to return to the device s root directory The selected file will automatically be played Files in the sa...

Страница 33: ... current track Tap to skip backward to the previous track If the current file is the first track in the list the last track will be played Tap to skip forward to the next available track If the current file is the last track in the list the first track will be played You can also move the joystick left right to skip to the previous next track Pressing the joystick during file playback will revert ...

Страница 34: ...a playlist You can choose to shuffle the playback sequence to play files in random order To enable the Shuffle mode tap An enabled Shuffle mode is indicated by the word Random on the playback display pad and a fade out Random icon To disable the Shuffle mode tap the fade out button Tapping will automatically disable the Shuffle mode 33 Multimedia mode MP3 ...

Страница 35: ... me e To adjust the playback volume you can use either the MP3 volume control slider or the volume control hot keys This will only affect the volume of the track playback Press the volume hot keys will adjust the sound level for the device s system sounds Photo These days every mobile gaDestinator OPet seems to be equipped with a digital camera better for capturing that spontaneous moment With SCO...

Страница 36: ...ed Cassie s 10th birthday or May 11 to June 24 log for a sub directory consisting of pictures taken during that period Using Photo T To o o op pe en n P Ph ho ot to o Tap on the Main Menu panel The program will automatically scan the device s SD card for supported image files Image files will be displayed as thumbnails only sub directories containing compatible files will be displayed Tap or use t...

Страница 37: ...e files Tap to return to the device s root directory 2 Open the file in full screen mode When the file is located in the root directory tap the file When the file is located inside a sub directory tap the sub directory icon then tap the file you want to view T Ta ap p t to o v vi ie ew w f fi ille es s i in n F Fu ullll S Sc cr re ee en n m mo od de e Tap or move the joystick left up to display th...

Страница 38: ... To change the image orientation Tap to rotate the images 90 clockwise T To o r re et tu ur rn n t to o T Th hu um mb bn na ai ill m mo od de e Tap screen or press the joystick Viewing files in Slide Show mode You have the option to view images in a slide show much like viewing a PowerPoint presentation in your computer Images are adjusted to fit the entire display area and are shown in a 3 second...

Страница 39: ...y ys st te em m p pa an ne ell Tap on the Main Menu panel There are six preferences icon on this panel Tap to set the volume level for system sounds enable tapping sound and the FMT Tap to view the battery power level and enable the hot keys backlight Tap to set the touch screen backlight level and enable its auto off function Tap to change the system date time and time zone settings Tap to set th...

Страница 40: ...made T To o e en na ab blle e t ta ap p s so ou un nd ds s 1 Tap the Enable sounds for taps check box 2 Tap to apply the changes made T To o s se et t t th he e F FM MT T f fr re eq qu ue en nc cy y 1 Tap to adjust the FMT frequency 2 Tap to apply the changes made When FMT is ON the system speaker is muted In battery power mode FMT does not operate 39 System configuration Customizing user preferen...

Страница 41: ...acklight s auto off function Options include backlight off after 5 10 15 and 20 seconds 3 Tap to apply the changes made T To o e en na ab blle e t th he e h ho ot t k ke ey ys s b ba ac ck klli ig gh ht t w wh he en n r ru un nn ni in ng g o on n A AC C p po ow we er r 1 Tap the Hot keys backlight on when AC in check box 40 System configuration Customizing user preferences ...

Страница 42: ... To o s se et t t th he e s sc cr re ee en n b ba ac ck klli ig gh ht t a au ut to o o of ff f f fu un nc ct ti io on n 1 Tap under the B Ba at tt te er ry y and A AC C P Po ow we er r settings Options include Never backlight off after 10 or 15 seconds and backlight off after 1 2 or 3 minutes 2 Tap to apply the changes made 41 System configuration Customizing user preferences ...

Страница 43: ...guage The SCOUT 355 B s user interface supports five pre loaded languages International English French German Italian and Spanish Additional language support is provided in navigation mode i e when using Destinator Destinator OP This includes English Italiano Frangais Castellano Deutsch Portuguese Nederlands Danish Swedish 42 System configuration Customizing user preferences ...

Страница 44: ...dditional language is installed and selected it will only affect the Destinator OP user interface System menus and non navigation screens M MP P3 3 and P Ph ho ot to o will default to English System Info Go to the T Tr ro ou ub blle es sh ho oo ot ti in ng g y yo ou ur r S SC CO OU UT T 3 35 55 5 B B section for instructions on how to use the three command buttons on the System Info screen 43 Syst...

Страница 45: ...g If you need to do so pull out of traffic and come to a stop in a legally permissible and safe location before using your device Vehicle operators must maintain full surveillance of pertinent driving conditions at all times Minimize the need to view the device screen while driving and use voice prompts to guide you Never place the device on the passenger seat or any place else in the car where it...

Страница 46: ...cle is parked and the device is not in use protect it from theft and extreme heat by storing it in an unobtrusive location away from direct sunlight The device is not a toy Never allow children to play with the device Never touch the liquid that might leak from a broken liquid crystal display Contact with this liquid could cause a skin rash If the crystal display liquid should come into contact wi...

Страница 47: ... ag ge e p pr re ec ca au ut ti io on ns s Do not store the device anywhere it may be exposed to water or in conditions of high humidity When the device is not in use for an extended period of time bring it indoors and store it in some location with a temperature range of 20 to 70 C 40 to 140 F Cleaning the SCOUT 355 B Use a damp soft dry cloth to wipe the device s casing not the display screen Ne...

Страница 48: ...M Me en nu u panel 2 Tap on the S Sy ys st te em m panel 3 Tap Calibration on the S Sy ys st te em m I In nf fo o screen 4 Tap the center of the black cross as it moves around the screen 5 Tap screen to apply the changes made 47 System maintenance and user support Troubleshooting the SCOUT 355 B ...

Страница 49: ...lar to rebooting a computer This will restart your device and adjust memory allocation All records and entries are retained after a soft reset GPS settings are also retained T To o p pe er rf fo or rm m a a s so of ft t r re es se et t Hold the device securely and then press the soft reset button 1 on the bottom of the device 48 System maintenance and user support Troubleshooting the SCOUT 355 B ...

Страница 50: ...device s performance T To o llo oa ad d t th he e f fa ac ct to or ry y d de ef fa au ullt t s se et tt ti in ng gs s 1 Tap on the M Ma ai in n M Me en nu u panel 2 Tap on the S Sy ys st te em m panel 3 Tap Factory Reset on the S Sy ys st te em m Info screen 4 Tap Yes on the dialog box 5 After the factory reset reconfigure your device s user preferences 49 System maintenance and user support Troub...

Страница 51: ...arth and is deemed normal To correct this perform a GPS reset This will update the GPS database which contains information about the GPS satellites that the unit needs to function in navigation mode T To o llo oa ad d t th he e f fa ac ct to or ry y d de ef fa au ullt t s se et tt ti in ng gs s 1 Tap on the M Ma ai in n M Me en nu u panel 2 Tap on the S Sy ys st te em m panel 3 Tap GPS Reset on th...

Страница 52: ...tically shut off Disconnect the earphone Check that the device s volume settings is not muted In the S Sy ys st te em m panel tap Volume The screen may have lost its calibration Recalibrate the screen Go to the R Re ec ca alli ib br ra at ti in ng g t th he e s sc cr re ee en n section for instructions If a user selects a language that is not one of the five pre loaded options International Englis...

Страница 53: ... a GPS reset Go to the R Re es se et tt ti in ng g t th he e G GP PS S f fu un nc ct ti io on n section for instructions Perform a soft reset on the device Go to the R Re es se et tt ti in ng g t th he e S SC CO OU UT T 3 35 55 5 B B section for instructions The device s OS version appears on the bottom left corner of the screen View the device s OS version and other technical specifications In th...

Страница 54: ...nty service cannot be provided without a sales receipt clearly indicating the original purchase date from a licensed Plenio retailer C Cu us st to om me er r S Se er rv vi ic ce e C Ce en nt te er r You can make an inquiries about the product through our call center or via email Please check the customer service website for troubleshooting tips before calling or emailing Also please check and inst...

Страница 55: ...of operation backlight in 10 and GPS locked o 4 5 hours charging time from empty to full capacity via car charger or AC adapter Recharging options o Indoors using the AC adapter o On the road using either the car charger or the USB cable Power status LED indicator 3 5 inch screen for a wider viewing angle 320 x 240 QVGA screen with 16 7M colors for a full color display 200 nit LCD provides higher ...

Страница 56: ... Receiver Antenna Navigation Software Map database D De es sc cr ri ip pt ti io on n SiRF Star III GPS 12 parallel channel Integrated patch antenna for optimum satellite pick up at every angle Optional connection for external antenna when the vehicle s windshield has a heat reflective shield Destinator OP features include Destinator Address Manager Favourite destination hot list Destination histor...

Страница 57: ...tart 8 sec Warm start 35 sec Cold start 55 sec 10 m for 90 0 1 m s NMEA 0183 v3 0 supporting the following commands GGA GSV GGL RMC GSA VTG I It te em m Operating system Navigation software Multimedia applications D De es sc cr ri ip pt ti io on n Microsoft Windows CE NET 4 2 Destinator OP MP3 supports MP3 WMA and WAV formats Photo supports JPEG and BMP formats System specifications Software speci...

Страница 58: ... volume and image magnification levels o Multi directional joystick o Touch sensitive screen Car mount o Versatile mounting options windshield or dashboard positioning o Firm grip suction cup provides a steady vibration free support o Swiveling mechanism and axial rod allows for multi angle adjustment for optimum viewing position Software o Multi language user interface options International Engli...

Страница 59: ...acilitates multi vehicle usage Compact and lightweight body makes it easy for users to carry it anywhere On the road recharging options via the car charger and USB cable Simple out of the box operation Mount dock and you re on the go No fussing with screws and cables Pre loaded software for accessing digital music M MP P3 3 and image files P Ph ho ot to o Car mount Cradle Car charger AC adaptor Pr...

Страница 60: ...d in a residential commercial or light industrial environment 59 System specifications Environmental specifications Regulatory information A As sp pe ec ct t Temperature Relative humidity non condensing D De es sc cr ri ip pt ti io on n Operating Storage Operating Non operating 0 to 45 10 to 60 C 20 to 90 RH 20 to 90 RH ...

Страница 61: ...terference will not occur in a particular Installation If this equipment does cause harmful interference to radio or television reception which can be determined by turning the equipment off and on the user is encouraged to try to correct the interference by one or more of the following measures Reorient or relocate the receiving antenna Increase the separation between the equipment and receiver C...

Страница 62: ...992 A1 A2 A3 A4 A11 EMC EN 55022 1998 EN 55024 1998 EN 61000 3 2 1995 A1 1998 A2 1998 EN 61000 3 3 1995 following the provisions of the Low Voltage Directive 73 23 EEC 93 68 EEC and the EMC Directive 89 336 EEC Accredited test laboratory TUV Rheinland Am Grauen Stein 51105 Koln KOREA April 27 2006 Place and date of issue Name and signature of authorized person 61 C CO OM MP PA AN NY Y N NA AM ME E...

Страница 63: ...ccordance with the instructions may cause harmful interference to radio communications However there is no guarantee that interference will not occur in a particular installation If this equipment does cause harmful interference to radio or television reception which can be determined by turning the equipment off and on the user is encouraged to try correct the interference by one or more of the f...

Страница 64: ......

Страница 65: ...Please write your purchase date below and save your sales receipt Both are needed for warranty repairs and customer service ...

Отзывы: