
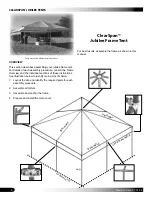


CLEARSPAN
™
JUBILEE TENTS
8
Revision date: 07.01.08
ASSEMBLE THE JUBILEE TENT COMPONENTS
NOTE:
Assistance is required to assemble the tent.
RAFTER ASSEMBLY
Gather the parts:
Rafter pipe (#190S099D)
•
Rafter pipe (#190S099)
•
Rafter pipe (#190P075D)
•
Rafter pipe (#190P029D)
•
Rafter pipe (#190P022)
•
Rafter pipe (#190P015D)
•
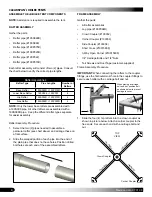
Each rafter assembly will consist of two (2) pipes. Consult
the chart below to verify the correct pipe lengths.
Rafter Assemblies
Rafter Type
Pipe Lengths
Number of
Rafters
Base Rafter
19 190P015D
8
Lower Base Rafter
1 190P022
8
Hip Rafter
19 190P075D
4
Side Rafter
19 190P029D
4
Rafter Assembly Procedure
Select the two (2) pipes needed to assemble a
1.
particular rafter (see chart above) and arrange these on
a flat surface.
Slide the swaged portion of each pipe into the end of
2.
the plain pipe that does not have holes. Position drilled
bolt holes at each end of the assembled rafters.
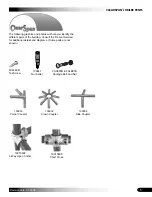
FRAME ASSEMBLY
Gather the parts:
All rafter assemblies
•
Leg pipe (#190P094D)
•
Crown Coupler (#103932)
•
Corner Coupler (#103933)
•
Side Coupler (#103934)
•
Short Cross (#10015808)
•
3-Way Open Corner (#10015608)
•
1/4" Carriage Bolts and 1/4" Nuts
•
Tek Screws and Duct Tape (customer-supplied)
•
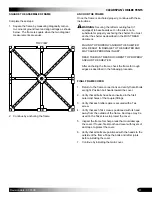
Frame Assembly Procedure
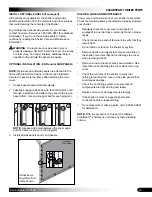
IMPORTANT:
When connecting the rafters to the coupler
fittings, use the first/outermost hole in the coupler fittings to
secure each rafter with a carriage bolt and nut.
Slide the four (4) hip rafters into the crown coupler as
1.
shown in picture below. Attach a corner coupler to the
free ends. Secure each end with a carriage bolt and
nut.
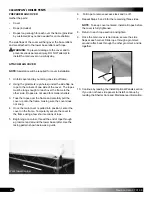
When placing a carriage
bolt and nut, position bolt
as shown below to prevent
damage to cover.
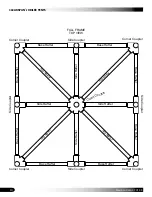
TOP
VIEW
Crown Coupler
Corner Coupler
Hip Rafter
Hip Rafter
Hip Rafter
Hip Rafter
NOTE:
Only the lower base rafters are assembled with
a 190S099 pipe. All other rafters are assembled with a
190S099D pipe. Keep the different rafter types separate
for easier assembly


