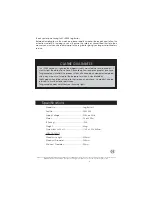
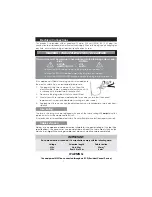
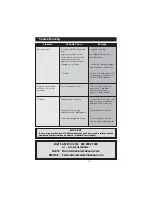
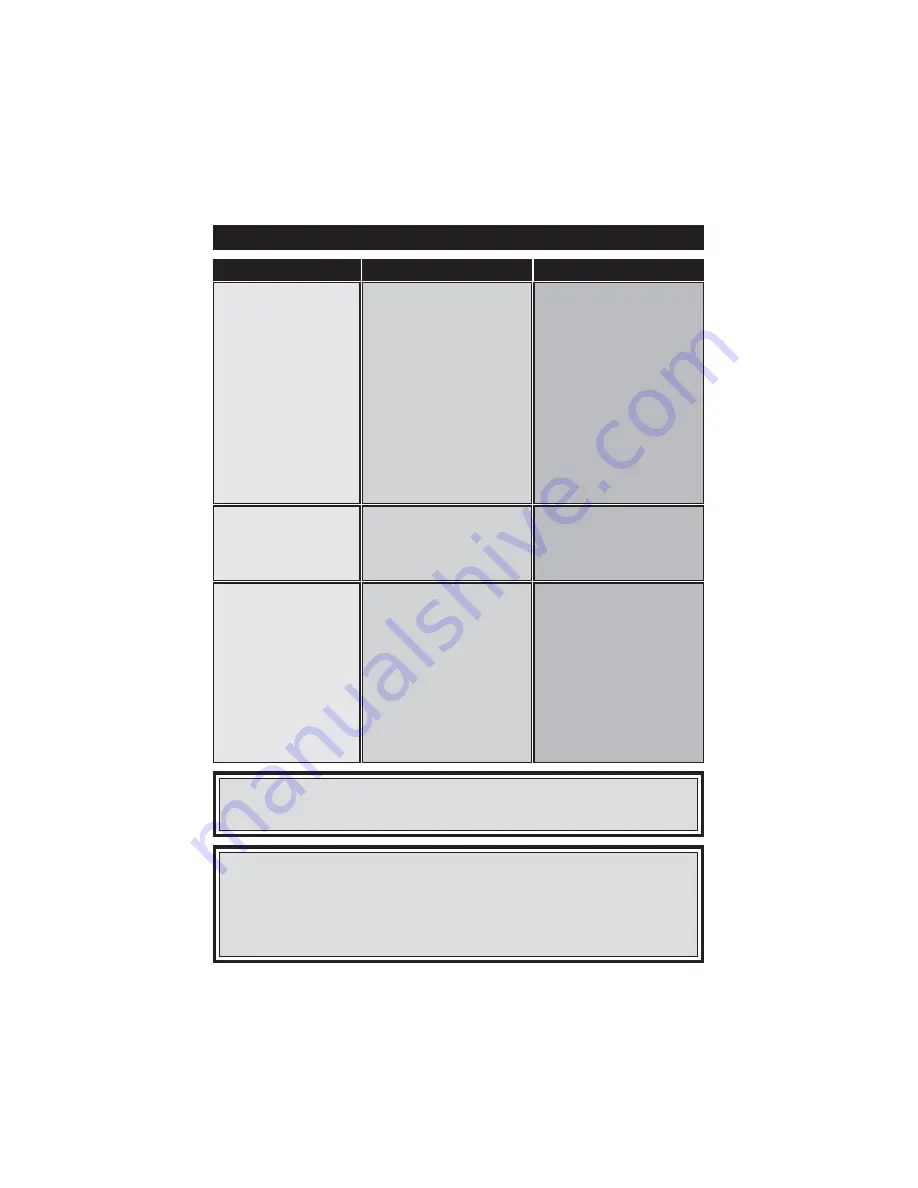
Clarke Log Buster 3 Скачать руководство пользователя страница 14

Trouble Shooting

Problem

Probable Cause

Remedy

Log fails to split.

Incorrect positioning of the
log.

Reposition the log.

Log exceeds permitted
dimensions or wood is too
hard or knotty for the
capacity of the machine.

Use logs of the correct
specifications.

Wedge not cutting.

Check the splitting wedge
and sharpen if necessary.
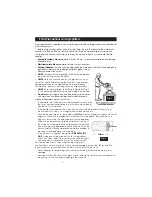
Oil Leak

Locate the leak and rectify,
if necessary, contact your
nearest Clarke dealer.

Log pusher advances
jerkily and/or vibrates
badly.

Air in hydraulic system.

Check oil level. Top up if
necessary. If problem
persists, consult your
nearest Clarke dealer.

Oil leaks.

Leaking from the tank.

Check the bleed screw has
been unscrewed before
operating the machine.

Washer/seal on plug/
dipstick worn or damaged.

Fit replacement washer.

Worn or damaged oil seals.

Fit new oil seals, consult
your nearest Clarke dealer.

PARTS & SERVICE TEL:  020 8988 7400

or    e-mail as follows:

PARTS:   [email protected]

SERVICE:    [email protected]
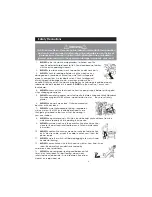
IMPORTANT:

T

he use of parts other than CLARKE replacement parts may result in safety hazards,

decreased tool performance and may invalidate your warranty.

Log pusher advances
jerkily or with strong
vibrations.

-14-

Содержание Log Buster 3

Страница 1: ...OPERATION MAINTENANCE INSTRUCTIONS 0205 MODEL NO Log Buster 3 PART No 3402020 LOG SPLITTER 4 Tonne Force LOG SPLITTER 4 Tonne Force...

Страница 2: ...50mm Minimum Diameter 50mm Please note that the details and specifications contained herein are correct at the time of going to print However CLARKE International reserve the right to change specifica...

Страница 3: ...sed as soon as possible Double Ended Spanners 2 off 10mm x 12mm 1 off 13mm x 16mm 1 Off Operating and Maintenance Instructions 1 Off Log splitter main body including motor and oil pump 1 Off Safety Co...

Страница 4: ...ies 5 ALWAYS wear safety goggles manufactured to the latest European Safety Standards Everyday eyeglasses do not have impact resistant lenses they are not safety glasses 6 ALWAYS keep work area clean...

Страница 5: ...ps can create a hazardous work environment The operator must take all necessary precautions to minimize the risk of accidental damage or injury due to wood being ejected from the machine The operator...

Страница 6: ...ER use the machine in a dangerous environment i e damp or wet conditions or expose it to rain DO NOT use in a potentially explosive atmosphere around paint flammable liquids etc ALWAYS comply with the...

Страница 7: ...self Cable Extension Always use an approved cable extension suitable for the power rating of this tool see specifications the conductor size should also be at least the same size as that on the machin...

Страница 8: ...k list on page 2 Any discrepancies should be reported to the Clarke dealer where the machine was purchased Main Body inc Motor and Oil Pump Handle Safety Cover Operating Handles Wheel Assy Nuts Bolts...

Страница 9: ...ten bolts 3 Attach the handle to the front legs using screws nuts and washers supplied Fig 8 NOTE insert screw with washer through the handle and secure to the legs with locknut DO NOT Overtighten Fig...

Страница 10: ...cover removed this is a safety cover making it necessary to use both hands to operate Fig 12 5 Carefully turn the machine over onto its feet Stand the log splitter on a firm level surface attach the...

Страница 11: ...le to the splitter only stack those logs that are ok for splitting i e length and diameter DO NOT attempt to split green logs dry seasoned logs split more easily Route the power supply cord safely fro...

Страница 12: ...bient temperature After several hours of continuous use the pump may become very hot This is not detrimental to the machine however it is very important to not cause overheating of the oil by attempti...

Страница 13: ...operation the splitting wedge will become blunt and require sharpening To do this simply remove burrs and flat spots using a fine file Fig 17 Jam Clearing Use extreme care when clearing jammed logs t...

Страница 14: ...Check oil level Top up if necessary If problem persists consult your nearest Clarke dealer Oil leaks Leaking from the tank Check the bleed screw has been unscrewed before operating the machine Washer...

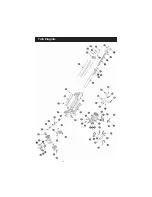
Страница 15: ...Parts Diagram 15...

Страница 16: ...Cover 1 16 SD30016 Double Ended Threaded Stud 4 18 SD30018 Cross Head Screw M6 x 20 2 19 SD30019 Handle 1 20 SD30020 Foot Pad left 1 21 SD30021 Foot Pad right 1 22 SD30022 Leg Assy 1 23 SD300023 Lock...

Страница 17: ...T3 5 x 14 6 52 SD30052 Power Cable Plug 1 53 SD30053 Cable Clamp 1 54 SD30054 Terminal Box 1 55 SD30055 Oil Cylinder Rear Cover 1 56 SD30056 Grub Screw M8 x 10 2 57 SD30057 Handle Housing left 1 57a S...

Страница 18: ...18...

Отзывы: