O
Either a cutting or scraping action can be used
when cutting at the circumference. The shaving
is removed like a peeling from a potato.
Scraping only, is used when cutting at the
diameter. The reason is obvious when you
consider that faceplate turning always requires
removal of wood across the grain. Wood does
not peel easily across the grain, and attempts
to use a cutting method will result in damage to
the work and throwing of the chisel by the work.
It follows that a cutting action is used for the
majority of spindle turning operations, whilst the
majority faceplate turning is done by the
scraping method.
When a combination approach is to be used,
you will have to judge, by the feel of the work,
when to stop cutting and start scraping.
Never try to cut when it becomes difficult to hold
the chisel against the roughness of the wood
grain.
2.3 How To Position The Tool Rest for
Circumference Cutting
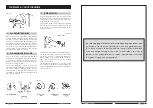
When cutting, the object is to pierce the outer
skin of wood to a certain desired depth, then to
hold the chisel steady, with the bevel edge
parallel to the work circumference, so that it will
peel off a shaving at this desired depth.
The only sure method of holding the chisel
steady is to rest the bevel against the work, as
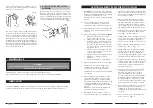
shown in sketch 1.
When the tool rest is at
the proper height , the
chisel can be held with
the bevel pressed
against the work, and
the tool rest will act as a
fulcrum to support the
chisel against the
downward force of the
revolving work.
If the rest is placed too
low, so that the chisel is
held with the bevel out
from the work (Sketch
2), the cutting edge will
continue to dig deeper
into the work. It will dig
in until the “bite”
becomes so deep that
your hands have
difficulty holding the
13
chisel, then the
improperly supported
chisel will begin to
bounce, or chatter,
against the workpiece.
If the rest is placed too
low, the chisel must be
held extremely high to
position the bevel
against the work
(Sketch 3). Then the rest
loses most of its value as
a fulcrum, and the
downward force of the
revolving workpiece
tends to kick the chisel
back out of your hands.
If the rest is placed too
high, (Sketch 4) and the
chisel is correctly
positioned for cutting, it
strikes the workpiece
near the top where the
direction of force
exerted by the
workpiece is nearly
horizontal, and
kickback will again
result.
If the rest is placed too
far out from the work
surface (Sketch 5) then,
when correctly held, the
chisel is again too high
on the work. Also, you
have less leverage on
your side of the tool rest,
and it is even more
difficult to hold the
chisel.
With large diameter
work (Sketch 6), the tool
rest can be above the
workpiece centre line,
and somewhat out from
the work surface.
With small diameter
work (Sketch 7), the rest
should not be far from
the work surface. As
work grows smaller, the
rest should be
repositioned.
SPINDLE TURNINGS
1. PLOTTING THE SHAPE
Once the basic cuts have been mastered, you
are ready to turn out finished work.
The first step is to prepare a plan for the proposed
turning. This can be laid out on a suitable sheet
of paper, and should be to full size.
Next, prepare the turning stock by squaring it
up to the size of the largest square or round
section in your plan. The stock can be cut to
the exact length of the proposed turning, but in
most cases it is best to leave the stock a little
long at one or both ends to allow for trimming.
2. DUPLICATE TURNINGS
Identical turnings require great accuracy when
plotting the work and doing the various cuts.
Many methods have been devised to assist in
perfecting the work.
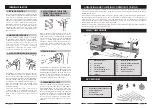
2.1 Use of Patterns
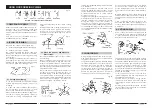
Professional workers generally use a pattern or
layout board.
This is a thin piece of wood or cardboard on
which is drawn a full-size half section of the
turning. The contour of the finished surface is
drawn first, then the diameters at various critical
points are drawn to scale as vertical lines
intersect the contour line.
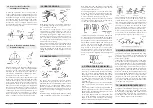
By placing the pattern against the roughed-out-
cylinder, you can quickly mark the various points
of the critical diameters.
To make each sizing cut, use outside callipers
and set these by actually measuring the length
of the vertical line on the pattern which
represents the diameter desired. Then make the
sizing cut, down to the proper diameter by using
the callipers to determine when the cut is
finished.
After making the sizing cuts, hang the pattern
behind the lathe where it will serve as a guide
for completion of the workpiece.
Mount the stock in the lathe, and rough it off to
a maximum size cylinder. Now project your plan
on to the turning by marking the various critical
dimensions along the length of the spindle in
pencil. These dimensions can be laid out with
an ordinary ruler, or by using a template. Make
the pencil marks about 12mm long, they will be
visible when the work is revolved under power,
and can be quickly traced around the spindle
by touching each line with the pencil.
After marking, use the parting tool to make sizing
cuts at all of the important shoulders. When
learning, you will find it best to make sizing cuts
to accurately plot the various diameters, but
experienced workers can do with a few such
cuts at the important shoulders.
Plan each sizing cut so that it is in waste stock,
and make each deep enough so that there will
be just enough wood left under the cut for the
finishing process.
Once the sizing cuts have been run in, rough-
out the excess wood with a gouge, then
proceed with the finishing process by making
the various types of cuts required.
20
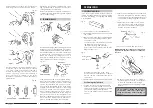
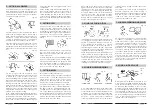
Fig. 35
2.2 Using a Template and a Diameter Board
When many identical tur nings are to be
produced, it is convenient to have a prepared
template. This can be made of thin wood or
cardboard, and is cut on a band saw or scroll
saw to have the exact contour of the finished
Fig. 36


