background image

Assembling your BTE Sound
Processor

Attaching the Earhook

The earhook is easily screwed on and off. You should turn the
earhook until it is tight and flush with the electronics module of
your BTE. The earhook is designed NOT to tighten completely in
order to ensure easy repositioning for comfort. Don’t hesitate to
turn it an additional turn if you prefer it tighter. Turning additional
turns will NOT cause damage to the earhook or electronics mod-
ule.

Connecting the Headpiece and Cable

At one end of the headpiece cable is a two-pin plug that you will

insert into the cable connector on the headpiece. The pins have

different diameters that match the two holes in the cable con-

nector.

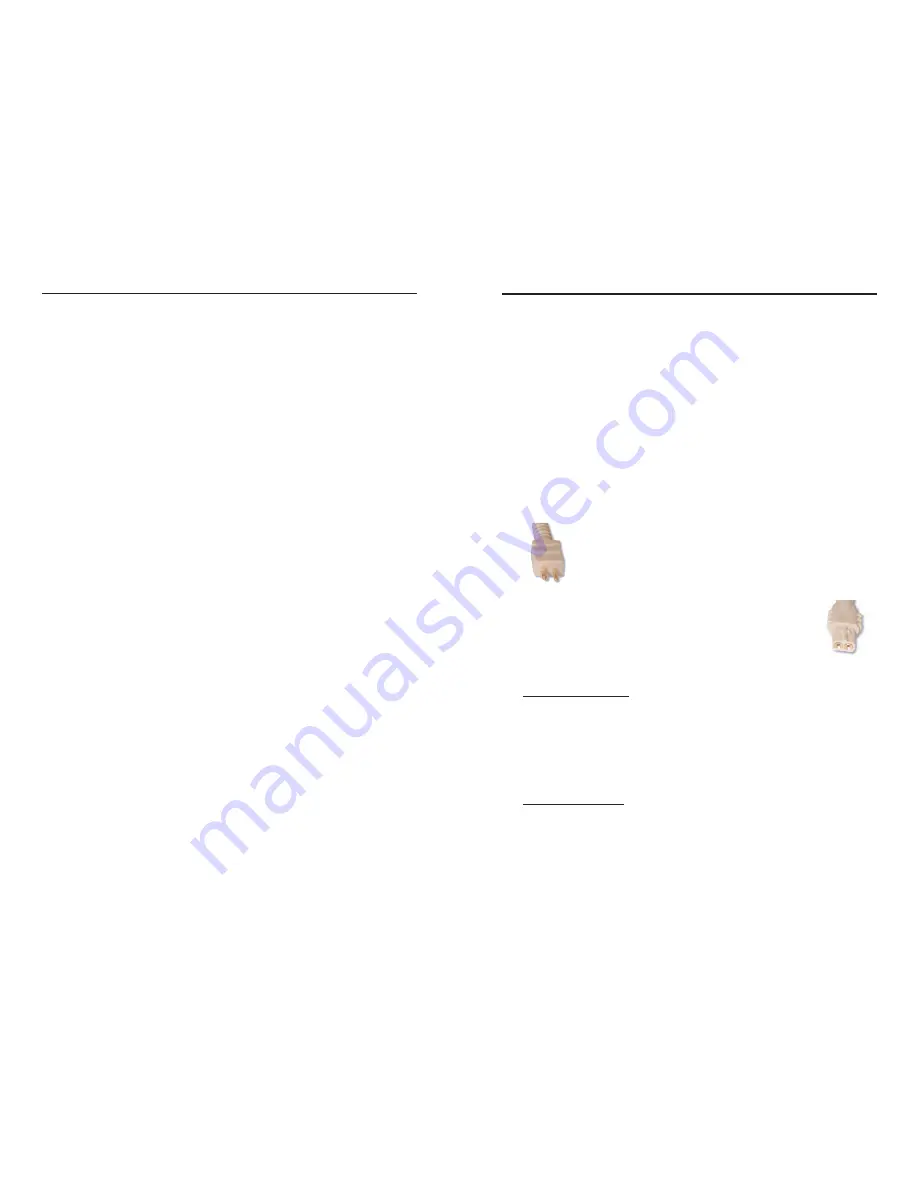
At the other end of the headpiece cable is a two-hole
plug that connects to the two-pin headpiece cable con-
nector on the back of the BTE Sound Processor. The
female end of the cable contains a raised area that will
align with a groove on the cable connection port of the
electronics module.

Connecting the cable:

1. Align the raised area on the end of the cable with the groove

on the cable connector on the BTE electronics module and
slide in place until it is secure.

2. Orient the connector so that the large pin on the cable matches

the large hole size on the headpiece and insert into the holes. 

Removing the cable:

1. Remove the PowerCel from the electronics module (see details

on page 15).

2. Hold the cable's strain relief (the plastic plug) and gently pull

it away. 

6

BTE Sound Processor User Guide

7

Assembling your BTE Sound Processor

Содержание CI-5210

Страница 1: ...onnecting the PowerCel to the Electronics Module 8 Customizing the Platinum Headpiece Color Caps 8 Using your BTE Sound Processor Turning your BTE Sound Processor On Off 11 Putting on your BTE Sound P...

Страница 2: ...01 PowerCel Wallets CI 7110 335 Dri Aid Kit CI 7301 Headpiece Cables Beige Brown 3 CI 5403 300 CI 5403 310 4 CI 5404 300 CI 5404 310 9 5 CI 5409 300 CI 5409 310 Auxiliary Microphone CI 5810 Auxiliary...

Страница 3: ...accompanies your BTE Sound Processor kit to verify the actual contents Description Model BTE Sound Processor CI 5210 CI 5220 PowerCelTM Charger CI 5600 Charger Power Supply CI 5610 Power Supply Adapt...

Страница 4: ...ccommodate your ear comfortably a standard earhook and a small earhook Your audiologist can assist you in determining which is more appropri ate for you Generally the larger earhook suits adult CLARIO...

Страница 5: ...ith the BTE Sound Processor Toggle Switch The BTE Sound Processor has one toggle switch which is located on the back side of the BTE Sound Processor This toggle switch serves as both a program selecto...

Страница 6: ...s in the cable con nector At the other end of the headpiece cable is a two hole plug that connects to the two pin headpiece cable con nector on the back of the BTE Sound Processor The female end of th...

Страница 7: ...ting the Rechargeable PowerCel to the Electronics Module To attach the rechargeable PowerCel module 1 Locate the slide tracks on the underside of the electronics module and the top of the PowerCel mod...

Страница 8: ...ugged into the cable connector on the processor 3 Place the BTE over your ear and the headpiece on your head over the implant IMPORTANT Use only the BTE Sound Processor that has been pro grammed espec...

Страница 9: ...u will notice a brief moment of silence as you change from one program to the next The program changes when you release the switch and it springs back to the mid point The last position is a reserved...

Страница 10: ...lly you will only change the rechargeable PowerCel when it has depleted its charge However you may also wish to return to the start up settings of the BTE by disconnecting waiting 5 seconds and then r...

Страница 11: ...rspiration BTE Sound Processor Protection Your BTE Sound Processor contains advanced electronics that can be damaged Care should always be taken when using or handling If the processor is dropped chec...

Страница 12: ...To prevent injury or burns do not allow metal objects such as keys or coins to contact or short circuit the PowerCel terminals PowerCel wallets are provided to carry and protect the PowerCel Exposing...

Страница 13: ...be fully depleted before recharging CAUTION Only use the PowerCel charger for charging the CLARIO N BTE PowerCel modules DO NOT use it to charge any other PowerCels LED indicators A green LED illumin...

Страница 14: ...modules in the PowerCel charger 1 Locate the slide tracks on the PowerCel charger 2 Position the PowerCel module so that the PowerCel contact is fac ing the vertical wall of the charger where the pins...

Страница 15: ...male stereo connector that can connect to the Auxiliary Microphone or with other audio equipment or assistive listening technology in conjunction with the Audio Interface Cable Auxiliary Microphone Yo...

Страница 16: ...position using the cable clip provided 4 Ensure that the PowerCel is properly attached to the BTE Sound Processor and adjust the volume or sensitivity as neces sary When the Auxiliary Microphone is u...

Страница 17: ...he tip of the BTE System Sensor up to the head piece depressing the button on the sensor The Sensor will then display various colored LED patterns refer to chart below Green LED Orange LED Outcome On...

Страница 18: ...rs and act accordingly Static heard Ensure that the sensitivity control is not set too high if it is enabled Clean contacts on PowerCel and BTE Replace the headpiece cable Try auxiliary microphone con...

Страница 19: ...is still no sound heard then call your audiologist Muffled or distorted sounds heard Ensure that the sensitivity control is properly set if it is enabled Remove any material hats headbands etc which...

Страница 20: ...d CII BTE are registered trademarks of Advanced Bionics Corporation in the United States of America and other countries This device is protected under one or more of the following U S Patents 4 400 59...

Отзывы: