background image

‑  ‑

5. 
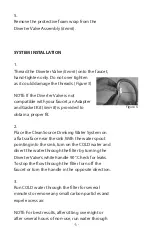
Remove the protective foam wrap from the 
Diverter Valve Assembly (

item 6

).

sYsTeM INsTallaTION

1.
Thread the Diverter Valve

 (item 6) 

onto the faucet, 

hand-tighten only. Do not over tighten 
as it could damage the threads. (

Figure 5

)

NOTE: If the Diverter Valve is not 
compatible with your faucet, an Adapter 
and Gasket Kit (

item 8

) is provided to 

obtain a proper fit.

2.
Place the CleanSource Drinking Water System on 
a flat surface near the sink. With the water spout 
pointing into the sink, turn on the COLD water and 
divert the water through the filter by turning the 
Diverter Valve’s white handle 90

o

. Check for leaks. 

To stop the flow through the filter turn off the 
faucet or turn the handle in the opposite direction.

3. 
Run COLD water through the filter for several 
minutes to remove any small carbon particles and 
expel excess air.

NOTE: For best results, after sitting overnight or 
after several hours of non-use, run water through 

Figure 5

Содержание CleanSource

Страница 1: ...CleanSource Drinking Water System Owner s and Operator s Manual...

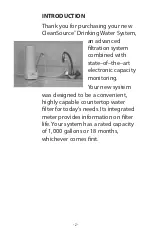
Страница 2: ...m combined with state of the art electronic capacity monitoring Your new system was designed to be a convenient highly capable countertop water filter for today s needs Its integrated meter provides i...

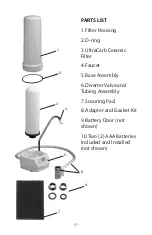
Страница 3: ...ring 3 UltraCarb Ceramic Filter 4 Faucet 5 Base Assembly 6 Diverter Valve and Tubing Assembly 7 Scouring Pad 8 Adapter and Gasket Kit 9 Battery Door not shown 10 Two 2 AAA Batteries Included and Inst...

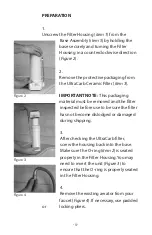
Страница 4: ...be removed and the filter inspected before use to be sure the filter has not become dislodged or damaged during shipping 3 After checking the UltraCarb filter screw the housing back into the base Make...

Страница 5: ...he CleanSource Drinking Water System on a flat surface near the sink With the water spout pointing into the sink turn on the COLD water and divert the water through the filter by turning the Diverter...

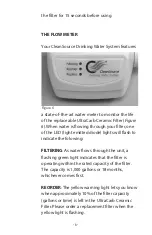
Страница 6: ...mitted diode lights will flash to indicate the folowing FILTERING As water flows through the unit a flashing green light indicates that the filter is operating within the rated capacity of the filter...

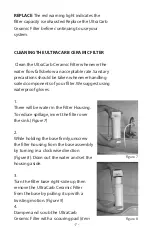
Страница 7: ...nts of your filter We suggest using waterproof gloves 1 There will be water in the Filter Housing To reduce spillage invert the filter over the sink Figure 7 2 While holding the base firmly unscrew th...

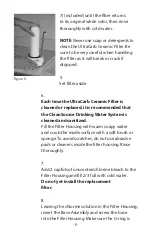
Страница 8: ...hat the CleanSource Drinking Water System is cleaned and sanitized Fill the Filter Housing with warm soapy water and scrub the inside surface with a soft brush or sponge To avoid scratches do not use...

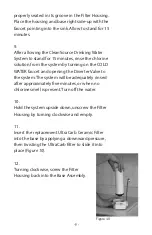
Страница 9: ...faucet and opening the Diverter Valve to the system The system will be adequately rinsed after approximately five minutes or when no chlorine smell is present Turn off the water 10 Hold the system ups...

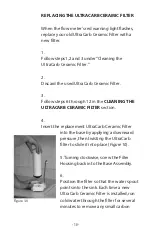
Страница 10: ...e CLEANING THE ULTRACARB CERAMIC FILTER section 4 Insert the replacement UltraCarb Ceramic Filter into the base by applying a downward pressure then twisting the UltraCarb filter to slide it into plac...

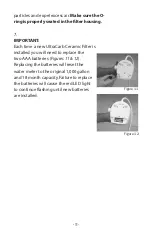
Страница 11: ...arb Ceramic Filter is installed you will need to replace the two AAA batteries Figures 11 12 Replacing the batteries will reset the water meter to the original 1 000 gallon and 18 month capacity Failu...

Страница 12: ...ou may be required to return the product at your expense to the nearest Rainbow service center in order to obtain warranty service You may also be required to provide proof of purchase If after inspec...

Отзывы: