iDP3240 SERVICE MANUAL
6
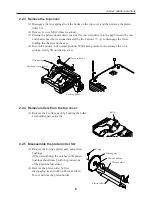
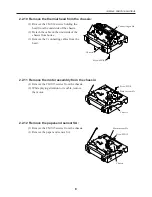
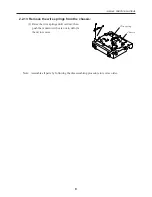
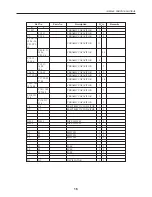
Roller
E-ring
Platen gear
Platen bushing
Platen holder
Platen roller
Wire spring
Pan head screw M3
×
8
Bushing guide
Platen roller SA
2
1
2.2.3 Remove the top cover:
(1) Disengage the wire springs from the hooks on the top cover, and then remove the platen
roller SA.
(2) Remove screws M3
×
8 (three locations).
(3) Placing the printer upside down, insert a flat-end screwdrive into the gap between the case
and chassis near the locations indicated by the 2 arrows
1
2
, to disengage the claws
holding the chassis and the case.
(4) Return the printer to its normal position. While being careful not to damage the wire
springs, slowly lift out the top cover.
2.2.4 Remove rollers from the top cover:
(1) Remove the 2 rollers, each by bending the roller
axis holding part outwards.
2.2.5 Disassemble the platen roller SA:
(1) Remove the E-rings, platen gear, and platen
bushings.
(When assembling, the notches in the platen
bushings should mesh with the protrusions
of the platen holder sides.)
(2) Remove the platen roller by first
disengaging its end with no D-cut and then
D-cut end from the platen holder.
Содержание iDP3240
Страница 1: ...LINE THERMAL PRINTER MODEL iDP3240 Rev 1 0 First created Feb 10th 2000 Service Manual...
Страница 2: ...i REVISION Rev No Date Content Rev 1 0 Feb 10th 2000 First created...
Страница 16: ...iDP3240 SERVICE MANUAL 13 3 2 Exploded View 2 5 4 3 71 31 30 29 28 45 44 43 41 52 51 50 49 48...
Страница 23: ...iDP3240 SERVICE MANUAL 20 4 3 2 Control PCB Assy Reverse side of the board...
Страница 24: ...iDP3240 SERVICE MANUAL 21 4 3 3 Control PCB Assy Top side of the board Parallel Interface...
Страница 25: ...iDP3240 SERVICE MANUAL 22 4 3 4 Control PCB Assy Reverse side of the board...
Страница 33: ...iDP3240 SERVICE MANUAL 30 6 OUTLINE DRAWING FEED ERROR POWER 9 37 201 119 5 186 123...


