


11
Network Analysis Module Memory Upgrade Installation Note
78-18630-01B0
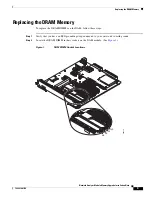
Replacing the DRAM Memory
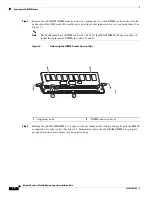
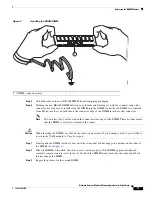
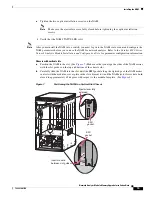
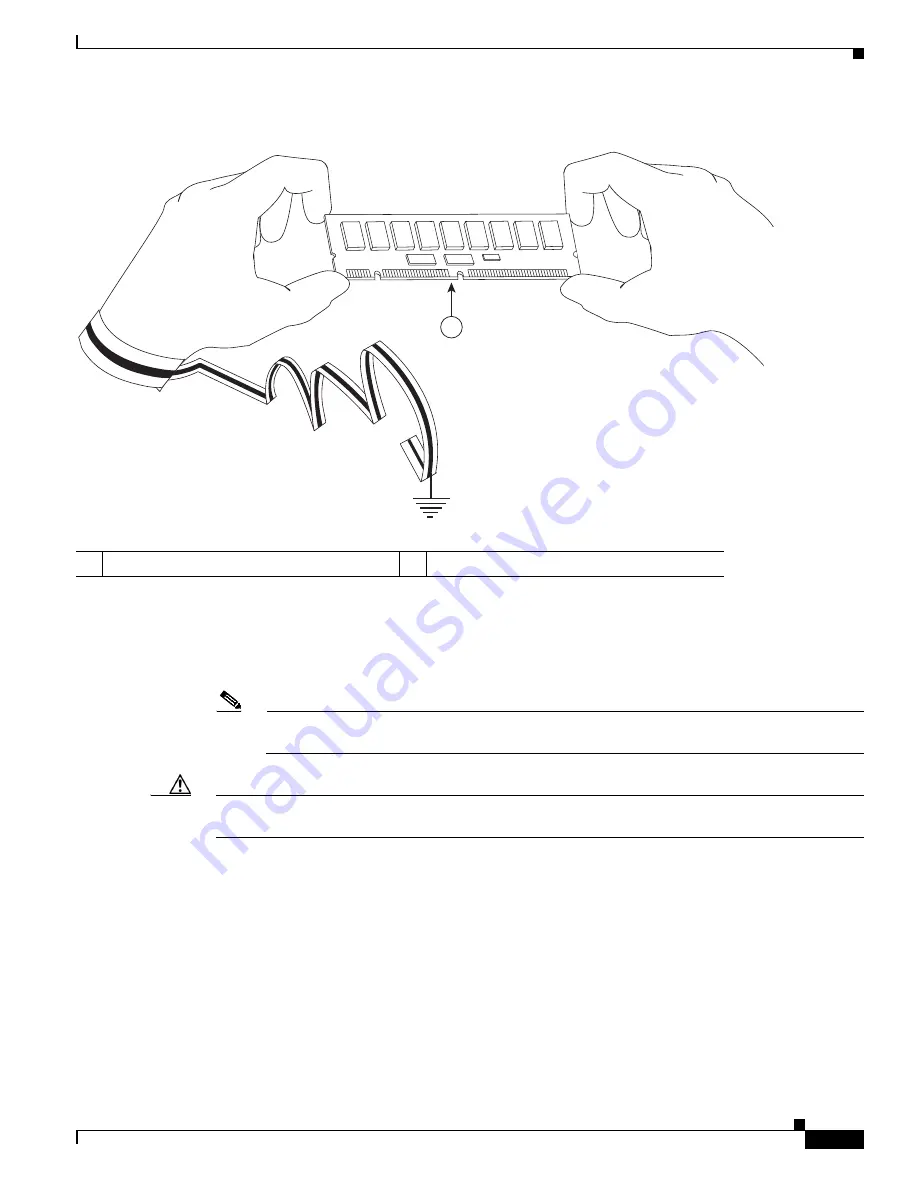
Figure 3
Handling the DRAM DIMM
Step 5
Carefully remove the new DRAM DIMM from its shipping packaging.
Step 6
Holding the new DRAM DIMM between your thumbs and forefingers, with the connector edge (the
connector traces) down, carefully slide the DIMM into the DIMM socket the old DIMM was removed
from. Make sure that you fully insert the connector edge of the DIMM into the socket connector.
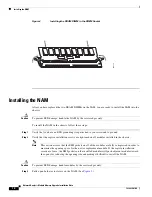
Note
Two notches (keys) are located on the connector trace edge of the DIMM. These notches ensure
that the DIMM is correctly oriented in the socket.
Caution
When inserting the DIMM, use firm but not excessive pressure. If you damage a socket, you will have
to return the NAM module to Cisco for repair.
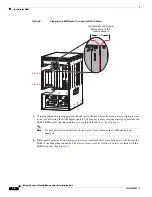
Step 7
Gently push the DIMM into the socket until the two socket latches engage the notches on the sides of
the DIMM. (See
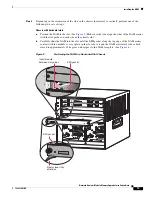
Step 8
When the DIMM is installed, check to see it is seated properly. If the DIMM appears misaligned,
carefully remove it and reseat it in the socket. Push the DIMM firmly back into the socket until both
latches engage the DIMM.
Step 9
Repeat the process for the second DIMM.
1
DIMM connector traces
188113
1


