


12
Network Analysis Module Memory Upgrade Installation Note
78-18630-01B0
Installing the NAM
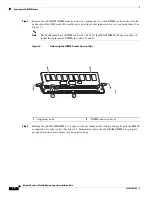
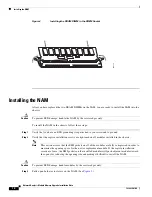
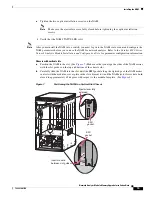
Figure 4
Installing the DRAM DIMM in the DIMM Socket
Installing the NAM
After you have replaced the two DRAM DIMMs on the NAM, you are ready to install the NAM into the
chassis.
Caution
To prevent ESD damage, handle the NAM by the carrier edges only.
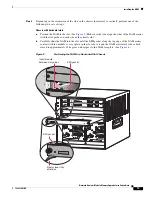
To install the NAM in the chassis, follow these steps:
Step 1
Verify that you have an ESD grounding strap attached to your wrist and to ground.
Step 2
Verify that the captive installation screws are tightened on all modules installed in the chassis.
Note
This action assures that the EMI gaskets on all of the modules are fully compressed in order to
maximize the opening space for the new or replacement module. If the captive installation
screws are loose, the EMI gaskets on the installed modules will push adjacent modules toward
the open slot, reducing the opening size and making it difficult to install the NAM.
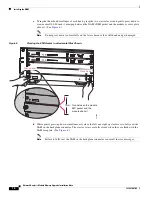
Caution
To prevent ESD damage, handle modules by the carrier edges only.
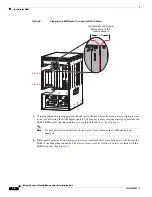
Step 3
Fully open both ejector levers on the NAM. (See
188114


