


7
Network Analysis Module Memory Upgrade Installation Note
78-18630-01B0
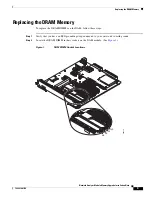
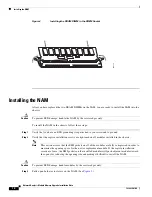
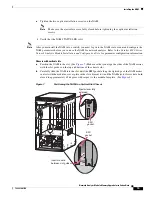
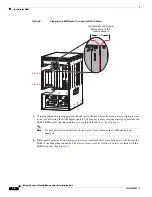
Removing the NAM
Removing the NAM
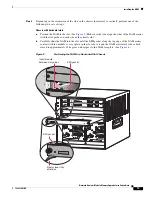
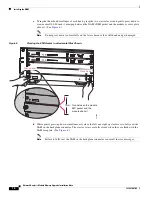
This section describes how to safely remove the NAM from the chassis slot.
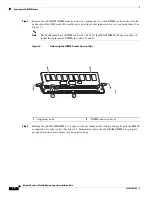
Shutting Down the NAM
To avoid corrupting the NAM hard disk, you must correctly shut down the NAM before you remove it
from the chassis or disconnect the power from the chassis. This shutdown procedure is normally initiated
by commands entered at the supervisor engine CLI prompt or the NAM CLI prompt. If the NAM fails
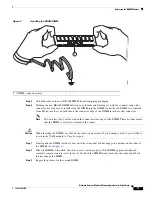
to respond to these commands properly, you must use the SHUTDOWN button on the NAM front panel
to initiate the shutdown procedure. To push the recessed button, use a small pointed object (such as a
paper clip).
Note
The shutdown procedure may require several minutes. The STATUS LED turns off when the NAM shuts
down.
To shutdown the NAM from the chassis slot, follow one of following methods.
If you are using Cisco IOS software:
•
From the root account on the NAM, enter the
shutdown
command.
•
In privileged mode from the CLI, enter the
hw-mod module
mod
shutdown
command. (When this
command is used, you will have to enter the
hw-mod module
mod
reset
command in order to restart
the NAM.)
Note
When the switch is rebooted, the NAM will reboot.
•
If the NAM does not respond to any commands from the NAM prompt or the supervisor engine, use
a small, pointed object to access the recessed SHUTDOWN button located on the NAM faceplate.
If you are using Catalyst OS software:
•
From the root account on the NAM, enter the
shutdown
command.
•
In privileged mode from the CLI, enter the
set module disable
mod
command. (When this command
is used, you will have to enter the
set module enable
mod
command in order to restart the NAM.)
•
When you enter the
set module disable
mod
command, the specified NAM will remain disabled,
even if the switch is rebooted, until you enter the
set module enable
mod
command.
•
In privileged mode from the CLI, enter the
set module shutdown
mod
command. This form of the
command will shut down only the specified NAM.
Note
When you enter the
set module shutdown
command, the NAM will reboot if the switch is
rebooted.
•
In privileged mode from the CLI, enter the
set module shutdown
all
command.
Note
When you enter the
set module shutdown
all
command, you will shut down every NAM
installed in the switch.


