Step 2
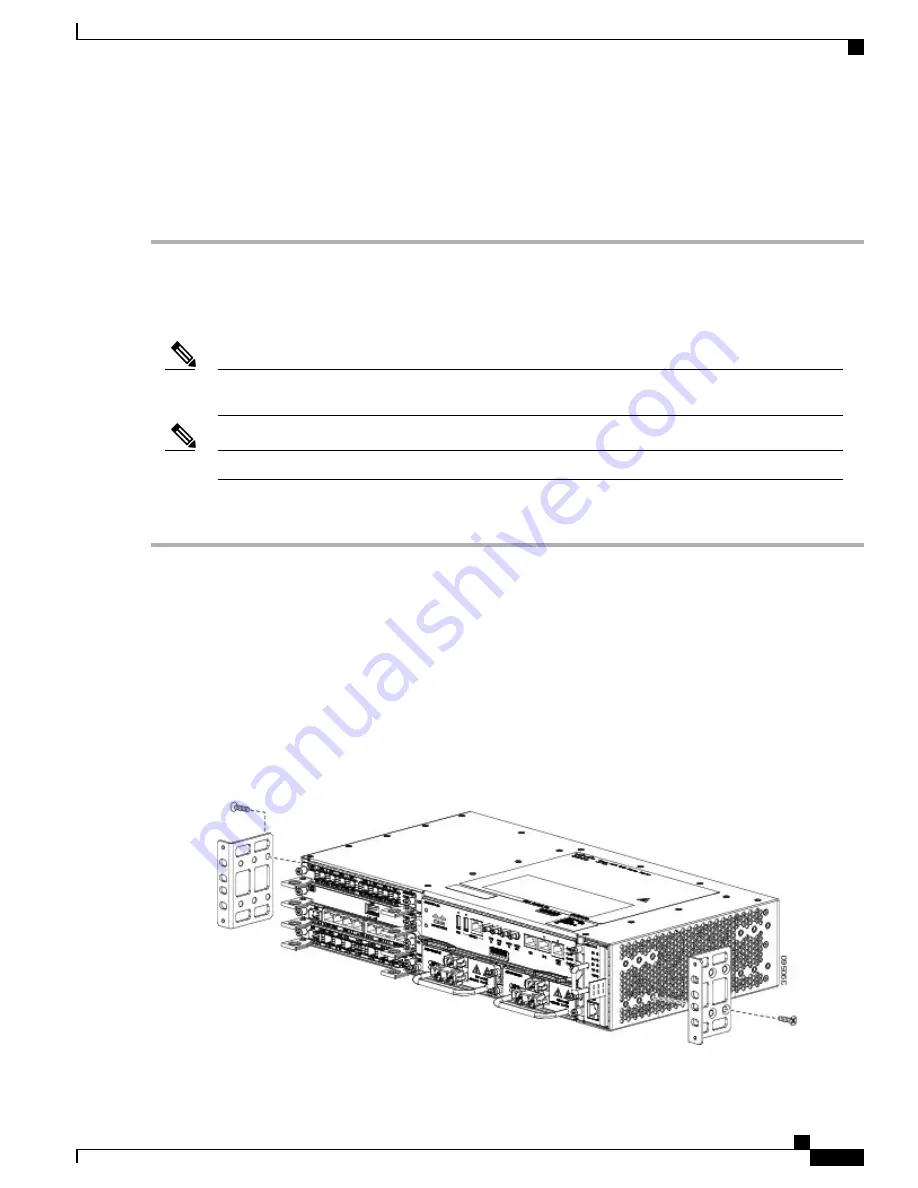
Position one of the brackets against the chassis side, and align the screw holes.
Step 3
Secure the bracket to the chassis with the screws removed when performing Step 1 . The recommended maximum torque
is 28 in.-lb (3.16 N-m).
Step 4
Repeat Step 2 and Step 3 for the other bracket.
Installing the Router Chassis in the Rack
Ensure adequate air flow when mounting the router in a rack. For more information, see the
section.
Note
Install the cable guides before installing the router in a 19-inch EIA rack.
Note
To install the router chassis in the equipment rack, perform these steps:
Step 1
Position the chassis in the rack as follows:
•
If the front of the chassis (front panel) is at the front of the rack, insert the rear of the chassis between the mounting
posts.
•
If the rear of the chassis is at the front of the rack, insert the front of the chassis between the mounting posts.
Step 2
Align the mounting holes in the bracket (and optional cable guide) with the mounting holes in the equipment rack.
Do not use interface module or power supply ejector handles to lift the chassis; using these handles to lift the
chassis can deform or damage the handles.
Caution
The figure below shows how to install the Cisco ASR 902 Router in a 19-inch EIA rack.
Figure 34: Attaching Mounting Brackets for a 19-inch EIA Rack
Cisco ASR 902 and ASR 902U Aggregation Services Router Hardware Installation Guide
67
Installing the Cisco ASR 902 Router
Installing the Router Chassis in the Rack


