20
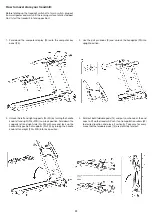
Assembly Instructions
Before beginning assembly, be sure to observe our recom-
mendations and safety instructions.
Step 1:
Remove the treadmill
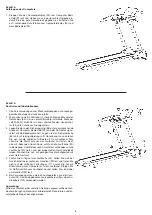
1. Remove all small parts, loose packing material out of the box
and then take out with help of a second person the preassem-
bled frame of packaging. Put your hands below the main frame
to take out of carton and take care of no squeezing. Don’t cut
the nylon strap for removing the main frame from carton.
Step 2:
Assembly of the treadmill part 1
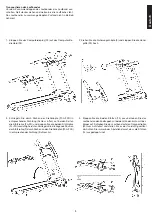
1. Cut the nylon strap with care and unlock the left and right
supports (2L+2R) by turning the handle knob left and right
(20L+20R) in un-lock position.
2. Fold up the supports left and right side (2L+2R) with care and
lock up the upright position of supports (2L+2R) by turning the
handle knob left and right (20L+20R) into lock position.
Step 3:
Installation of treadmill part 2
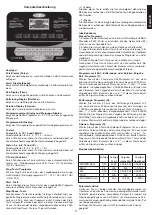
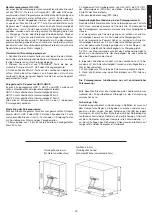
1. Carefully fold down the handgrips (29L+29R) into correct posi-
tion onto the support tubes left and right (2L+2R). Use the pull
pin knobs (9) which you can pull and turn at the head (C) to lock
the hand grips (29). The pull pin knobs (9) need right positions
on both sides (See drawing 9, A + B) so that the handgrip can-
not fold upright anymore.


