


19
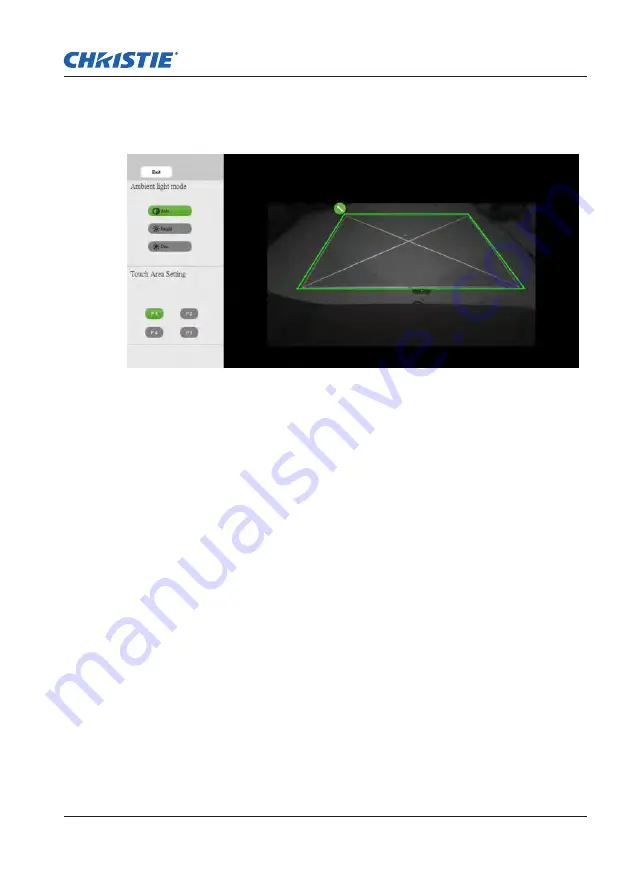
sTeP 7: ToUCH area seTTiNg
Remark:
The captured image shows the camera view, which is reversed from the
projection image. For example: P1 is in the lower right corner, P2 is in
the lower left corner, and so on.
2-2. Touch Area Boundary Fine-tuning
Step 1: Click on P1, and use mouse to drag P1 to upper
left corner. Align the adjustable green zone with the
projected white frame.
Step 2: Adjust P2 to P4 accordingly; the adjustable green
zone should completely overlap with projected white
frame.
Step 3: Check again if the green frame overlap completely
with projected white frame. If not, fine-adjust again.
2-3. When the Touch Area is correctly located, click to Exit.
Captiva Touch User Manual
020-000838-01 Rev. 1 (08-2015)