Chapter 3
Operation
CMN015-005
原本
(Original instructions)
51
3.2
Operation
1.
Turn on the power switch.
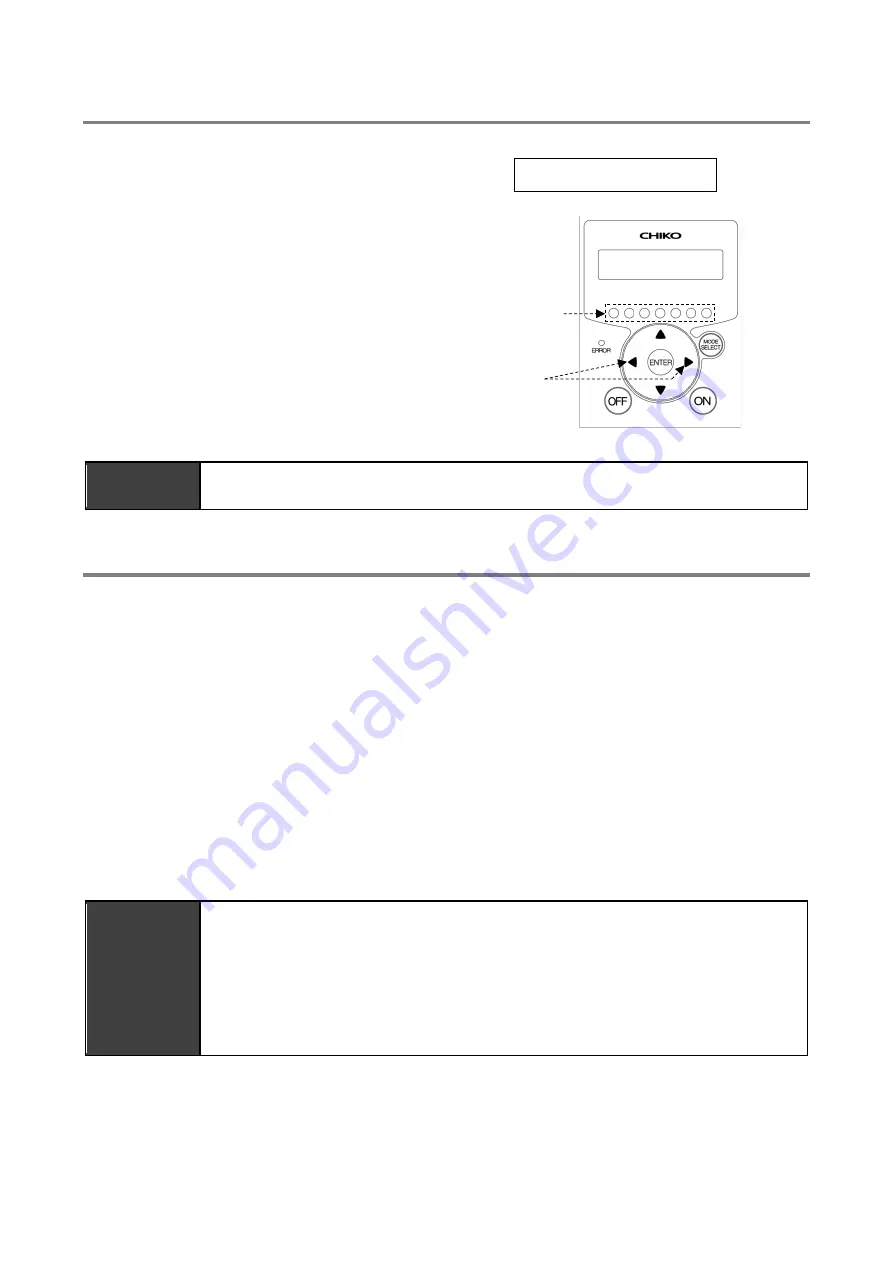
The display indicates the program
version and the ID for RS485
communication.
2.
Press the ON button on the AT3 panel.
The device starts operation.
3.
Check that abnormal noise is not
generated and the suction is appropriate
4.
Set a desired suction power level by
pressing the Left/Right arrow buttons.
The suction power is indicated by the
suction power level lamps (1 to 7).
IMPORTANT
•
Ensure appropriate piping during operation. The piping should be as short as
practicable, with the piping port diameter not too small.
3.3
Registering Initial Pressures
Air volume reduction due to filter clogging is judged based on a registered initial differential pressure and
indicated as low air volume (WARN4). Register initial pressures through these steps:
1.
Perform the wiring and piping of the device.
2.
Start the device at a desired suction power level.
3.
Press and hold down the ENTER button for three seconds.
The display shows “Initial DP Get Y”, prompting confirmation to register/update initial pressures.
4.
To proceed with registration/update, press the ENTER button.
The device starts to acquire initial pressure.
If you do not want to update, press the MODE SELECT button to return to normal operation.
5.
The device runs through a sequence of suction power levels 1 to 7, to automatically acquire the
differential pressure for each level.
While the device is acquiring initial pressure, the display alternates between the “Initial DP Check”
message and the “suction power level and differential pressure” values.
6.
When the registration completes, the display shows the “Initial DP Entry” message and the device
returns to normal operation.
IMPORTANT
•
Ensure that the filters are new when initial pressures are registered.
•
Update registered initial pressures once again if piping is changed or all filters are
replaced (except for the exhaust filter).
•
If initial pressures are not registered, an “initial pressure unregistered” warning
(WARN6) appears.
•
The registered initial pressures can be cleared by holding down the OFF button for
three seconds when the device is in stop state.
●
Clearing registered initial pressures
1.
Hold down the OFF button for three seconds when the device is in stop state.
The display shows “Initial DP Clr Y”, prompting confirmation to clear registered initial pressures.
2.
Press the ENTER button to clear them, or press the MODE SELECT button to return to normal
operation.
Ver*.** ID.**
Left/Right
arrow
buttons
Performance
level lamps
Содержание CHP-5000AT3-DSA-UD
Страница 3: ......
Страница 38: ...第 7 章 付録 34 7 3 電気回路図 7 3 1 CHP 5000AT3 DSA UD ...
Страница 40: ...36 ...
Страница 76: ...Chapter 7 Appendix 72 English 7 3 Electrical Diagram 7 3 1 CHP 5000AT3 DSA UD ...


