SKU 98912
For technical questions, please call 1-800-444-3353.
Page 8
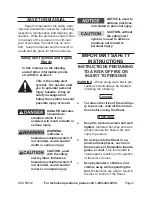
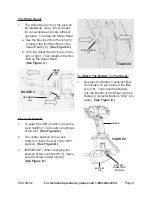
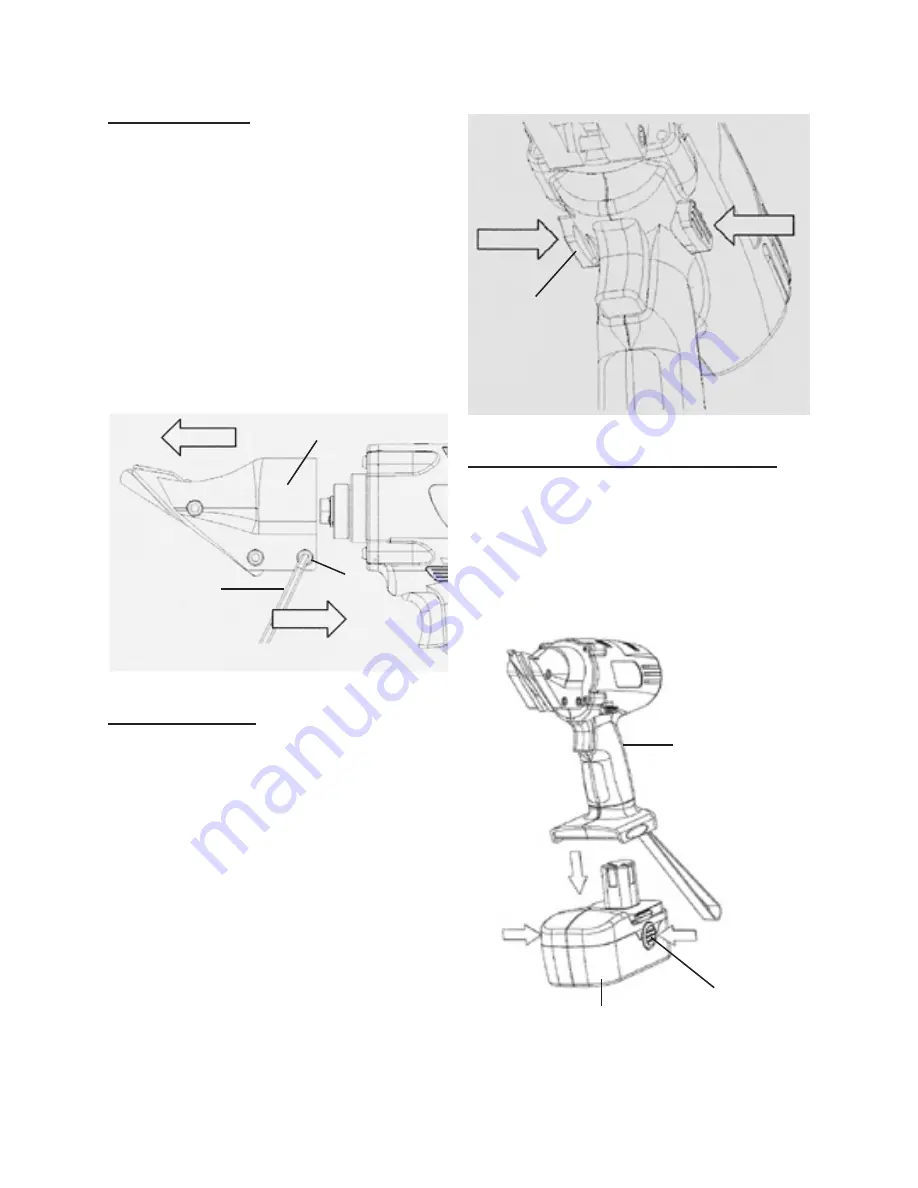
The Shear Head:
The Shear Head (16) of the tool can
1.
be rotated up, down, left, and right
for convenience and more efficient
operation. To rotate the Shear Head:
Use the provided Hex Wrench (23)
a.
to loosen the
third
Hex Bolt on the
Shear Head (16).
(See Figure C.)
Turn the Shear Head (16) up, down,
b.
left, or right. Then retighten the Hex
Bolt on the Shear Head.
(See Figure C.)
FiguRE C
SHEaR
HEaD
(16)
HEX WREnCH
(23)
HEX
BOLT
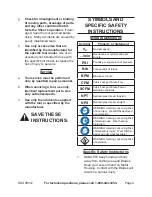
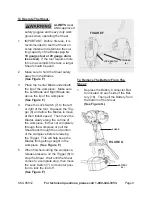
The Lock Switch:
To select the “ON” position, press the
1.
Lock Switch (7) to the
left
or
right
side
of the tool.
(See Figure D.)
The
2.
center
position of the Lock
Switch (7) locks the tool in the “OFF”
position.
(See Figure D.)
IMPORTANT: When changing the
3.
position of the Lock Switch (7), make
sure the Shear
is not
running.
(See Figure D.)
FiguRE D
LOCk SWiTCH
(7)
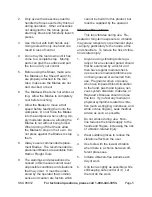
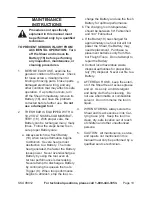
To attach The Battery To The Shear:
Depress the Battery Connector But-
1.
ton located on each side of the Bat-
tery (18). Then insert the Battery
into the bottom of the Shear until the
Battery Connector Buttons “click” into
place.
(See Figure E.)
FiguRE E
SHEaR
BaTTERY
(18)
BaTTERY
COnnECTOR
BuTTOn


