SKU 98912
For technical questions, please call 1-800-444-3353.
Page 7
any control or component in a
way not specifically explained
within this manual. improper
adjustment can result in tool
failure or other serious hazards.
Work area Set up
Designate a work area that is clean
1.
and well-lit. The work area must not
allow access by children or pets to
prevent injury and distraction.
Secure loose workpieces using a vise
2.
or clamps (not included) to prevent
movement while working.
There must not be hazardous ob-
3.
jects (such as utility lines or foreign
objects) nearby that will present a
hazard while working.
general Operating instructions
To Charge The Battery:
Prior to its first use, and before sub
-
1.
sequent uses, the Battery (18) must
be charged. The charge time for the
Battery is
one hour
. Do not over-
charge the Battery, as damage to the
Battery and Charger (19) may occur.
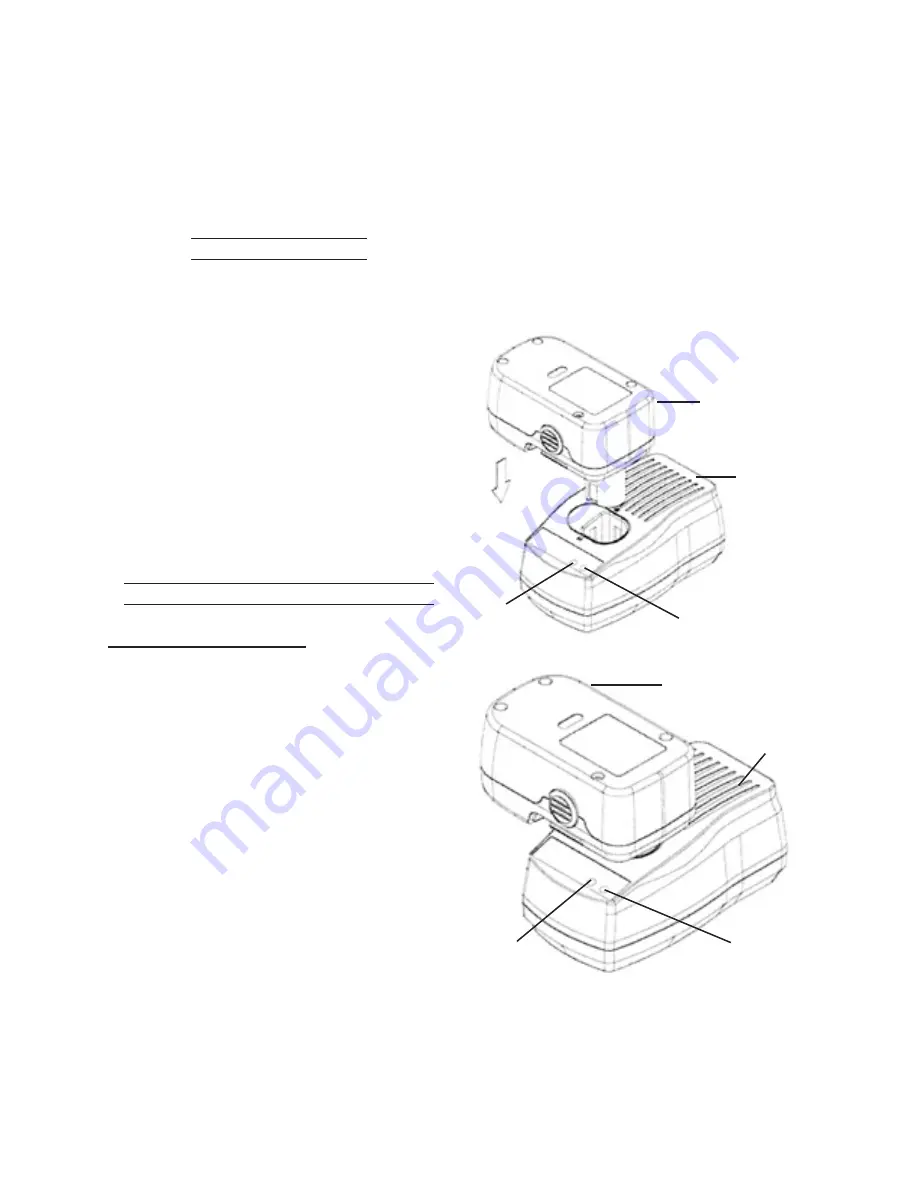
To charge the Battery:
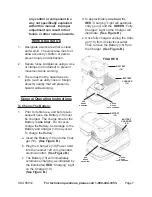
Insert the Battery (18) onto the Char-
a.
ger (19).
(See Figure B.)
Plug the Charger’s (19) Power Cord
b.
into the nearest 120 volt, grounded,
electrical outlet.
(See Figure B.)
The Battery (18) will immediately
c.
commence charging, as indicated by
the illuminated
RED
“Charging” Light
on the Charger (19).
(See Figure B.)
In approximately
d.
one hour
the
RED
“Charging” Light will automati-
cally go out, and the
gREEn
“Fully
Charged” Light on the Charger will
illuminate.
(See Figure B.)
Once fully charged, unplug the Char-
e.
ger (19) from its electrical outlet.
Then remove the Battery (18) from
the Charger.
(See Figure B.)
FiguRE B
BaTTERY
(18)
BaTTERY
CHaRgER
(19)
RED
mEanS
“CHaRging”
gREEn
mEanS
“FuLLY CHaRgED”
BaTTERY
(18)
BaTTERY
CHaRgER
(19)
RED
mEanS
“CHaRging”
gREEn
mEanS
“FuLLY CHaRgED”


