Page 12
For technical questions, please call 1-800-444-3353.
Item 68993
Sa
FE
ty
Op
ER
ati
O
n
m
aint
Enanc
E
SE
tup
user-maintenance instructions
procedures not specifically explained in this manual must
be performed only by a qualified technician.
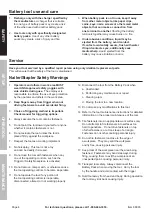
tO pREVEnt SERiOuS injuRy FROm tOOl FailuRE:
Do not use damaged equipment.
if abnormal noise or vibration, have the problem corrected before further use.
1.
BEFORE Each uSE,
inspect the general condition
of the tool. Check for loose hardware, misalignment
or binding of moving parts, cracked or broken
parts, damaged electrical wiring, and any other
condition that may affect its safe operation.
2. Remove the Battery Pack and
unload fasteners after use.
3.
aFtER uSE,
wipe external surfaces
of the tool with clean cloth.
4.
WaRninG! if the supply cord of the ac/
Dc adapter is damaged, it must be replaced
only by a qualified service technician.
clearing jams
tO pREVEnt SERiOuS injuRy FROm acciDEntal OpERatiOn,
BEFORE any maintEnancE OR REpaiRS aRE DOnE (including clearing jams):
• Wear anSi-approved safety goggles with side shields.
Other people in the work area must also wear ANSI-approved impact safety goggles with side shields.
• Release the trigger.
• Detach the Battery pack.
• attempt to fire the tool into a piece of scrap wood to ensure that it
is disconnected and is incapable of firing any fasteners.
• Empty the magazine and leave it open during service.
the magazine is spring-loaded and may cause parts or a fastener to fly out of the tool.
1. If a fastener is jammed in the
discharge area, remove it with pliers.
2. If the tool is still jammed, there may be
a jam in the Safety Nosepiece area.
Follow steps 3-6 to clear the jam.
3. Remove the four Bolts (11) holding the
Nosepiece assembly and loosen the two
bolts on either side of the housing.
4. Carefully remove the Driver Cover (12), Firing
Nose (13), the Safety Nosepiece (10) and the
Spring (9), noting their orientation for reassembly.
5. Carefully remove any jammed fasteners with
needle-nose pliers (sold separately).
6. Reassemble all parts and secure
in place with the bolts.
7.
Figure 5
Loosen two bolts
Housing
Remove Driver Cover
Magazine
Remove four Bolts
Driver and Nose
Stay in place
Remove Spring
and Safety
Nosepiece
Remove
Firing Nose
Housing, Magazine and Driver shown separated for illustration purposes.
Pull out the jammed fastener and the remainder of
the fastener strip from the magazine.
Dispose of the remaining fastener strip;
it is likely bent or damaged and may cause repeated
jamming or damage to the tool if reused.
8. If the jam cannot be cleared using the
methods above, have the tool serviced
by a qualified technician.


