6
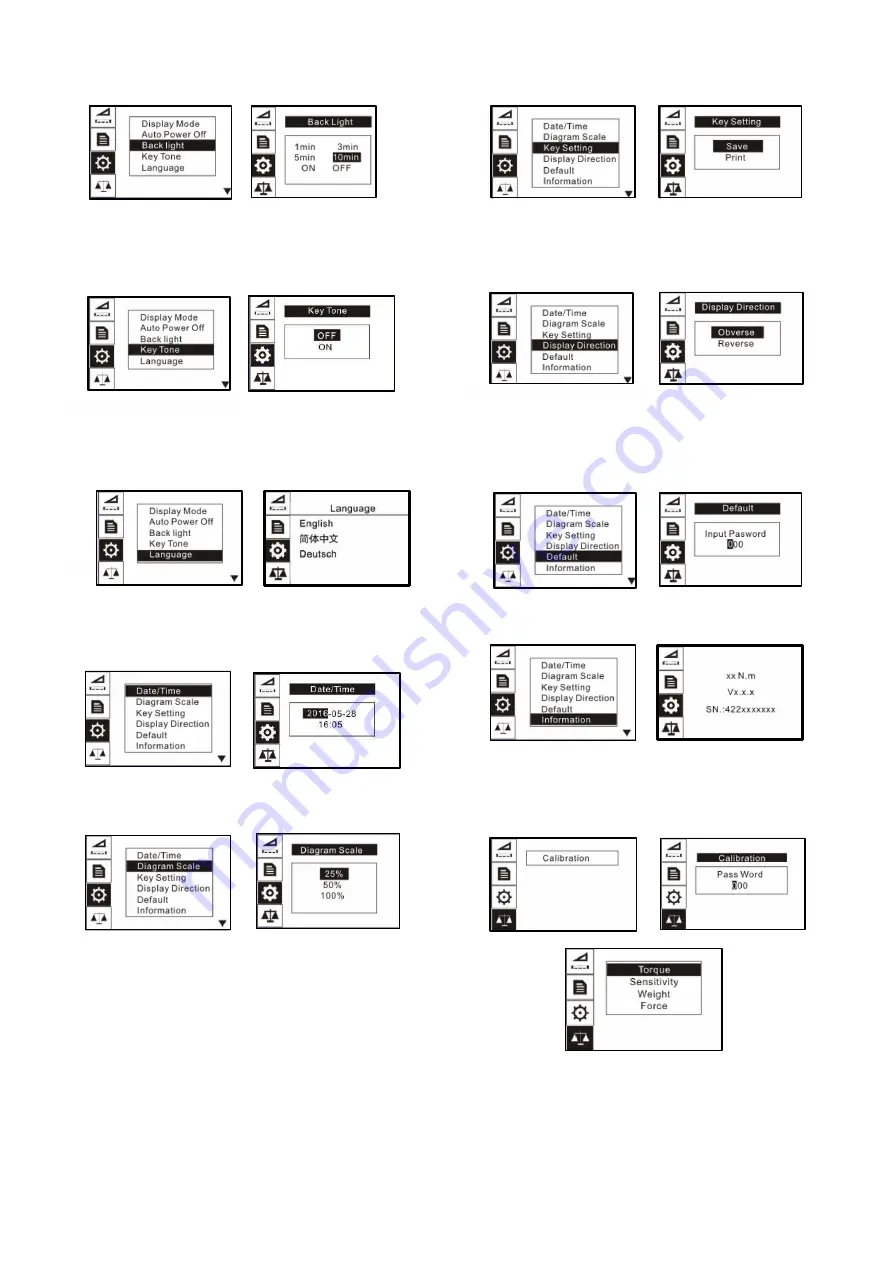
7.4 Key Tone
Turn the key sound ON or OFF. Touch “MODE/UP” or “DOWN” keys to
shift to the next position. Touch “LOG” to cancel; Press “MENU/ENTER”
to confirm and exit.
7.5 Language
Select between English, German and Chinese.
7.6 Date/Time
The system time may be set under this menu. Touch “MODE/ UP” to
adjust the value. Press “SAVE/PRINT” to shift to the next position.
Touch “ZERO/EXIT” to cancel. Press “MENU/ENTER” to confirm and
exit.
7.7 Diagram Scale
Select the visible are of the graph when in diagram mode in this menu.
Select between 3 levels.
7.8 Key Setting
Set the default function of the “SAVE/PRINT” key from the home
screen. The function can be set to print or store the current displayed
value. Press “MODE/UP” or “DOWN” to select the proper setting.
Press “LOG” to cancel; touch “MENU/ENTER” to confirm and exit.
7.9 Display Direction
Select the mode of the LCD display: Automatic, Obverse or Reverse.
Touch “MODE/UP” or “DOWN” keys to shift to the next position. Press
“ZERO/EXIT” to cancel; Push “MENU/ENTER” to confirm and exit.
7.10 Default Setting
If you make a selection that you feel has caused the gauge to operate
improperly, you can restore the instrument to the factory default
settings. Carefully use this function! The password to accomplish this
factory default is 1, 2, 3. A confirm screen will appear to complete.
7.11 Information
Information includes the model, version of the software and the serial
number.
8. CALIBRATION
To Obtain access to the calibration sub menus, input the password 1, 2,
3. Four methods of calibration may be selected.


